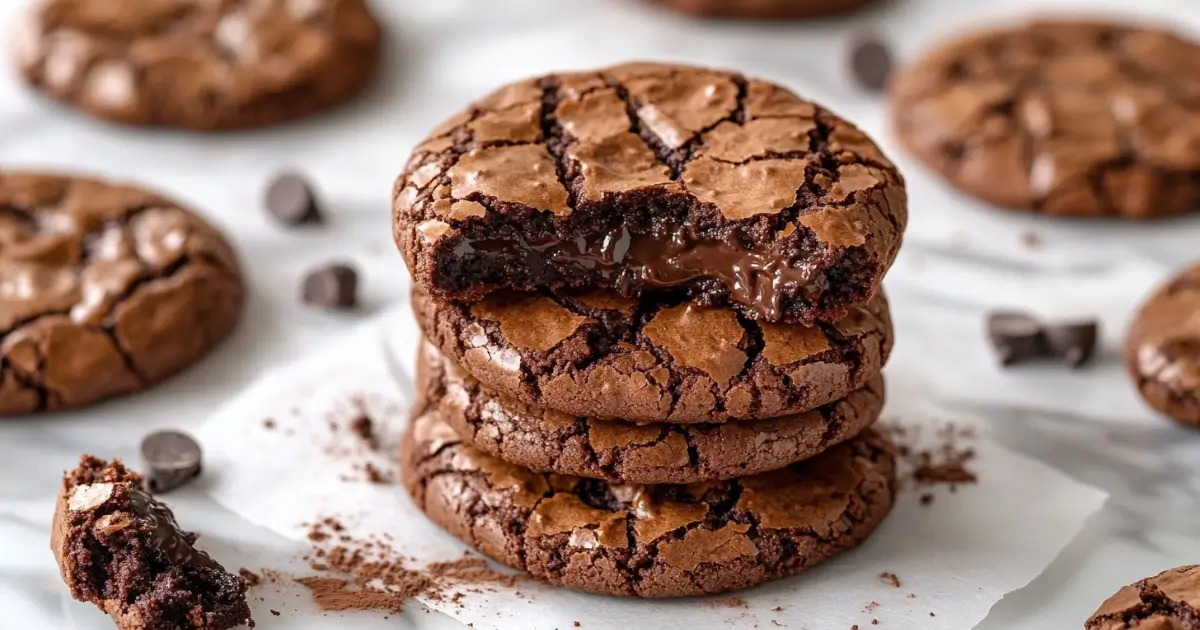
Imagine a dessert that perfectly captures the fudgy richness of a brownie and the soft, chewy goodness of a chocolate chip cookie. What you’re envisioning is the beloved “brookie.” This dessert hybrid has been delighting sweet tooths for several years now, bringing together two classic confections into one spectacular treat. If you’ve never tasted a brookie before, picture a layered bar dessert where a dense, chocolatey brownie base is topped with a layer of buttery, chocolate chip cookie dough, then baked to perfection until both layers are beautifully set and slightly gooey in the center. It’s a delicious union that is greater than the sum of its parts — and making it is as simple as following a great Brookie Recipe.
The brookie effortlessly combines the best aspects of both brownies and cookies, making it a versatile treat suitable for various occasions. Hosting a family gathering? Your guests will be impressed by your creativity. Need something for a potluck? Brookies will stand out on the dessert table. Craving a weekend baking project that doesn’t require professional pastry chef skills? This recipe fits the bill. With their familiar flavors, these brookies appeal to everyone from kids to adults, offering the comfort of chocolate chip cookies and brownies rolled into one unforgettable dessert experience.
Why You’ll Love This Recipe
1. Two Desserts in One: Let’s face it, deciding between a brownie and a cookie can be tough. With brookies, you never have to choose. You get a rich, chocolatey base and a soft, chewy cookie topping baked into one harmonious bar.
2. Easy to Make, Hard to Resist: Even though the resulting treat looks like something from a gourmet bakery, the recipe is relatively straightforward. Each step is approachable—even for novice bakers—and you don’t need any fancy equipment or complicated techniques.
3. Perfect for Sharing: Brookies are the kind of dessert people will remember. Whether you’re serving them at a party, gifting them to friends, or bringing them to a potluck, you’ll quickly become everyone’s favorite baker.
4. Kid-Friendly and Adult-Approved: The comforting combination of chocolate and cookie dough transcends age boundaries. Kids love the sweetness and the novelty, while adults appreciate the rich flavors and nostalgic charm.
5. Flexible and Adaptable: Want to experiment? Toss in some chopped nuts for crunch, swirl in peanut butter for a twist, or try adding toffee bits for extra sweetness. The basic brookie recipe is a blank canvas for your baking creativity.
6. Better Than Store-Bought: Sure, you can buy pre-made brookies, but there’s nothing like homemade. You control the ingredients, sweetness level, and texture. Plus, the aroma that fills your kitchen as they bake is absolutely divine.
Ingredients
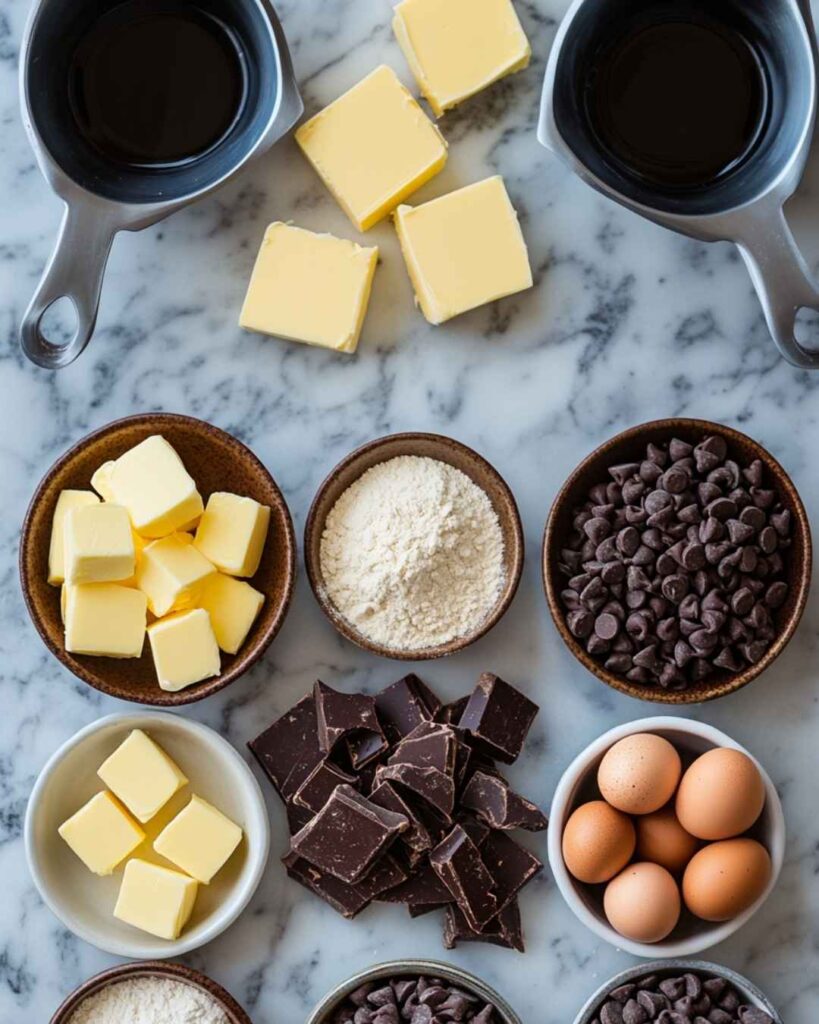
Before we begin, let’s break down the ingredients for each layer. Using high-quality ingredients will yield the best results. Fresh butter, good-quality chocolate, and pure vanilla extract will enhance both flavor and texture.
For the Brownie Layer:
- Unsalted Butter: ½ cup (1 stick), melted and slightly cooled
- Granulated Sugar: 1 cup
- Brown Sugar: ¼ cup, packed (light or dark, depending on your preference)
- Eggs: 2 large, at room temperature
- Vanilla Extract: 1 teaspoon, pure
- All-Purpose Flour: ¾ cup
- Cocoa Powder: ½ cup, unsweetened and high-quality (Dutch-processed recommended)
- Salt: ¼ teaspoon
For the Cookie Layer:
- Unsalted Butter: ½ cup (1 stick), softened to room temperature
- Brown Sugar: ½ cup, packed (light or dark)
- Granulated Sugar: ¼ cup
- Egg: 1 large, at room temperature
- Vanilla Extract: 1 teaspoon, pure
- All-Purpose Flour: 1 ¼ cups
- Baking Soda: ½ teaspoon
- Salt: ¼ teaspoon
- Chocolate Chips: 1 cup (semi-sweet or milk chocolate, depending on preference)
Optional Add-Ins and Toppings:
- Chopped walnuts or pecans
- White chocolate chips or peanut butter chips
- A sprinkle of flaky sea salt on top
How to Make the Brookie Recipe
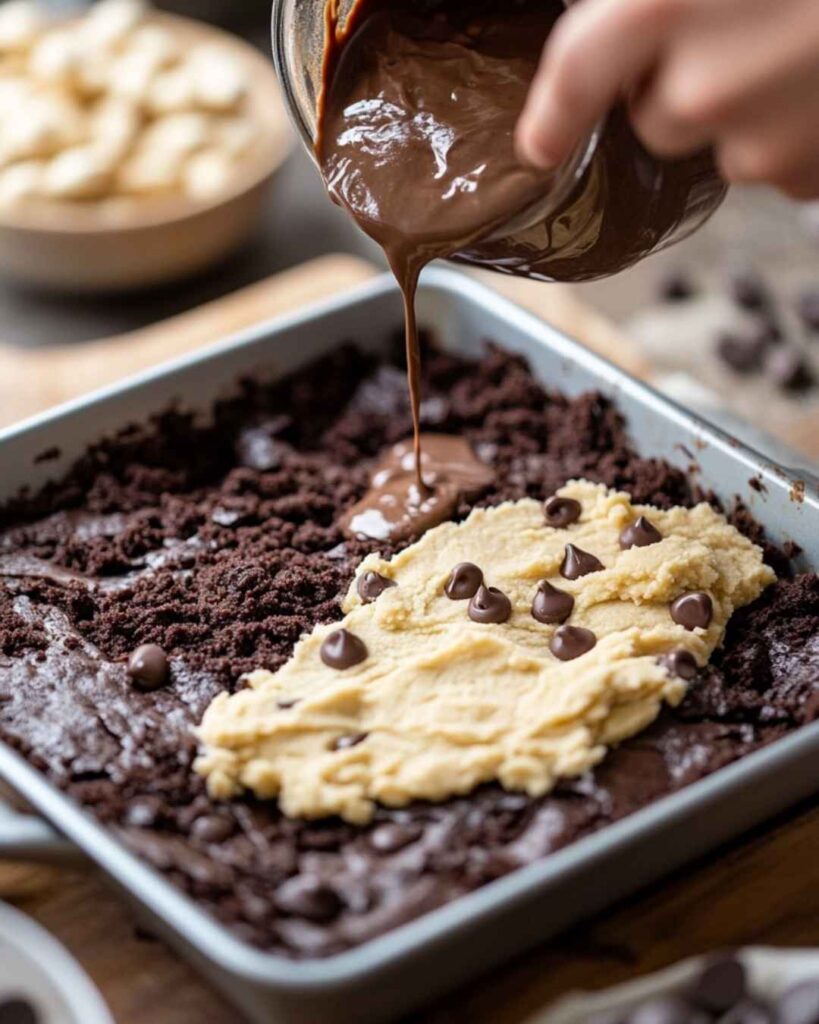
Step-by-Step Instructions for a Perfect Brookie Every Time
1. Prep Your Pan and Oven:
Begin by preheating your oven to 350°F (175°C). Line a 9×9-inch baking pan with parchment paper. Allow the parchment to hang over two sides of the pan for easy removal of the brookies after baking. If you don’t have parchment paper, you can use aluminum foil lightly greased with butter or non-stick spray. Proper preparation ensures your bars won’t stick and makes slicing simple.
2. Make the Brownie Layer:
- Melt the Butter: Gently melt the butter in a microwave-safe bowl or over low heat on the stovetop. Let it cool slightly so it doesn’t scramble your eggs.
- Mix the Sugars and Wet Ingredients: In a large mixing bowl, whisk together the melted butter, granulated sugar, and brown sugar until well combined. Add the eggs and vanilla extract, whisking vigorously until the mixture is smooth and shiny.
- Dry Ingredients for Brownies: Sift the flour, cocoa powder, and salt into the bowl. Slowly fold the dry ingredients into the wet ingredients, mixing just until combined. Overmixing can lead to tough brownies, so stir gently and stop when you no longer see dry flour streaks.
- Pour into Pan: Transfer the brownie batter into your prepared baking pan, using a spatula to level the top. Set aside while you prepare the cookie layer.
3. Make the Cookie Layer:
- Cream Butter and Sugars: In a separate bowl, cream the softened butter, brown sugar, and granulated sugar until light and fluffy. This step usually takes about 2 minutes with an electric mixer, but can be done by hand with a sturdy whisk as well.
- Add Egg and Vanilla: Beat in the egg and vanilla extract until fully incorporated. The mixture should be smooth and creamy.
- Incorporate Dry Ingredients: In another bowl, whisk together the flour, baking soda, and salt. Slowly add this dry mixture to your wet mixture, mixing just until a soft cookie dough forms.
- Add Chocolate Chips: Fold in the chocolate chips, ensuring they’re evenly distributed throughout the dough.
4. Layering the Brookie:
- Gently drop small spoonfuls of the cookie dough over the brownie batter. It will be a bit sticky, so consider lightly wetting your hands or using two spoons to spread it out. Don’t worry if the layers aren’t perfectly even; the cookie dough will spread as it bakes.
- Aim for a relatively even layer, but slight imperfections are part of the charm.
5. Bake to Perfection:
- Place the pan in the preheated oven. Bake for 25-30 minutes, or until a toothpick inserted into the center comes out with just a few moist crumbs. The edges should look set, and the top cookie layer should be golden-brown.
- Avoid overbaking. The brookies will continue to set as they cool. It’s better to have them slightly underdone for that soft, gooey texture rather than overly dry.
6. Cool and Slice:
- Allow the brookies to cool in the pan for at least 30 minutes. For cleaner slices, you can even refrigerate them for about an hour.
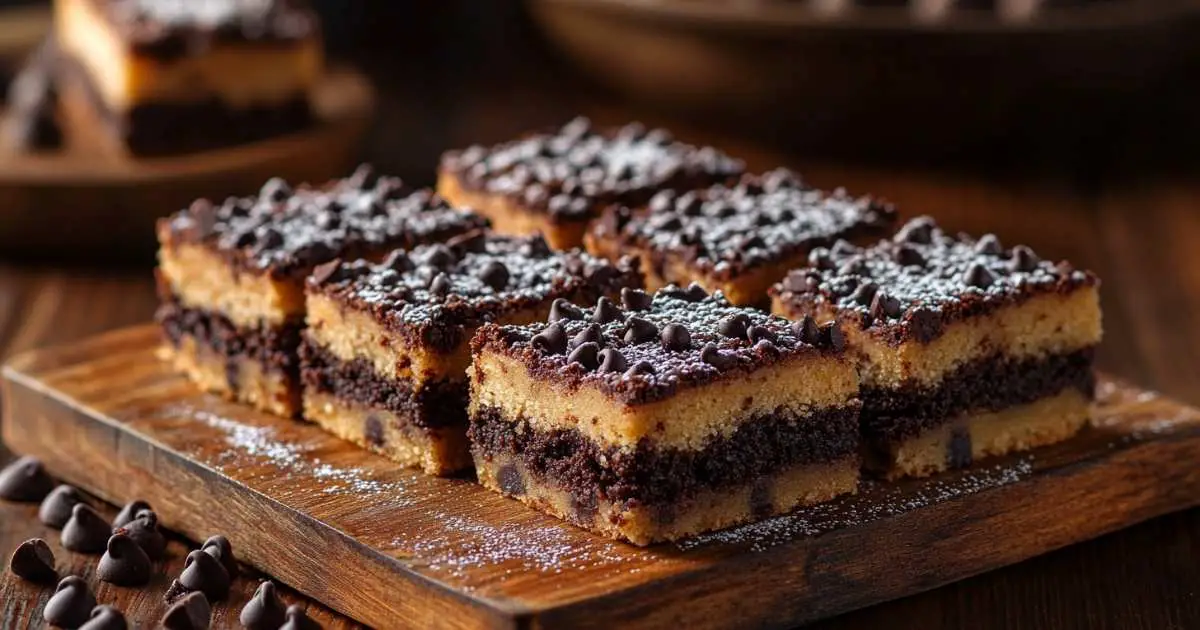
- Lift the entire block out using the parchment paper overhang. Place on a cutting board and slice into squares. The size of each piece is up to you, but 16 squares (4×4) is a good starting point.
You now have a tray of perfectly layered, homemade brookies—fudgy brownies on the bottom, chewy cookies on top, and chocolate bliss in every bite.
Serving and Storage Tips
Serving Suggestions:
- Warm and Gooey: Serve your brookies slightly warmed. A quick 10-second microwave zap softens the chocolate and intensifies the flavors. Pair with a scoop of vanilla ice cream for an indulgent dessert.
- Coffee and Tea Pairing: Brookies pair beautifully with a cup of coffee or black tea, cutting through the sweetness and complementing the chocolate.
- Party Platters: Arrange brookie squares on a decorative plate for a party. Add fresh berries or small chocolate truffles around the edges for an eye-catching presentation.
- Lunchbox Treat: Wrap individually in parchment paper for a sweet addition to a lunchbox or picnic basket. They also make great bake-sale items!
Storage Tips:
- Room Temperature: Store brookies in an airtight container at room temperature for 3-4 days. Their texture actually improves slightly after the first day as the flavors meld.
- Refrigeration: If you prefer a firmer texture, or live in a warm climate, you can refrigerate them in an airtight container for up to a week.
- Freezing: Brookies freeze remarkably well. Wrap each bar in plastic wrap, then place them in a freezer-safe container or zip-top bag. They’ll keep for up to 3 months. Thaw overnight in the fridge or at room temperature for about an hour before enjoying.
Helpful Notes
1. Ingredient Quality Matters:
Because brookies are all about chocolate and butter, the quality of these ingredients can make or break your dessert. Use the best chocolate you can afford, real butter, and pure vanilla extract. Skip the imitation flavorings for a more authentic taste.
2. Adjusting Sweetness:
If you prefer a less sweet dessert, you can reduce the sugar in the cookie layer by a couple of tablespoons. Alternatively, consider using dark chocolate chips instead of milk chocolate for a more intense chocolate flavor with less sweetness.
3. Texture Variations:
- For a gooier brookie, underbake slightly so the brownie layer remains ultra-fudgy and the cookie layer is just set.
- For a more cake-like texture, bake an extra few minutes until the brownie layer is fully set.
4. Altitude Adjustments:
If you live at a high altitude, you may need to adjust baking times or slightly alter the flour amounts. Generally, a tablespoon or two more flour or a few extra minutes in the oven will help. Always test with a toothpick to ensure doneness.
5. Add Mix-Ins Wisely:
- Nuts: Walnuts, pecans, or even hazelnuts add crunch and depth. Chop them finely for subtle texture or leave them in larger chunks for more pronounced bites of nuttiness.
- Candy Mix-Ins: Crushed toffee bits, peanut butter cups, or white chocolate chunks can introduce new flavor dimensions. Just be mindful of sweetness levels.
6. Presentation and Cutting Tips:
Dip your knife in hot water and wipe it dry before slicing for perfectly clean edges. This is especially helpful if you’ve chilled your brookies for neater squares.
7. Dietary Considerations:
- Gluten-Free: You can experiment with a 1-to-1 gluten-free flour blend. Results vary, but many readers report success using high-quality gluten-free baking mixes.
- Dairy-Free: Swap out butter for a plant-based butter substitute, ensuring it’s one meant for baking. Use dairy-free chocolate chips as well.
- Egg Substitutions: For those who need egg-free options, consider a flax egg (1 tablespoon ground flaxseed + 3 tablespoons water, allowed to gel) for each egg.
Conclusion
You’ve just mastered the art of making brookies—an epic dessert fusion that satisfies cookie and brownie lovers alike. Whether you’re an experienced baker or trying something new, this recipe is both approachable and endlessly customizable. From weekend treats to special celebrations, brookies fit every occasion, delivering a dessert that looks stunning and tastes even better. With the tips, tricks, and techniques provided here, you’re set up for sweet success.
Remember, baking is a form of culinary creativity. Don’t hesitate to adapt and experiment. The beauty of brookies lies in their versatility: you can play with flavor additions, textures, and presentations to create your own signature version. Your kitchen, your rules!
As you enjoy your freshly baked batch, consider pairing them with your favorite beverage, experimenting with various mix-ins next time, or simply relishing the comfort that comes from combining two dessert classics into one unforgettable treat.
___________________________
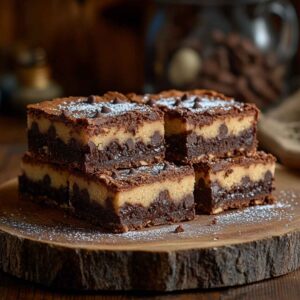
brookie recipe
Ingredients
For the Brownie Layer:
- Unsalted Butter: ½ cup 1 stick, melted and slightly cooled
- Granulated Sugar: 1 cup
- Brown Sugar: ¼ cup packed (light or dark, depending on your preference)
- Eggs: 2 large at room temperature
- Vanilla Extract: 1 teaspoon pure
- All-Purpose Flour: ¾ cup
- Cocoa Powder: ½ cup unsweetened and high-quality (Dutch-processed recommended)
- Salt: ¼ teaspoon
For the Cookie Layer:
- Unsalted Butter: ½ cup 1 stick, softened to room temperature
- Brown Sugar: ½ cup packed (light or dark)
- Granulated Sugar: ¼ cup
- Egg: 1 large at room temperature
- Vanilla Extract: 1 teaspoon pure
- All-Purpose Flour: 1 ¼ cups
- Baking Soda: ½ teaspoon
- Salt: ¼ teaspoon
- Chocolate Chips: 1 cup semi-sweet or milk chocolate, depending on preference
Optional Add-Ins and Toppings:
- Chopped walnuts or pecans
- White chocolate chips or peanut butter chips
- A sprinkle of flaky sea salt on top
Instructions
Prep Your Pan and Oven:
- Begin by preheating your oven to 350°F (175°C). Line a 9×9-inch baking pan with parchment paper. Allow the parchment to hang over two sides of the pan for easy removal of the brookies after baking. If you don’t have parchment paper, you can use aluminum foil lightly greased with butter or non-stick spray. Proper preparation ensures your bars won’t stick and makes slicing simple.
Make the Brownie Layer:
- Melt the Butter: Gently melt the butter in a microwave-safe bowl or over low heat on the stovetop. Let it cool slightly so it doesn’t scramble your eggs.
- Mix the Sugars and Wet Ingredients: In a large mixing bowl, whisk together the melted butter, granulated sugar, and brown sugar until well combined. Add the eggs and vanilla extract, whisking vigorously until the mixture is smooth and shiny.
- Dry Ingredients for Brownies: Sift the flour, cocoa powder, and salt into the bowl. Slowly fold the dry ingredients into the wet ingredients, mixing just until combined. Overmixing can lead to tough brownies, so stir gently and stop when you no longer see dry flour streaks.
- Pour into Pan: Transfer the brownie batter into your prepared baking pan, using a spatula to level the top. Set aside while you prepare the cookie layer.
Make the Cookie Layer:
- Cream Butter and Sugars: In a separate bowl, cream the softened butter, brown sugar, and granulated sugar until light and fluffy. This step usually takes about 2 minutes with an electric mixer, but can be done by hand with a sturdy whisk as well.
- Add Egg and Vanilla: Beat in the egg and vanilla extract until fully incorporated. The mixture should be smooth and creamy.
- Incorporate Dry Ingredients: In another bowl, whisk together the flour, baking soda, and salt. Slowly add this dry mixture to your wet mixture, mixing just until a soft cookie dough forms.
- Add Chocolate Chips: Fold in the chocolate chips, ensuring they’re evenly distributed throughout the dough.
Layering the Brookie:
- Gently drop small spoonfuls of the cookie dough over the brownie batter. It will be a bit sticky, so consider lightly wetting your hands or using two spoons to spread it out. Don’t worry if the layers aren’t perfectly even; the cookie dough will spread as it bakes.
- Aim for a relatively even layer, but slight imperfections are part of the charm.
Bake to Perfection:
- Place the pan in the preheated oven. Bake for 25-30 minutes, or until a toothpick inserted into the center comes out with just a few moist crumbs. The edges should look set, and the top cookie layer should be golden-brown.
- Avoid overbaking. The brookies will continue to set as they cool. It’s better to have them slightly underdone for that soft, gooey texture rather than overly dry.
Cool and Slice:
- Allow the brookies to cool in the pan for at least 30 minutes. For cleaner slices, you can even refrigerate them for about an hour.
- Lift the entire block out using the parchment paper overhang. Place on a cutting board and slice into squares. The size of each piece is up to you, but 16 squares (4×4) is a good starting point.
Notes
- Calories: ~300 kcal
- Total Fat: ~15g
- Saturated Fat: ~9g
- Cholesterol: ~50mg
- Sodium: ~130mg
- Total Carbohydrates: ~38g
- Dietary Fiber: ~2g
- Sugars: ~26g
- Protein: ~4g
FAQs
1. Can I Use Boxed Brownie Mix or Pre-Made Cookie Dough?
Yes, you can use a boxed brownie mix and store-bought cookie dough to save time. Just follow the box instructions for the brownie base and press store-bought cookie dough on top. Keep in mind, though, that using homemade layers will give you fresher flavors and more control over the ingredients.
2. How Do I Know When My Brookies Are Done Baking?
Check at the 25-minute mark by inserting a toothpick into the center. If it comes out with moist crumbs—not raw batter—they’re good to go. The cookie layer should appear golden and set on top. Remember, they’ll continue to firm up slightly as they cool.
3. Can I Make This Recipe in a Larger Pan?
You can scale the recipe up for a 9×13-inch pan by increasing the ingredient quantities by about 50%. Baking time may need to be adjusted; start checking for doneness around 30-35 minutes. Keep an eye on the center to ensure it’s fully baked without overbaking the edges.
4. What’s the Best Way to Get Clean Slices?
Chill your baked brookies in the refrigerator for about an hour before cutting. Use a sharp knife warmed under hot water, then wipe dry. Press down firmly and smoothly for neat, bakery-style bars.
5. Can I Freeze the Dough Ahead of Time?
Absolutely. You can prepare both the brownie batter and cookie dough in advance. Store them separately in airtight containers in the refrigerator for up to 24 hours, or freeze for longer storage. When ready to bake, bring them to room temperature, assemble, and bake as directed. For freezing fully baked brookies, wrap individual squares and store them in a freezer-safe container for up to 3 months.
6. Are Brookies Suitable for Dietary Restrictions?
By using dairy-free butter, plant-based chocolate chips, and egg alternatives like flax eggs, you can adjust the recipe to fit vegan or dairy-free diets. A gluten-free flour blend can also work for those avoiding gluten. Keep in mind that texture and flavor may differ slightly from the original.
7. Can I Add Extra Flavor Extracts?
Yes! A hint of almond, coconut, or even peppermint extract can introduce a new dimension to the flavor profile. Be cautious and start with ¼ teaspoon, as these extracts can be quite strong.



Thank you