Who doesn’t love a sweet treat that’s simple, quick, and absolutely delicious? These Peanut Butter Balls are your perfect no-bake solution for satisfying those dessert cravings without the fuss. Whether you’re whipping them up for a party, a lunchbox snack, or a cozy family night, these bite-sized delights will win everyone over.
With just a handful of pantry staples, you can create a treat that’s equal parts indulgent and wholesome. The creamy peanut butter pairs beautifully with a smooth chocolate coating, making them irresistible for both kids and adults. Ready to add a touch of homemade magic to your day? Let’s dive in!
Why You’ll Love This Recipe
There’s something magical about a recipe that’s both effortless and impressive. These Peanut Butter Balls check all the boxes for flavor, ease, and versatility. Whether you’re a seasoned chef or a kitchen newbie, you’ll love how quickly these come together—no baking required!
Here’s why this recipe will become your go-to favorite:
- Quick and Easy: Ready in under 30 minutes, these treats are perfect for busy days or last-minute gatherings.
- Kid-Friendly Fun: Little hands can help with rolling and dipping, making this a delightful family activity.
- Versatile Ingredients: Don’t have honey? Swap it for maple syrup. Need a gluten-free option? Use certified gluten-free oats.
- Irresistible Flavor: The creamy peanut butter and chocolate combo delivers a classic taste everyone loves.
- Perfect for Any Occasion: These bite-sized treats are great for lunchboxes, dessert platters, or even as a sweet energy boost.
If you’re looking for a recipe that feels indulgent but doesn’t require hours in the kitchen, these Peanut Butter Balls are your answer. Plus, they store beautifully, so you can make them ahead and enjoy them throughout the week. Get ready to roll up your sleeves and create something truly special!
Ingredients
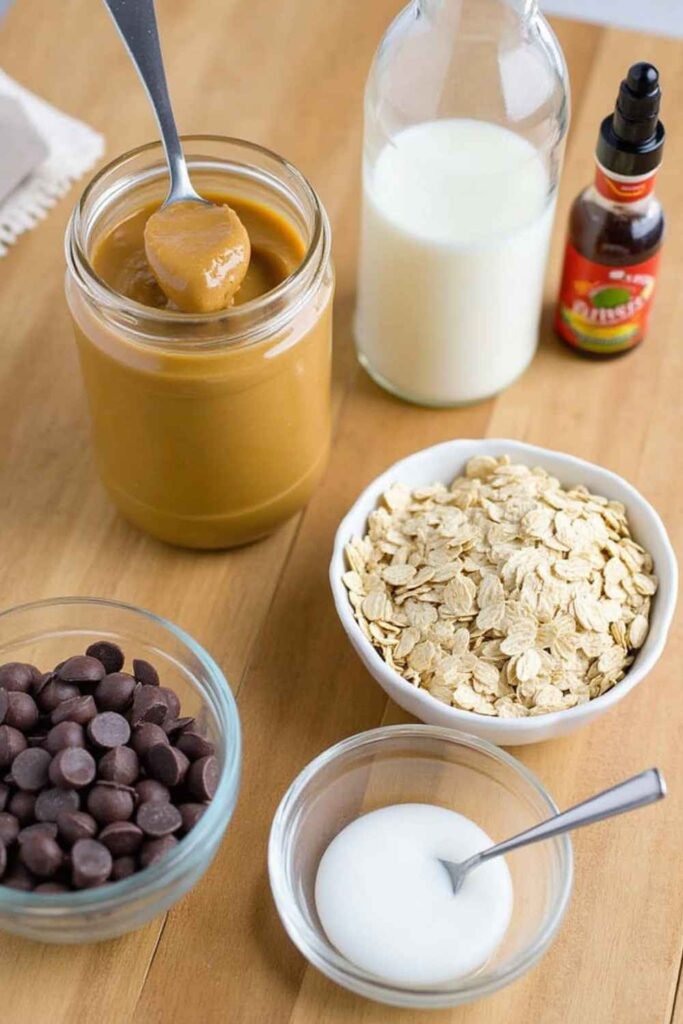
Gathering the right ingredients is the first step toward making these irresistible Peanut Butter Balls. Luckily, you don’t need anything fancy—just a few pantry staples to create magic. Here’s what you’ll need:
- 1 cup creamy peanut butter
Opt for natural peanut butter for a smoother texture, but feel free to use your favorite brand. - 1/2 cup honey or maple syrup
This adds natural sweetness while helping the balls hold their shape. - 1 teaspoon vanilla extract
A small touch of vanilla enhances the overall flavor. - 2 cups rolled oats
These provide structure and a satisfying bite. Use gluten-free oats if needed. - 1 cup semi-sweet chocolate chips
Perfect for that luscious outer coating or as a mix-in. - 1 tablespoon coconut oil (optional)
Helps the chocolate melt smoothly for a glossy finish.
Ingredient Tips
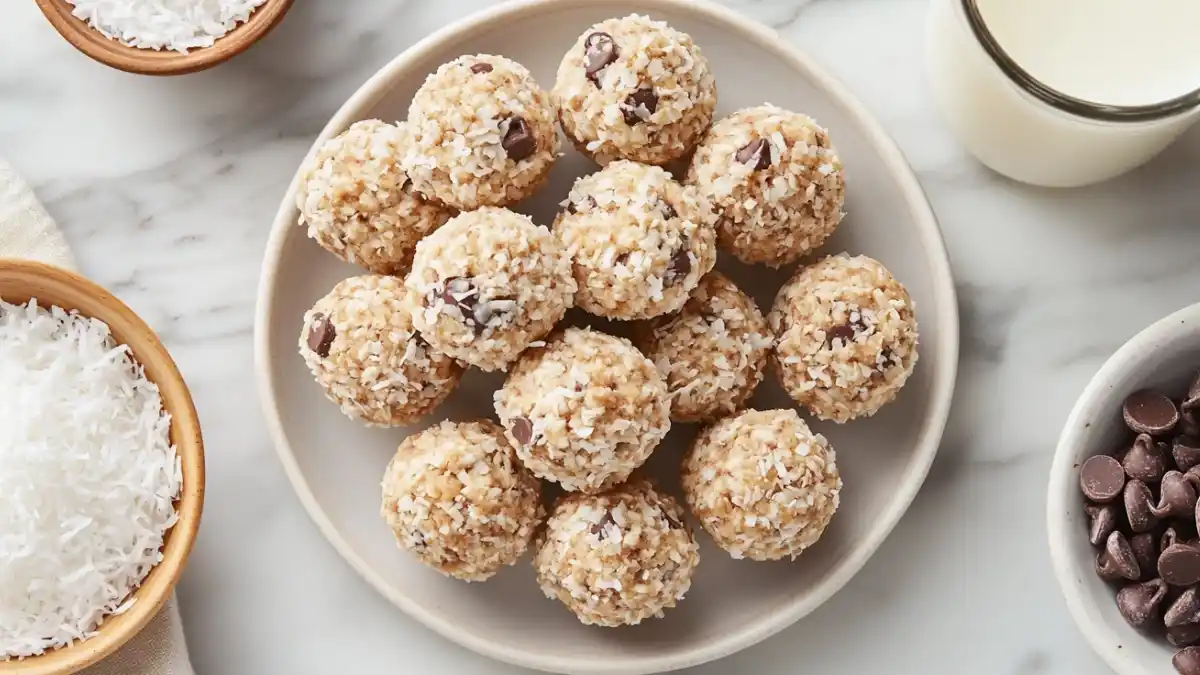
- Make It Crunchy: Add a handful of chopped peanuts or shredded coconut for extra texture.
- Healthier Twist: Substitute the chocolate chips with dark chocolate for a less sugary option.
- Allergy-Friendly: Swap peanut butter for almond butter or sunflower seed butter for a nut-free version.
Having your ingredients prepped and measured makes the process seamless. Once everything’s ready, you’re just a few steps away from a no-bake treat that’s guaranteed to impress!
How to Make Peanut Butter Balls
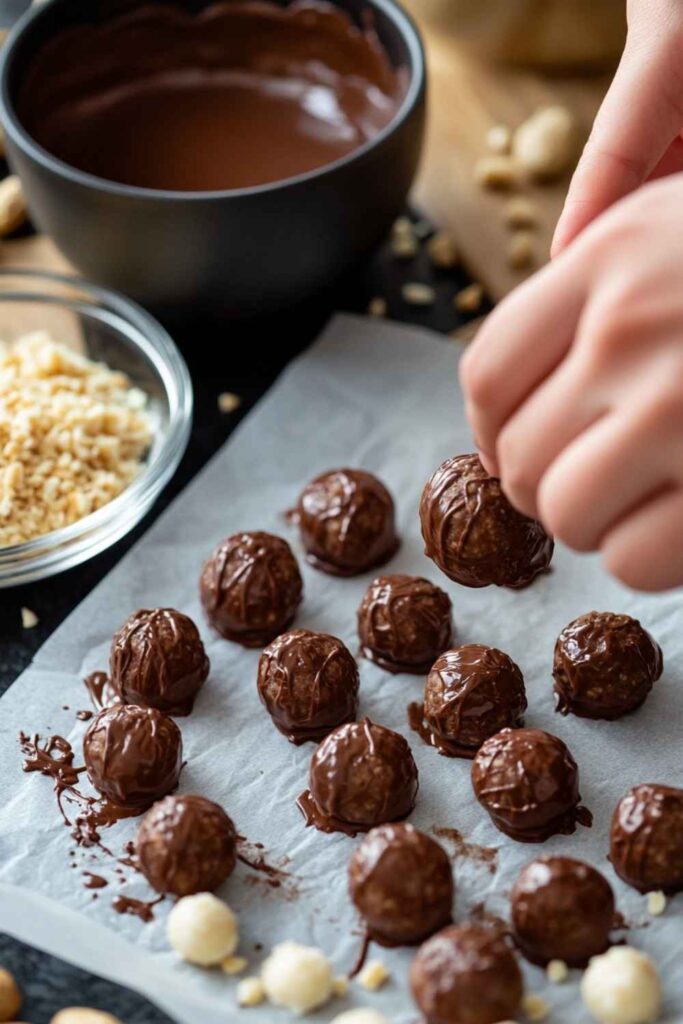
Making these Peanut Butter Balls is as easy as it gets! Follow these simple steps, and you’ll have a batch of delightful, no-bake treats ready in no time.
Step 1: Mix the Base
In a large mixing bowl, combine the peanut butter, honey (or maple syrup), and vanilla extract. Stir until the mixture is smooth and creamy. Gradually fold in the rolled oats, ensuring they’re evenly coated with the wet ingredients. The mixture should hold together when pressed.
Pro Tip: If the mixture feels too sticky, add a bit more oats. If it’s too dry, a small splash of milk or an extra drizzle of honey will fix it!
Step 2: Roll into Balls
Scoop out portions of the mixture using a tablespoon or a small cookie scoop. Roll each portion between your palms to form smooth, bite-sized balls. Place them on a baking sheet lined with parchment paper.
Fun Tip: Let the kids help with this step—it’s messy but fun!
Step 3: Melt the Chocolate
In a microwave-safe bowl, combine the chocolate chips and coconut oil (if using). Microwave in 20-second intervals, stirring after each, until the chocolate is fully melted and glossy.
Alternative Method: Use a double boiler if you prefer more control over the melting process.
Step 4: Dip and Coat
Using a fork or toothpick, dip each peanut butter ball into the melted chocolate, ensuring it’s fully coated. Let any excess drip off before placing it back on the parchment-lined sheet.
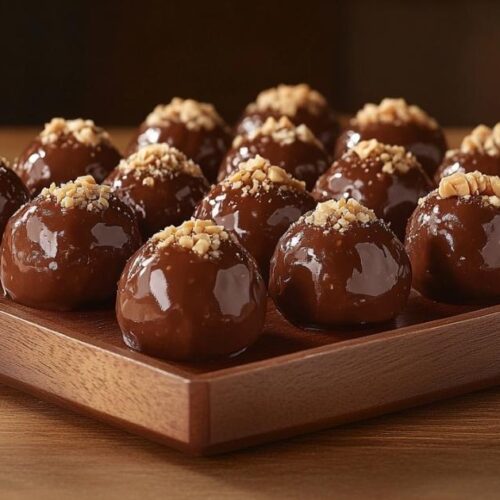
Optional: Sprinkle with crushed peanuts, shredded coconut, or sea salt while the chocolate is still wet for added texture and flavor.
Step 5: Chill
Refrigerate the chocolate-dipped balls for at least 20–30 minutes, or until the coating is firm. Once set, they’re ready to enjoy!
These Peanut Butter Balls are perfect for a quick treat or a sweet snack on the go. With minimal effort and maximum flavor, you’ll want to make them again and again!
Serving and Storage Tips
Now that your Peanut Butter Balls are ready, it’s time to enjoy and store them properly to keep them fresh and delicious. Here’s everything you need to know!
Serving Suggestions
- Perfect Party Snack: Arrange them on a decorative platter for gatherings—watch them disappear in minutes!
- Quick Energy Boost: Pop a few into a snack bag for a midday pick-me-up or post-workout treat.
- Kid-Friendly Delight: Serve as an after-school snack with a glass of milk for a wholesome treat kids will love.
- Holiday Treat: Wrap them in decorative boxes or tins for a homemade gift that feels extra special.
Storage Tips
- Refrigerator: Store the peanut butter balls in an airtight container in the fridge for up to 1 week. This helps maintain their texture and keeps the chocolate coating firm.
- Freezer: Need to save some for later? Freeze them in a single layer on a baking sheet, then transfer to a freezer-safe bag or container. They’ll last for up to 2 months and can be enjoyed straight from the freezer or after thawing for a few minutes.
- Avoid Room Temperature: While tempting to leave them out, the chocolate may soften too much, especially in warmer climates.
Pro Tip: Label your containers with the date for easy tracking, so you’ll always know when they’re at their freshest.
Whether you’re indulging right away or planning ahead, these Peanut Butter Balls are a treat that stays versatile and convenient for any occasion!
Helpful Notes
Every great recipe comes with a few insider tips to make the process smoother and the results even better. Here are some tried-and-true tricks to help you master these Peanut Butter Balls with confidence:
Customization Ideas
- Add a Crunch: Mix in crushed pretzels, rice cereal, or chopped nuts for an extra layer of texture.
- Make Them Festive: Add colorful sprinkles or drizzle with white chocolate for a decorative touch during holidays or special events.
- Boost the Protein: Incorporate a scoop of protein powder into the peanut butter mixture for a snack that fuels your day.
Troubleshooting Common Issues
- Too Sticky to Handle: If the mixture is sticking to your hands, chill it in the fridge for 10–15 minutes before rolling. Lightly greasing your hands with a bit of oil can also help.
- Chocolate Coating Too Thick: Thin it out by adding a teaspoon of coconut oil or shortening during melting.
- Balls Falling Apart: If your mixture isn’t holding together, add a small amount of peanut butter or honey to improve consistency.
Healthier Substitutions
- Replace semi-sweet chocolate chips with dark chocolate for a richer, less sweet coating.
- Use natural peanut butter without added sugars or oils for a more wholesome treat.
- Substitute honey with maple syrup or agave nectar for a vegan-friendly option.
Kitchen Efficiency Tips
- Prep Ahead: The peanut butter mixture can be made a day in advance and stored in the fridge until you’re ready to roll and dip.
- Batch Freezing: Double the recipe and freeze extras for when cravings strike. They’ll be ready whenever you are!
Pro Tip: Don’t be afraid to experiment with flavors—try adding a pinch of cinnamon, nutmeg, or even a splash of espresso to elevate the taste.
With these helpful notes, you’re set up for success. Enjoy the process and the delicious results of these simple yet satisfying treats!
Conclusion
Making these Peanut Butter Balls is not just about creating a delicious treat—it’s about crafting moments of joy, whether you’re indulging solo or sharing with loved ones. With their irresistible flavor and simple preparation, they’re bound to become a favorite in your recipe collection.
What’s even better is their versatility. Whether you enjoy them as a snack, dessert, or energy boost, these little bites of goodness never fail to impress. Plus, they’re customizable to fit your preferences, making them as unique as you are!
So, what are you waiting for? Grab your ingredients, roll up your sleeves, and give these no-bake delights a try. Trust me, once you’ve made them, you’ll find yourself coming back to this recipe again and again.
Pro Tip: Share the joy—pack a few in a pretty box and gift them to someone special. Sometimes, the simplest treats create the sweetest memories!
Now it’s your turn to shine in the kitchen. Let me know how your Peanut Butter Balls turn out in the comments below, or share your creations on social media—don’t forget to tag me! Happy rolling!
____________________________
Peanut Butter Balls
Ingredients
- 1 cup creamy peanut butter
- Opt for natural peanut butter for a smoother texture but feel free to use your favorite brand.
- 1/2 cup honey or maple syrup
- This adds natural sweetness while helping the balls hold their shape.
- 1 teaspoon vanilla extract
- A small touch of vanilla enhances the overall flavor.
- 2 cups rolled oats
- These provide structure and a satisfying bite. Use gluten-free oats if needed.
- 1 cup semi-sweet chocolate chips
- Perfect for that luscious outer coating or as a mix-in.
- 1 tablespoon coconut oil optional
- Helps the chocolate melt smoothly for a glossy finish.
Ingredient Tips
- Make It Crunchy: Add a handful of chopped peanuts or shredded coconut for extra texture.
- Healthier Twist: Substitute the chocolate chips with dark chocolate for a less sugary option.
- Allergy-Friendly: Swap peanut butter for almond butter or sunflower seed butter for a nut-free version.
Instructions
Step 1: Mix the Base
- In a large mixing bowl, combine the peanut butter, honey (or maple syrup), and vanilla extract. Stir until the mixture is smooth and creamy. Gradually fold in the rolled oats, ensuring they’re evenly coated with the wet ingredients. The mixture should hold together when pressed.
- Pro Tip: If the mixture feels too sticky, add a bit more oats. If it’s too dry, a small splash of milk or an extra drizzle of honey will fix it!
Step 2: Roll into Balls
- Scoop out portions of the mixture using a tablespoon or a small cookie scoop. Roll each portion between your palms to form smooth, bite-sized balls. Place them on a baking sheet lined with parchment paper.
- Fun Tip: Let the kids help with this step—it’s messy but fun!
Step 3: Melt the Chocolate
- In a microwave-safe bowl, combine the chocolate chips and coconut oil (if using). Microwave in 20-second intervals, stirring after each, until the chocolate is fully melted and glossy.
- Alternative Method: Use a double boiler if you prefer more control over the melting process.
Step 4: Dip and Coat
- Using a fork or toothpick, dip each peanut butter ball into the melted chocolate, ensuring it’s fully coated. Let any excess drip off before placing it back on the parchment-lined sheet.
- Optional: Sprinkle with crushed peanuts, shredded coconut, or sea salt while the chocolate is still wet for added texture and flavor.
Step 5: Chill
- Refrigerate the chocolate-dipped balls for at least 20–30 minutes, or until the coating is firm. Once set, they’re ready to enjoy!
Notes
- Calories: 120
- Fat: 8g
- Saturated Fat: 3g
- Protein: 3g
- Carbohydrates: 10g
- Sugar: 7g
- Fiber: 1g
- Cholesterol: 0mg
- Sodium: 40mg
FAQs
1: Can I use crunchy peanut butter instead of creamy?
Absolutely! Crunchy peanut butter adds a delightful texture to the balls, with little peanut bits in every bite. Just ensure it’s well-mixed before using for an even consistency.
2: How long do these Peanut Butter Balls last?
When stored in an airtight container in the fridge, they’ll stay fresh for up to a week. If you freeze them, they’ll last for about 2 months—perfect for planning ahead!
3: Can I make these without chocolate?
Yes! If you prefer, you can skip the chocolate coating and roll the balls in crushed nuts, coconut flakes, or cocoa powder for a different but equally delicious finish.
4: Are these Peanut Butter Balls gluten-free?
They can be! Just ensure you’re using certified gluten-free oats to make this recipe suitable for those with gluten sensitivities.
5: What can I use instead of oats?
If you’re looking for alternatives, try crushed graham crackers, almond flour, or even rice cereal for a different texture.
6: How do I keep the chocolate coating smooth?
Adding a tablespoon of coconut oil to the melted chocolate helps achieve a silky, glossy coating. Be sure to stir thoroughly while melting to avoid clumps.
7: Can kids help with this recipe?
Definitely! This recipe is fun and easy for little ones to join in. They’ll love rolling the balls and decorating them with sprinkles or toppings.
If you have more questions or creative ideas, feel free to share them in the comments. Let’s make this recipe even better together!




Wow! Delicious