If you’re looking to bring the vibrant flavors of Mexico straight to your dinner table, you’ve come to the right place. Authentic Adobada Tacos (also known as Tacos de Adobada) are a beloved Mexican street food that highlights succulent, marinated pork bursting with smoky, tangy, and slightly spicy flavors. Often found at bustling taco stands throughout central and northern Mexico, these tacos feature tender pork bathed in a richly seasoned adobo-style marinade made from dried chiles, aromatic spices, and a hint of sweetness.
Whether you’ve enjoyed them from a street vendor on a warm afternoon or you’re completely new to the world of adobada, learning how to create these tacos at home can feel like unlocking a culinary secret. Unlike many store-bought options that may skimp on authenticity, making your own Adobada Tacos ensures quality, freshness, and the gratifying experience of building something truly special from scratch. In this comprehensive guide, we’ll show you every step of the process—from selecting the right chilies to perfecting the marinade, cooking the marinated pork until it’s juicy and tender, and assembling Instagram-worthy tacos that rival any you’ve had while traveling.
Why You’ll Love Adobada Tacos Recipe
1. Authentic Flavor Profile: This recipe captures the essence of traditional Mexican street food, employing dried guajillo and ancho peppers, aromatic spices like cumin and oregano, and a touch of vinegar for tang. The result is a balanced, complex profile that’s both comforting and exciting.
2. Great for Entertaining: Adobada Tacos are a crowd-pleaser. Whether you’re throwing a weekend get-together, celebrating Cinco de Mayo, or just enjoying a fun family dinner, these tacos allow everyone to customize their toppings and have a blast in the process.
3. Easy Customization: Prefer it spicier? Add more chiles. Looking for a milder version? Opt for sweeter pineapple garnish or dial back on the dried chilies. This recipe is highly adaptable, enabling you to create a version that suits your taste buds perfectly.
4. Perfect for Meal Prep: The pork can be marinated ahead of time—overnight if possible—making the final cooking process much simpler. This allows you to impress guests or family members with seemingly little effort on the day of serving.
5. Nutritious and Satisfying: With lean marinated pork, fresh corn tortillas, and a variety of wholesome toppings like cilantro, onions, and fresh pineapple, these tacos provide a well-rounded, nutrient-dense meal that doesn’t skimp on satisfaction.
Ingredients
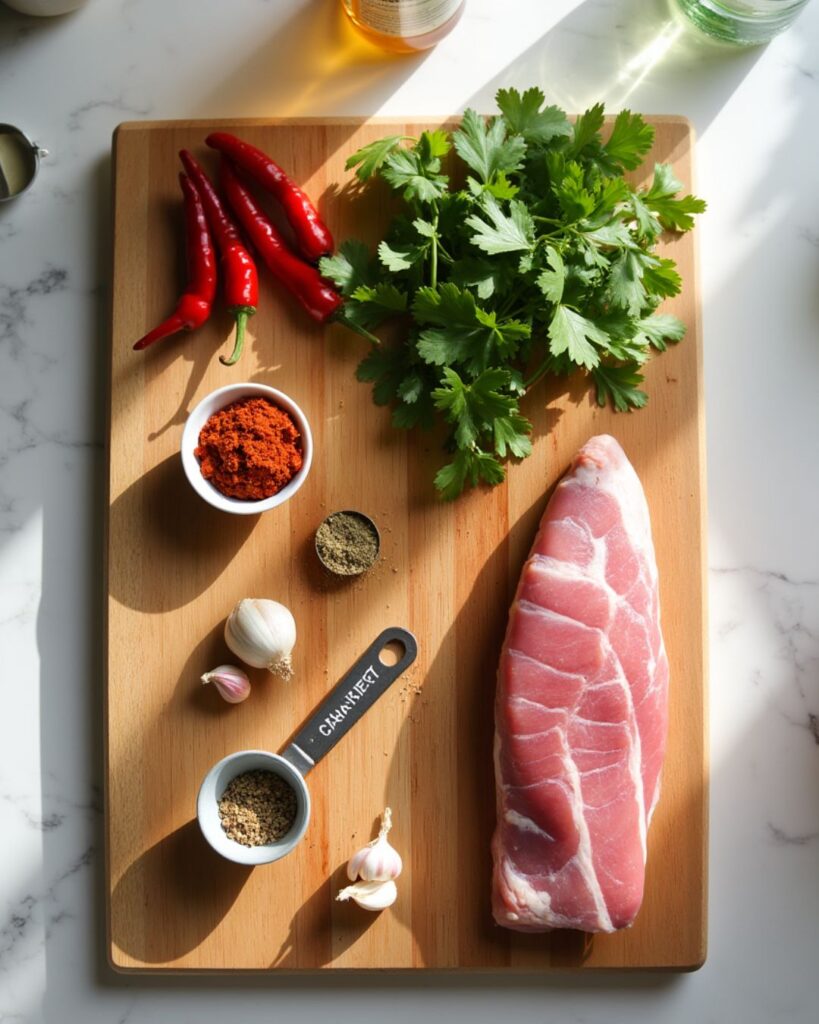
For the Marinade:
- Pork: Approximately 2 pounds (900g) of pork shoulder or pork butt, trimmed of excess fat and sliced into thin strips. This cut’s marbling ensures tender, juicy meat.
- Dried Chilies: 4-5 dried guajillo chilies and 2-3 dried ancho chilies. These chilies bring a rich, earthy sweetness with a mild-to-medium spice level.
- Vinegar: About 1/4 cup of apple cider vinegar or white vinegar. Vinegar adds tanginess and helps tenderize the meat.
- Achiote Paste (Annatto): 2 tablespoons, for a vibrant red hue and subtle earthy sweetness.
- Garlic: 4-6 cloves, peeled and smashed.
- Spices: 1 tablespoon dried Mexican oregano, 1 teaspoon ground cumin, 1 teaspoon smoked paprika, and 1 teaspoon black pepper. These spices round out the flavors, adding depth and aroma.
- Salt: About 1-2 teaspoons, or to taste.
- Orange Juice or Pineapple Juice (optional): 1/4 cup for additional sweetness and complexity.
For the Tacos:
- Corn Tortillas: 12-16 fresh corn tortillas. Look for high-quality, non-GMO tortillas for best flavor.
- Toppings: Finely diced white onion, chopped fresh cilantro, pineapple chunks (preferably fresh and grilled or charred lightly), and wedges of lime.
- Optional Garnishes: Crumbled cotija cheese, sliced radishes, fresh jalapeño slices, or a splash of your favorite hot sauce.
Directions
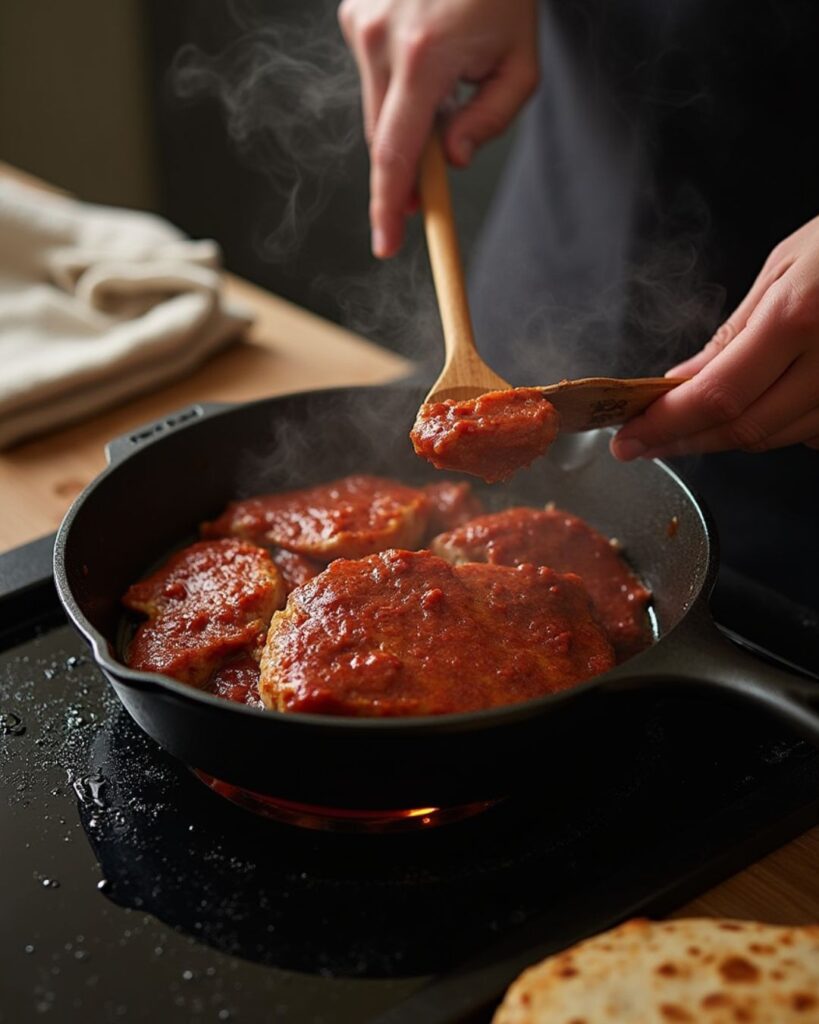
Step 1: Preparing the Chilies
- Toast the Chilies: Heat a dry skillet over medium heat. Add the dried guajillo and ancho chilies and toast them lightly for about 30-60 seconds per side until they become fragrant. Be careful not to burn them; you want just enough heat to release their natural oils.
- Soak the Chilies: Remove chilies from heat, then remove stems and seeds. Place the cleaned chilies in a bowl and cover with hot water. Let them soak for about 10-15 minutes until they become soft and pliable.
Step 2: Making the Marinade
- Blend the Marinade: In a blender, combine the softened chilies (drained of their soaking water), garlic cloves, vinegar, achiote paste, oregano, cumin, smoked paprika, black pepper, and salt. If you’re using juice (orange or pineapple), add it now. Blend until you achieve a smooth, thick paste. If the mixture is too thick, add a few tablespoons of the chili soaking water or additional vinegar for a smooth consistency.
- Adjust Seasoning: Taste the marinade and adjust the salt, spice, or acidity to your preference. The marinade should be bold, bright, and a bit tangy.
Step 3: Marinating the Pork
- Coat the Pork: Place the pork slices in a large, non-reactive container or a zip-top plastic bag. Pour the marinade over the pork, ensuring every piece is thoroughly coated. Massage gently to distribute the marinade evenly.
- Marinate: Cover the container or seal the bag and place it in the refrigerator. For best results, marinate the pork for at least 4 hours, ideally overnight. The longer it marinates, the deeper and more complex the flavor will be.
Step 4: Cooking the Pork
- Preheat Your Cooking Surface: Heat a large cast-iron skillet or griddle over medium-high heat. You can also grill the pork on an outdoor grill for extra smokiness.
- Cook the Pork: Once the skillet is hot, add a small drizzle of oil to prevent sticking. Cook the marinated pork in batches, laying it out in a single layer. Cook for 2-3 minutes per side until nicely browned and slightly caramelized. The pork should be cooked through, juicy, and tender. Avoid overcrowding the skillet, as that can cause steaming rather than browning.
- Rest the Pork: Transfer the cooked pork to a plate and let it rest for a few minutes. This allows the juices to redistribute, ensuring maximum tenderness.
Step 5: Warming the Tortillas
- Heat the Tortillas: Warm your corn tortillas on a dry skillet or griddle over medium heat for about 30-45 seconds per side until they’re soft and pliable. You can also wrap them in a damp towel and microwave for a few seconds to achieve a similar effect.
- Keep Them Warm: Stack warmed tortillas in a cloth towel or a tortilla warmer to maintain their softness while you assemble the tacos.
Step 6: Assembling Your Adobada Tacos
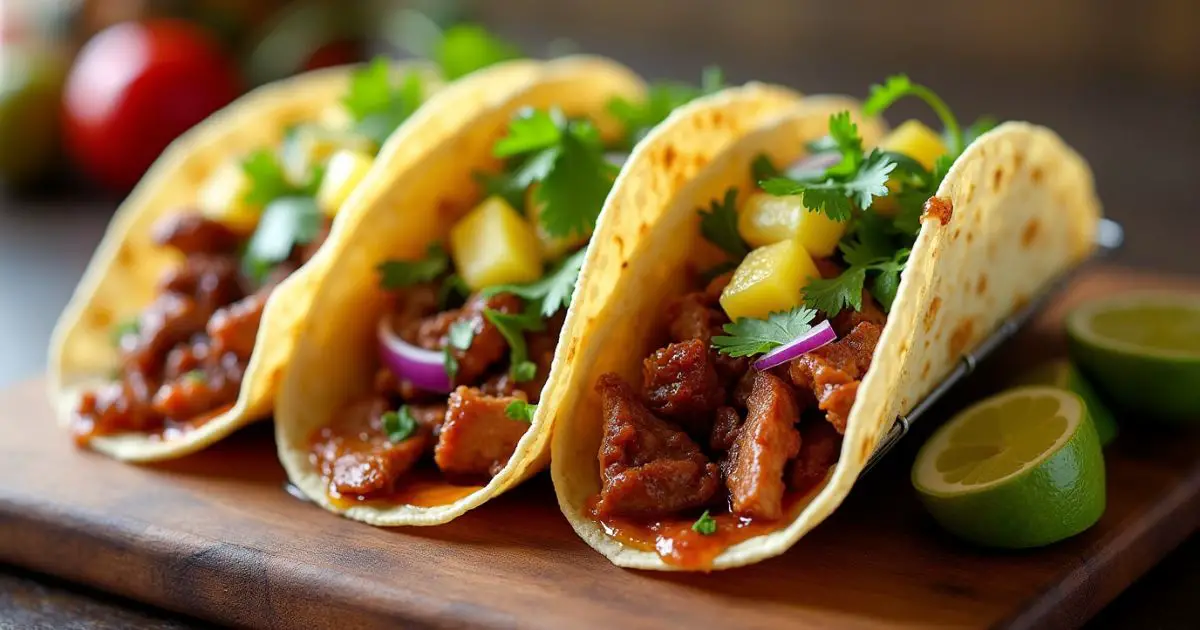
- Layer the Pork: Place a generous spoonful of the cooked adobada pork onto each warm corn tortilla.
- Add Toppings: Top with finely diced white onion, fresh cilantro, and a few pineapple chunks. These toppings add brightness, crunch, and subtle sweetness that complement the savory pork.
- Garnish and Serve: Serve immediately with lime wedges on the side. A squeeze of fresh lime juice just before the first bite enhances all the flavors and brings everything together.
Serving and Storage Tips
Serving Suggestions:
- Side Dishes: Serve your Adobada Tacos with a simple side of Mexican-style rice and refried beans. A light cabbage slaw or a roasted corn salad can add freshness and crunch.
- Beverage Pairings: A crisp Mexican lager, a tangy margarita, or a refreshing glass of agua fresca (like hibiscus or tamarind) pairs beautifully with these tacos.
- Spice It Up: If you love heat, a drizzle of your favorite hot sauce or a spoonful of homemade salsa roja can dial the flavor up another notch.
Storage Tips:
- Refrigeration: If you have leftover pork, store it in an airtight container in the refrigerator for up to 3-4 days.
- Freezing: You can freeze the cooked adobada pork for up to 3 months. Thaw overnight in the refrigerator and reheat in a skillet before serving.
- Reheating: Warm leftover pork in a lightly oiled skillet over medium heat, adding a splash of water or broth if it appears dry. Warm tortillas fresh before assembling leftover tacos.
Helpful Notes
- Chili Substitutions:
If guajillo or ancho chilies aren’t readily available, consider using New Mexico chilies or pasilla peppers. They offer a similar flavor profile. Just be mindful of heat levels and adjust accordingly. - Marinade Consistency:
The marinade should be thick enough to cling to the pork. If it’s too thin, add more achiote paste or a bit less liquid. If it’s too thick, a splash of water, vinegar, or juice will help. - Cut of Meat:
Pork shoulder or pork butt is ideal for this dish due to its fat content and tenderness. If you prefer a leaner cut, you can use pork loin, but keep in mind it may be slightly drier. Adjust marinade times and cooking methods as needed. - Adjusting Heat:
For a spicier dish, consider adding a few árbol chilies or increasing the number of guajillo chilies. To mellow out the heat, use fewer chilies or add more pineapple juice for sweetness. - Tortilla Quality:
Corn tortillas are traditional for Adobada Tacos. If possible, pick up fresh tortillas from a local tortilleria or a high-quality grocery brand. Fresh tortillas make a noticeable difference in flavor and texture. - Pineapple Addition:
Grilling or lightly charring pineapple slices brings out their natural sugars and adds a subtle caramelization that harmonizes with the savory adobada pork.
Conclusion
Authentic Adobada Tacos are more than just a meal—they’re a culinary trip to the vibrant streets of Mexico. With their complex marinade, tender pork, and vibrant toppings, these tacos are sure to impress. By mastering the steps outlined above, you’ll be able to bring this delicious street food right into your own kitchen. The process may feel elaborate the first time, but each phase—from toasting chilies to layering onions and cilantro—is an opportunity to savor the tradition and artistry behind this classic dish.
Once you’ve nailed down the basics, feel free to customize. Maybe you prefer a bit more heat, a sweeter finish, or a tangier marinade. With practice, you’ll discover your personal version of this timeless favorite. So go ahead—gather your ingredients, set aside some marinating time, and invite your friends or family over to enjoy a round of smoky, succulent Adobada Tacos. One bite and you’ll understand why they’ve captivated diners for generations.

Adobada Tacos
Ingredients
For the Marinade:
- Pork: Approximately 2 pounds 900g of pork shoulder or pork butt, trimmed of excess fat and sliced into thin strips. This cut’s marbling ensures tender, juicy meat.
- Dried Chilies: 4-5 dried guajillo chilies and 2-3 dried ancho chilies. These chilies bring a rich earthy sweetness with a mild-to-medium spice level.
- Vinegar: About 1/4 cup of apple cider vinegar or white vinegar. Vinegar adds tanginess and helps tenderize the meat.
- Achiote Paste Annatto: 2 tablespoons, for a vibrant red hue and subtle earthy sweetness.
- Garlic: 4-6 cloves peeled and smashed.
- Spices: 1 tablespoon dried Mexican oregano 1 teaspoon ground cumin, 1 teaspoon smoked paprika, and 1 teaspoon black pepper. These spices round out the flavors, adding depth and aroma.
- Salt: About 1-2 teaspoons or to taste.
- Orange Juice or Pineapple Juice optional: 1/4 cup for additional sweetness and complexity.
For the Tacos:
- Corn Tortillas: 12-16 fresh corn tortillas. Look for high-quality non-GMO tortillas for best flavor.
- Toppings: Finely diced white onion chopped fresh cilantro, pineapple chunks (preferably fresh and grilled or charred lightly), and wedges of lime.
- Optional Garnishes: Crumbled cotija cheese sliced radishes, fresh jalapeño slices, or a splash of your favorite hot sauce.
Instructions
Step 1: Preparing the Chilies
- Toast the Chilies: Heat a dry skillet over medium heat. Add the dried guajillo and ancho chilies and toast them lightly for about 30-60 seconds per side until they become fragrant. Be careful not to burn them; you want just enough heat to release their natural oils.
- Soak the Chilies: Remove chilies from heat, then remove stems and seeds. Place the cleaned chilies in a bowl and cover with hot water. Let them soak for about 10-15 minutes until they become soft and pliable.
Step 2: Making the Marinade
- Blend the Marinade: In a blender, combine the softened chilies (drained of their soaking water), garlic cloves, vinegar, achiote paste, oregano, cumin, smoked paprika, black pepper, and salt. If you’re using juice (orange or pineapple), add it now. Blend until you achieve a smooth, thick paste. If the mixture is too thick, add a few tablespoons of the chili soaking water or additional vinegar for a smooth consistency.
- Adjust Seasoning: Taste the marinade and adjust the salt, spice, or acidity to your preference. The marinade should be bold, bright, and a bit tangy.
Step 3: Marinating the Pork
- Coat the Pork: Place the pork slices in a large, non-reactive container or a zip-top plastic bag. Pour the marinade over the pork, ensuring every piece is thoroughly coated. Massage gently to distribute the marinade evenly.
- Marinate: Cover the container or seal the bag and place it in the refrigerator. For best results, marinate the pork for at least 4 hours, ideally overnight. The longer it marinates, the deeper and more complex the flavor will be.
Step 4: Cooking the Pork
- Preheat Your Cooking Surface: Heat a large cast-iron skillet or griddle over medium-high heat. You can also grill the pork on an outdoor grill for extra smokiness.
- Cook the Pork: Once the skillet is hot, add a small drizzle of oil to prevent sticking. Cook the marinated pork in batches, laying it out in a single layer. Cook for 2-3 minutes per side until nicely browned and slightly caramelized. The pork should be cooked through, juicy, and tender. Avoid overcrowding the skillet, as that can cause steaming rather than browning.
- Rest the Pork: Transfer the cooked pork to a plate and let it rest for a few minutes. This allows the juices to redistribute, ensuring maximum tenderness.
Step 5: Warming the Tortillas
- Heat the Tortillas: Warm your corn tortillas on a dry skillet or griddle over medium heat for about 30-45 seconds per side until they’re soft and pliable. You can also wrap them in a damp towel and microwave for a few seconds to achieve a similar effect.
- Keep Them Warm: Stack warmed tortillas in a cloth towel or a tortilla warmer to maintain their softness while you assemble the tacos.
Step 6: Assembling Your Adobada Tacos
- Layer the Pork: Place a generous spoonful of the cooked adobada pork onto each warm corn tortilla.
- Add Toppings: Top with finely diced white onion, fresh cilantro, and a few pineapple chunks. These toppings add brightness, crunch, and subtle sweetness that complement the savory pork.
- Garnish and Serve: Serve immediately with lime wedges on the side. A squeeze of fresh lime juice just before the first bite enhances all the flavors and brings everything together.
Notes
(Values may vary based on specific brands and portion sizes)
- Calories: ~300-350
- Fat: ~12-15g
- Protein: ~20-25g
- Carbohydrates: ~25-30g
- Fiber: ~3-4g
- Sugar: ~3-6g
- Sodium: ~400-600mg
FAQs
1. Can I make Adobada Tacos ahead of time?
Yes. In fact, marinating the pork overnight is highly recommended. You can also prepare the marinade in advance and refrigerate it. Cook the pork just before serving to ensure it’s at its most tender and flavorful.
2. What if I can’t find achiote paste?
If you can’t locate achiote paste, you can substitute with a blend of paprika, a small amount of ground annatto seeds (if available), and a pinch of turmeric for color. The flavor won’t be identical, but it will still be delicious and visually appealing.
3. Can I use chicken instead of pork?
Certainly! While pork is traditional, chicken thighs marinated in the same adobo mixture make for a flavorful alternative. Just adjust cooking time to ensure the chicken is fully cooked.
4. Are there any vegetarian options?
You can use firm tofu or portobello mushrooms in place of pork. Press tofu to remove excess moisture and marinate as you would the meat. For mushrooms, marinate them briefly, then grill or sauté. The result is a flavorful vegetarian taco that still showcases the robust adobada marinade.
5. How spicy are Adobada Tacos?
They are generally mildly spicy. Guajillo chilies are mild-to-medium, and ancho chilies are quite mild. If you love spice, add hotter chilies like árbol or chipotle. If you prefer milder flavors, reduce the number of chilies or incorporate more sweetness (pineapple juice) to balance the heat.
6. Can I use flour tortillas instead of corn?
While corn tortillas are traditional and add a distinct flavor, you can use flour tortillas if that’s what you have. The taste and texture will differ slightly, but the flavorful pork and toppings will still shine.
7. What’s the best way to reheat leftover pork?
Heat it in a skillet with a splash of water or chicken broth over medium heat until warmed through. Avoid microwaving if possible, as it may dry out the meat.
8. Where can I find dried chilies and achiote paste?
Check your local Latin American grocery store or the international aisle of a well-stocked supermarket. Many online retailers also carry them. Just make sure to buy from reputable sources to ensure fresh, high-quality chilies.







Delicious