Welcome to my kitchen, where I’m excited to share with you one of my all-time favorite go-to meals: Cheesy Garlic Chicken Wraps. Whether you’re pressed for time on a busy weeknight, looking for a tasty lunchbox idea, or simply craving a savory, comforting meal, these wraps have you covered. Picture tender chicken infused with the bold flavor of garlic, creamy melted cheese, and a medley of vibrant veggies—then wrapped in a soft tortilla for ultimate convenience. They’re portable, kid-friendly, and delightfully scrumptious.
If you find yourself stuck in a recipe rut, these Cheesy Garlic Chicken Wraps can be your saving grace. A handheld meal that’s bursting with flavor, they’re the perfect grab-and-go solution for hectic schedules. Plus, once you master the simple technique of marinating and assembling, the possibilities are limitless. Think about how you could easily swap out different veggies, sauces, or cheeses to keep your wraps exciting every time.
I love that this recipe can effortlessly transition from lunch to dinner without skipping a beat. Pair it with some crunchy fries, a crisp green salad, or a bowl of comforting soup to round out the meal. Got leftover chicken lurking in the fridge? Toss it in. Ran out of a specific veggie? Use what’s available. Need a hearty make-ahead option? They reheat beautifully. The adaptability of these wraps is truly their superpower.
In this article, I’ll walk you through everything you need to know to create a stunning batch of Cheesy Garlic Chicken Wraps. From the ingredients list to step-by-step assembly instructions, serving tips, storage guidelines, and answers to frequently asked questions, you’ll learn all my insider tips and tricks. By the end, you’ll be whipping up delicious wraps even on your busiest days—no takeout menu required!
Why You’ll Love This Recipe
These Cheesy Garlic Chicken Wraps aren’t just another typical chicken dish; they’re an experience in comfort-food bliss. Here are some great reasons why you and your family will fall head over heels for them:
- Big on Flavor: Garlic and cheese are a match made in heaven. The fragrant garlic marinade envelopes the chicken in a delicious embrace, and the melted cheese adds a rich, creamy touch that ties everything together.
- Simple Ingredients: You won’t need any fancy or hard-to-find items. Most of the ingredients for these wraps are probably in your kitchen already—like tortillas, garlic, chicken, and your go-to cheese.
- Easy Weeknight Meal: Tired after a long day? No problem! With straightforward preparation steps, you can have dinner ready in just around 30 minutes. Plus, clean-up is a breeze since we’ll mostly be using a single skillet or pan.
- Kid-Friendly: These wraps are an easy way to sneak in extra veggies without the kids noticing. The cheesy filling and the convenient “handheld” nature of the wrap make it fun for children to eat, turning mealtime into a less stressful event.
- Meal Prep Friendly: If you’re a fan of meal prepping or simply want to plan ahead, these wraps are an ideal candidate. The chicken marinade can be done in advance, and assembly doesn’t take long. Simply store them in the fridge or freezer and heat them up as needed.
- Customizable: Want more spice? Add jalapeños or a dash of hot sauce. Prefer different veggies? Swap the bell peppers for mushrooms or zucchini. The recipe is super flexible, so you can tailor it to suit your palate or dietary needs.
- Budget-Conscious: Chicken, garlic, and tortillas are all wallet-friendly items. Even if you opt for higher-quality or organic options, the overall cost remains manageable, especially compared to ordering takeout or dining out.
Overall, these Cheesy Garlic Chicken Wraps excel in flavor, convenience, and versatility, making them a fantastic addition to any recipe repertoire.
Ingredients
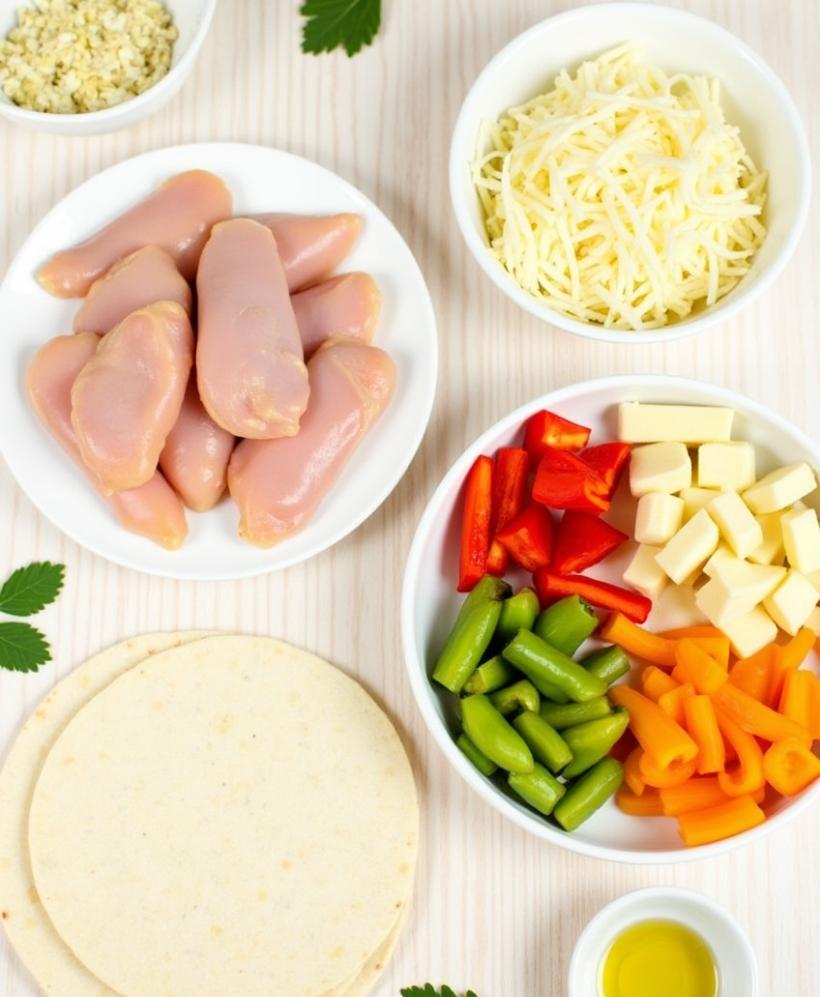
Before we dive into the recipe, let’s gather everything you’ll need. While the exact quantities will vary based on your preferences, here’s a rundown of key ingredients to keep on hand. Feel free to customize as you like.
- Chicken Breasts (or Thighs)
- Typically, boneless and skinless chicken breasts are easiest to work with, but thighs can be used if you prefer a juicier bite. Aim for around 1 to 1.5 pounds of chicken, enough to feed 4 people.
- Flour Tortillas
- You can use regular-sized tortillas or larger burrito-style wraps. For a healthier twist, opt for whole wheat tortillas. If you’re gluten-free, use certified gluten-free wraps.
- Garlic
- Fresh garlic is key for robust flavor. Plan on using at least 3-4 cloves for a bold garlicky punch.
- Cheese
- A blend of mozzarella, cheddar, or Monterey Jack works best for a gooey, melty texture. Shredded is ideal for easy incorporation.
- Marinade Essentials
- Olive Oil: Helps the chicken stay moist and also carries the flavors.
- Salt and Pepper: Balances and enhances all the other seasonings.
- Herbs and Spices: Consider oregano, paprika, dried basil, or Italian seasoning.
- Optional Veggies
- Bell Peppers: Red, green, or yellow, sliced thinly for a sweet crunch.
- Onions: Sautéed or caramelized onions add great depth.
- Spinach or Lettuce: For a burst of color and nutritional benefits.
- Additional Sauces or Spreads (Optional)
- Garlic Aioli or Mayonnaise: Amp up the creaminess factor.
- Hot Sauce or Sriracha: Perfect for those who crave a little heat.
- Barbecue Sauce: Adds a tangy-sweet note if you’re looking to shake things up.
- Garnishes
- Fresh Parsley or Cilantro: Chopped herbs bring a pop of color and a refreshing element.
- Extra Cheese: Because who can say no to more cheese?
How to Make Cheesy Garlic Chicken Wraps
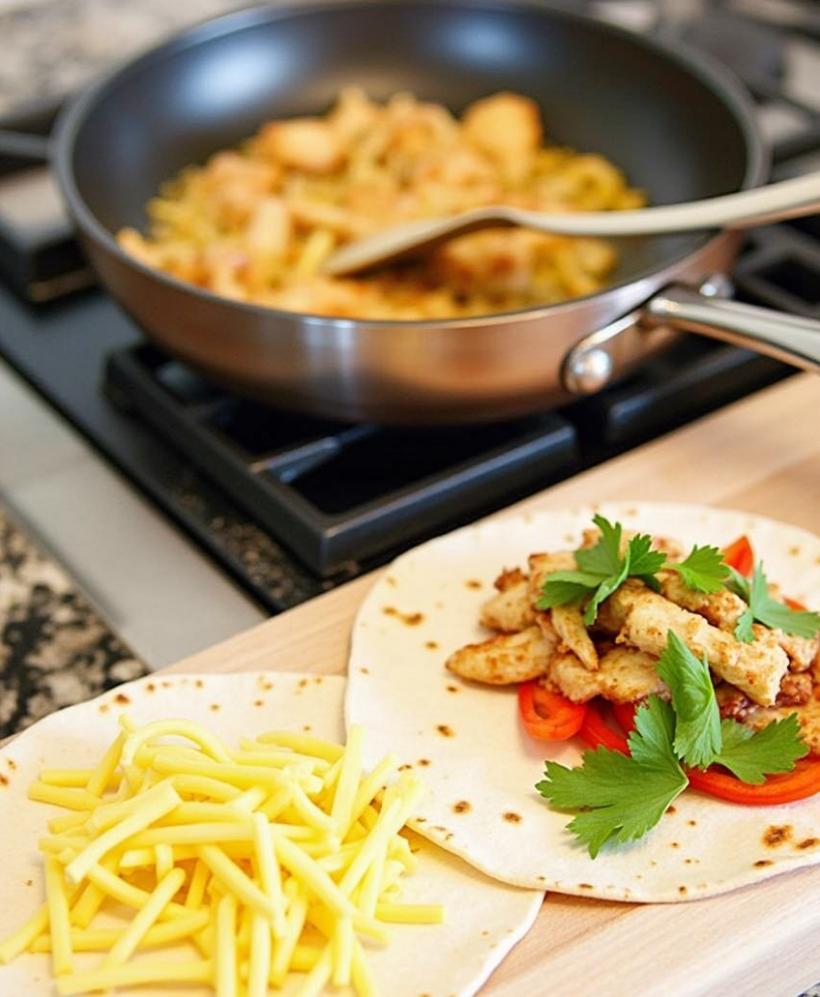
Here’s the fun part: putting together these mouthwatering wraps. Follow the steps below for a foolproof dinner (or lunch) that your entire family will devour.
Step 1: Marinate the Chicken
- Prep the Chicken
- If you’re using chicken breasts, consider pounding them lightly to an even thickness for faster, more uniform cooking. Alternatively, slice them into thin strips.
- Create the Marinade
- In a large bowl or a zip-top bag, combine olive oil, minced garlic, salt, pepper, and any additional herbs or spices (such as oregano, paprika, or Italian seasoning).
- Stir to combine thoroughly.
- Coat the Chicken
- Add the chicken strips or breasts to the marinade, ensuring every piece is well-coated.
- Let the chicken marinate for at least 15-30 minutes. If time permits, you can cover and refrigerate for up to 24 hours to maximize flavor.
Step 2: Cook the Chicken
- Heat a Skillet
- Place a non-stick skillet or cast-iron pan over medium-high heat. Add a drizzle of olive oil if necessary.
- Cook Until Golden
- Add the marinated chicken pieces, being careful not to overcrowd the pan.
- Cook for approximately 4-6 minutes per side (depending on thickness) until the chicken is cooked through and has a golden-brown exterior.
- If you’re using a meat thermometer, aim for an internal temperature of 165°F (74°C).
- Rest and Slice
- Transfer the chicken to a cutting board and let it rest for about 5 minutes. Slice into bite-sized pieces or thin strips, perfect for stuffing into your tortilla.
Step 3: Sauté Additional Veggies (Optional)
- Add to the Same Skillet
- If you’re including sautéed onions or bell peppers, place them in the same skillet after removing the chicken.
- Sauté for around 5 minutes or until softened and slightly caramelized. Season with salt, pepper, or your favorite herbs.
- Set Aside
- Transfer the cooked veggies to a plate or bowl, and keep them nearby for assembly.
Step 4: Assemble the Wraps
- Warm the Tortillas
- Briefly heat each tortilla in a dry skillet or microwave for a few seconds to make them more pliable.
- Spread the Fillings
- Lay a warm tortilla on a flat surface.
- If desired, spread a thin layer of garlic aioli, mayonnaise, or a sauce of your choice.
- Add the Chicken and Veggies
- Arrange a handful of sliced chicken and sautéed veggies down the center of the tortilla.
- Sprinkle Cheese
- Generously sprinkle shredded cheese on top of the chicken and veggies.
- This is where the “cheesy” magic happens!
- Wrap It Up
- Fold in the sides of the tortilla, then roll it tightly from the bottom up.
- For a crispy exterior, you can place the wrap seam-side down in a hot skillet or press it in a panini press.
Step 5: Melt and Serve
- Heat for Melty Goodness
- If you want the cheese extra melty, cook the assembled wraps in a skillet over medium heat for about 1-2 minutes per side.
- Alternatively, use a sandwich press or grill pan.
- Slice and Serve
- Cut each wrap diagonally for a more appealing presentation.
- Serve them immediately while they’re warm and gooey.
Pro Tip: If you have leftover chicken from a previous dinner, you can skip the marinating step and jump straight to assembly. Just be sure to add a bit of garlic flavor via a sauce or spice blend!
Serving and Storage Tips
Serving Suggestions
- Pair with a Crisp Salad: A refreshing green salad balances the richness of these Cheesy Garlic Chicken Wraps. Toss together some lettuce, cucumbers, tomatoes, and a light vinaigrette.
- Add a Bowl of Soup: Whether it’s a creamy tomato soup or a hearty minestrone, soup pairs wonderfully with these wraps. Dip, slurp, and enjoy!
- Fries or Sweet Potato Wedges: For a comforting side dish, whip up some crispy fries or sweet potato wedges in the oven. The combination of crispy potatoes and a cheesy chicken wrap is unbeatable.
- Coleslaw: A tangy coleslaw can add crunch and lighten the meal’s overall feel, making for a complete summertime (or any time) lunch.
Storage and Reheating
- Refrigeration: If you have leftover wraps, store them in an airtight container or wrap them tightly in aluminum foil. They’ll keep well in the fridge for up to 3 days.
- Freezing: For longer storage, wrap each cooked Cheesy Garlic Chicken Wrap in plastic wrap and then place in a zip-top freezer bag. They can be frozen for up to 2 months.
- Reheating:
- Microwave: Unwrap the frozen wrap and heat in 30-second intervals until warmed through. While this is quick, the tortilla may become a bit soft.
- Oven: For a crispier result, preheat your oven to 350°F (175°C), place the wrap on a baking sheet, and heat for 15-20 minutes, or until the cheese is melted and the chicken is heated.
- Skillet: Warm a skillet over medium heat, place your wrap in, and flip occasionally until heated through, giving you a slightly crispy exterior.
Make-Ahead Tip: If you know you’ll need a quick meal in the next day or two, assemble the wraps fully but hold off on crisping them. Store them in the fridge, and when you’re ready to eat, just pop them in the pan or oven to warm and crisp.
Helpful Notes
- Marinate for Maximum Flavor: While 15 minutes is enough in a pinch, letting the chicken sit in its garlic-infused marinade for a few hours significantly boosts the taste.
- Don’t Skimp on the Garlic: This recipe is all about celebrating garlic’s robust character. You can adjust to taste, but err on the side of more garlic for that signature flavor punch.
- Cheese Options: A mixture of cheeses (cheddar, mozzarella, Monterey Jack, or even pepper jack if you like a little spice) can elevate the wrap. Each cheese brings its own nuance—mozzarella for meltiness, cheddar for sharpness, and Monterey Jack for a mild creaminess.
- Veggie Variety: You’re not limited to peppers and onions. Mushrooms, roasted zucchini, or even thinly sliced carrots can lend exciting textures and flavors.
- Spice It Up: Sprinkle chili flakes or drizzle your favorite hot sauce for a spicier wrap. Adding jalapeños or pickled peppers can also brighten things up.
- Doneness Check: Undercooking chicken is a no-no. Make sure it reaches 165°F (74°C). A food thermometer is a worthwhile kitchen tool if you’re uncertain.
- Prevent Sogginess: If you plan on storing leftover wraps, cool the cooked chicken to room temperature before assembling. Too much heat trapped in the wrap can lead to a soggy tortilla.
- Go Fresh: If possible, use fresh herbs like basil, parsley, or cilantro for added flavor bursts. Chopping them up and sprinkling them in right before serving can make a noticeable difference.
- Gluten-Free Option: Opt for certified gluten-free tortillas or wraps if you have dietary restrictions. The cooking method remains the same.
Putting It All Together
From the zesty aroma of freshly minced garlic to the indulgent pull of melted cheese, these Cheesy Garlic Chicken Wraps encapsulate the best qualities of a quick, comforting meal. With budget-friendly ingredients, easy-to-follow steps, and endless customization options, there’s no reason not to make this recipe a staple in your family’s weekly rotation.
Whether you’re cooking for picky eaters, health enthusiasts, or anyone who just loves a hearty, flavor-packed meal, these wraps check every box. And don’t forget about meal prep—whip up a batch on Sunday, and you’ll have a convenient protein-packed lunch or dinner ready to go all week. So roll up your sleeves, gather your ingredients, and treat yourself to the cheesy, garlicky delight that awaits in every bite of these irresistible chicken wraps. Bon appétit!
Conclusion
Cooking doesn’t have to be complicated. In fact, sometimes the simplest recipes are the most satisfying, and that’s exactly what these Cheesy Garlic Chicken Wraps deliver. They bring together the timeless pairing of cheese and garlic to create a comforting, flavor-packed meal you can prepare in a flash. Best of all, they’re endlessly adaptable. You can change up the cheese, add your favorite vegetables, or experiment with different sauces and marinades to create your own personalized version.
There’s something about biting into a warm tortilla stuffed with savory chicken, melted cheese, and garlicky undertones that just feels like a hug on a plate. Serve them at a casual dinner party, slip them into a picnic basket, or cozy up on the couch after a long day with one in hand. No matter how you enjoy them, these wraps are sure to become a beloved staple in your household.
As you begin to incorporate these Cheesy Garlic Chicken Wraps into your meal rotation, you’ll likely find yourself looking for new ways to tweak the recipe. Maybe you’ll add some crushed red pepper flakes, throw in fresh spinach for extra nutrients, or switch to a whole wheat tortilla for a nuttier taste. Whatever your twist may be, these wraps offer a foolproof foundation for experimentation.
From a practical standpoint, they store and reheat so well that they’re tailor-made for leftovers, meal-prepping, and last-minute lunches. So go ahead and join the fan club—these Cheesy Garlic Chicken Wraps are guaranteed to be a crowd-pleaser time and time again.
_________________________________
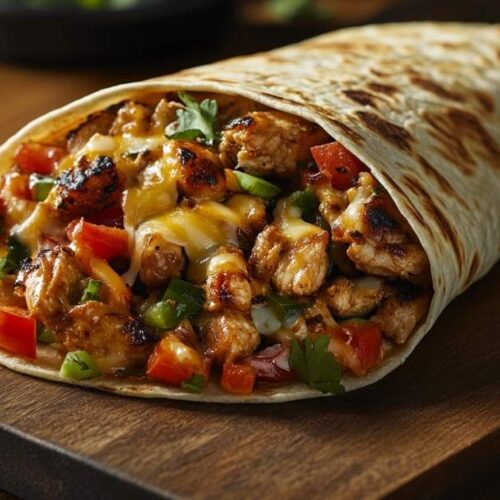
Cheesy Garlic Chicken Wraps
Ingredients
Chicken Breasts (or Thighs)
- Typically boneless and skinless chicken breasts are easiest to work with, but thighs can be used if you prefer a juicier bite. Aim for around 1 to 1.5 pounds of chicken, enough to feed 4 people.
Flour Tortillas
- You can use regular-sized tortillas or larger burrito-style wraps. For a healthier twist opt for whole wheat tortillas. If you’re gluten-free, use certified gluten-free wraps.
Garlic
- Fresh garlic is key for robust flavor. Plan on using at least 3-4 cloves for a bold garlicky punch.
Cheese
- A blend of mozzarella cheddar, or Monterey Jack works best for a gooey, melty texture. Shredded is ideal for easy incorporation.
Marinade Essentials
- Olive Oil: Helps the chicken stay moist and also carries the flavors.
- Salt and Pepper: Balances and enhances all the other seasonings.
- Herbs and Spices: Consider oregano paprika, dried basil, or Italian seasoning.
Optional Veggies
- Bell Peppers: Red green, or yellow, sliced thinly for a sweet crunch.
- Onions: Sautéed or caramelized onions add great depth.
- Spinach or Lettuce: For a burst of color and nutritional benefits.
Additional Sauces or Spreads (Optional)
- Garlic Aioli or Mayonnaise: Amp up the creaminess factor.
- Hot Sauce or Sriracha: Perfect for those who crave a little heat.
- Barbecue Sauce: Adds a tangy-sweet note if you’re looking to shake things up.
Garnishes
- Fresh Parsley or Cilantro: Chopped herbs bring a pop of color and a refreshing element.
- Extra Cheese: Because who can say no to more cheese?
Instructions
Step 1: Marinate the Chicken
- Prep the Chicken:– If you’re using chicken breasts, consider pounding them lightly to an even thickness for faster, more uniform cooking. Alternatively, slice them into thin strips.
- Create the Marinade:– In a large bowl or a zip-top bag, combine olive oil, minced garlic, salt, pepper, and any additional herbs or spices (such as oregano, paprika, or Italian seasoning).– Stir to combine thoroughly.
- Coat the Chicken:– Add the chicken strips or breasts to the marinade, ensuring every piece is well-coated.– Let the chicken marinate for at least 15-30 minutes. If time permits, you can cover and refrigerate for up to 24 hours to maximize flavor.
Step 2: Cook the Chicken
- Heat a Skillet:– Place a non-stick skillet or cast-iron pan over medium-high heat. Add a drizzle of olive oil if necessary.
- Cook Until Golden:– Add the marinated chicken pieces, being careful not to overcrowd the pan.– Cook for approximately 4-6 minutes per side (depending on thickness) until the chicken is cooked through and has a golden-brown exterior.– If you’re using a meat thermometer, aim for an internal temperature of 165°F (74°C).
- Rest and Slice:– Transfer the chicken to a cutting board and let it rest for about 5 minutes. Slice into bite-sized pieces or thin strips, perfect for stuffing into your tortilla.
Step 3: Sauté Additional Veggies (Optional)
- Add to the Same Skillet:– If you’re including sautéed onions or bell peppers, place them in the same skillet after removing the chicken.– Sauté for around 5 minutes or until softened and slightly caramelized. Season with salt, pepper, or your favorite herbs.
- Set Aside:– Transfer the cooked veggies to a plate or bowl, and keep them nearby for assembly.
Step 4: Assemble the Wraps
- Warm the Tortillas:– Briefly heat each tortilla in a dry skillet or microwave for a few seconds to make them more pliable.
- Spread the Fillings:– Lay a warm tortilla on a flat surface.– If desired, spread a thin layer of garlic aioli, mayonnaise, or a sauce of your choice.
- Add the Chicken and Veggies:– Arrange a handful of sliced chicken and sautéed veggies down the center of the tortilla.
- Sprinkle Cheese:– Generously sprinkle shredded cheese on top of the chicken and veggies.– This is where the “cheesy” magic happens!
- Wrap It Up:– Fold in the sides of the tortilla, then roll it tightly from the bottom up.– For a crispy exterior, you can place the wrap seam-side down in a hot skillet or press it in a panini press.
Step 5: Melt and Serve
- Heat for Melty Goodness:– If you want the cheese extra melty, cook the assembled wraps in a skillet over medium heat for about 1-2 minutes per side.– Alternatively, use a sandwich press or grill pan.
- Slice and Serve:– Cut each wrap diagonally for a more appealing presentation.– Serve them immediately while they’re warm and gooey.
Pro Tip:
- If you have leftover chicken from a previous dinner, you can skip the marinating step and jump straight to assembly. Just be sure to add a bit of garlic flavor via a sauce or spice blend!
Notes
- Calories: ~450
- Fat: 18g
- Saturated Fat: 7g
- Protein: 28g
- Carbohydrates: 38g
- Fiber: 3g
- Sugar: 3g
- Sodium: 650mg
FAQs
1. Can I Use Leftover Cooked Chicken for This Recipe?
Absolutely! If you have cooked chicken on hand, you can shred or slice it and proceed with assembly. To maintain the garlicky essence, lightly season the already-cooked chicken with garlic powder or drizzle some garlic-infused oil before adding it to the tortilla.
2. How Can I Make These Wraps Healthier?
Consider using whole wheat or gluten-free tortillas, opting for a reduced-fat cheese or using less cheese overall, and loading up on veggies. You could also switch to grilled chicken breast without added oil or marinade to cut back on calories.
3. What’s the Best Way to Reheat These Without Turning Them Soggy?
Reheating in an oven or skillet is your best bet. Using a microwave can make the tortilla a bit soggy. By gently warming the wrap in a skillet over medium heat or in the oven at 350°F (175°C), you’ll achieve a lovely crisp exterior and perfectly melted cheese on the inside.
4. Can I Freeze These Wraps?
Yes! Wrap them tightly in plastic wrap or foil, then place them in a freezer-safe container or zip-top bag. You can freeze them for up to 2 months. When you’re ready to enjoy, thaw them overnight in the refrigerator and reheat as desired.
5. Are There Any Vegetarian Alternatives?
Certainly. For a meat-free version, substitute the chicken with tofu, tempeh, or roasted vegetables like zucchini, mushrooms, or bell peppers. You can still maintain the garlic marinade by mixing it with the alternative protein or veggies, and you’ll end up with equally delicious Cheesy Garlic Wraps.
6. What Kind of Cheese Melts the Best?
Mozzarella is a classic for gooey goodness, but Monterey Jack, cheddar, or a blend of these cheeses also melt nicely. Pepper Jack offers a hint of spice, which complements the garlic flavor well.
7. Do I Have to Use Fresh Garlic, or Can I Use Garlic Powder?
While fresh garlic offers the best flavor and aroma, you can substitute garlic powder if necessary. Keep in mind that the flavor may be less intense. Start with about half a teaspoon of garlic powder per clove of garlic you’re replacing, and adjust to taste.
8. How Can I Prevent the Tortilla from Tearing?
Warming the tortilla briefly before filling it makes it more pliable and less likely to tear. Overfilling can also lead to rips, so be mindful of how much chicken and cheese you add.
9. What’s the Ideal Internal Temperature for Chicken?
Chicken should be cooked to 165°F (74°C). If you have a digital kitchen thermometer, use it to ensure the chicken is fully cooked and safe to eat.
10. Can I Prepare the Marinade in Advance?
You bet. You can stir together the marinade up to 24 hours before using it. Keep it chilled in a covered container or jar. When you’re ready to marinate, simply pour it over the chicken, and continue with the recipe as usual.




Thank you