The holidays are a time for magic, warmth, and creating memories that linger long after the season ends. Imagine the aroma of buttery sweetness wafting through your home, the joyful laughter of loved ones as they gather around the table, and the irresistible crunch of a perfectly baked Christmas butter cookie.
These cookies are more than just a treat—they’re an experience. Crafted with love and decorated to festive perfection, they transform simple ingredients into a masterpiece of flavor and nostalgia. Whether you’re preparing for a family gathering, hosting a holiday party, or simply indulging in the joy of baking, these cookies bring a sprinkle of festive cheer to every moment.
This holiday season, let your kitchen become the heart of celebration as you bake these unforgettable Christmas butter cookies. They’re not just cookies; they’re a tradition in the making, waiting to be shared, savored, and celebrated.
Why You’ll Love This Recipe
There’s something magical about a recipe that combines simplicity, flavor, and joy all in one bite. These Christmas butter cookies are the epitome of holiday indulgence, offering a rich, melt-in-your-mouth texture that’s nothing short of divine. Whether you’re an experienced baker or a beginner just dipping your toes into the festive spirit, this recipe is approachable yet endlessly rewarding.
What sets these cookies apart is their versatility. Want to create a classic treat with a touch of powdered sugar? Done. Prefer a vibrant splash of color with festive sprinkles or royal icing? Easy. These cookies are like a blank canvas, inviting your creativity to take center stage. Plus, the dough is sturdy enough to hold intricate shapes, making it perfect for those whimsical Christmas cookie cutters shaped like stars, snowflakes, or even jolly old Santa himself.
But it’s not just about taste or appearance—it’s about the experience. The act of rolling out the dough, cutting out playful shapes, and decorating with loved ones creates memories that last far longer than the cookies themselves. Each batch becomes a story, a tradition, a moment of holiday magic shared with family and friends.
So, why will you love this recipe? Because it’s more than just a recipe—it’s an invitation to savor the season in the most delightful way possible.
Ingredients
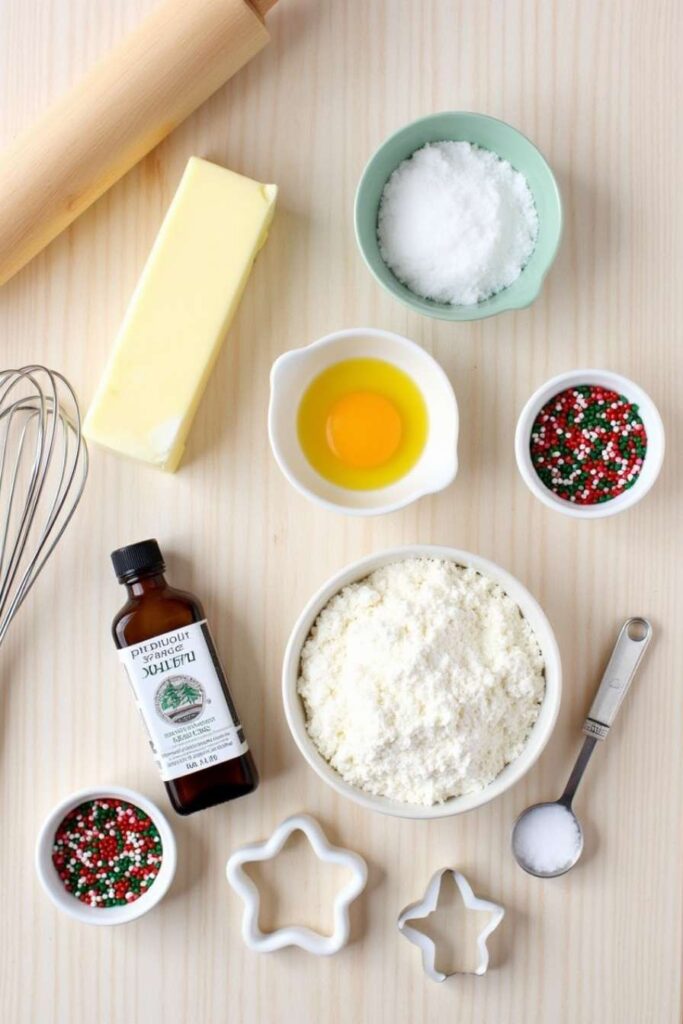
The beauty of Christmas butter cookies lies in their simplicity. With just a handful of everyday ingredients, you can create something truly extraordinary. Here’s what you’ll need to whip up these festive delights:
- Unsalted Butter (1 cup, softened)
The star of the show! Butter gives these cookies their rich, melt-in-your-mouth texture. Softened butter ensures a smooth, lump-free dough. - Granulated Sugar (3/4 cup)
Sweetens the cookies to perfection while giving them a slight crunch. For a touch of depth, you can use a mix of granulated and superfine sugar. - Vanilla Extract (1 teaspoon)
Adds warmth and a subtle aroma, making these cookies irresistibly fragrant. Use pure vanilla for the best results. - Egg Yolk (1 large)
Acts as a binder and adds a luscious richness to the dough. - All-Purpose Flour (2 1/2 cups)
The backbone of the recipe. Be sure to measure your flour accurately to avoid a dry or overly dense dough. - Salt (1/4 teaspoon)
A pinch of salt enhances the flavors and balances the sweetness. - Optional Decorations
Think festive sprinkles, colorful royal icing, or a dusting of powdered sugar to bring the holiday magic alive.
These ingredients are simple, but together, they create a cookie that’s bursting with buttery flavor and festive charm. Each one serves a purpose, ensuring the perfect balance of taste, texture, and appearance. Ready to turn these into unforgettable Christmas butter cookies? Let’s dive into the fun part—making them!
How to Make Christmas Butter Cookies
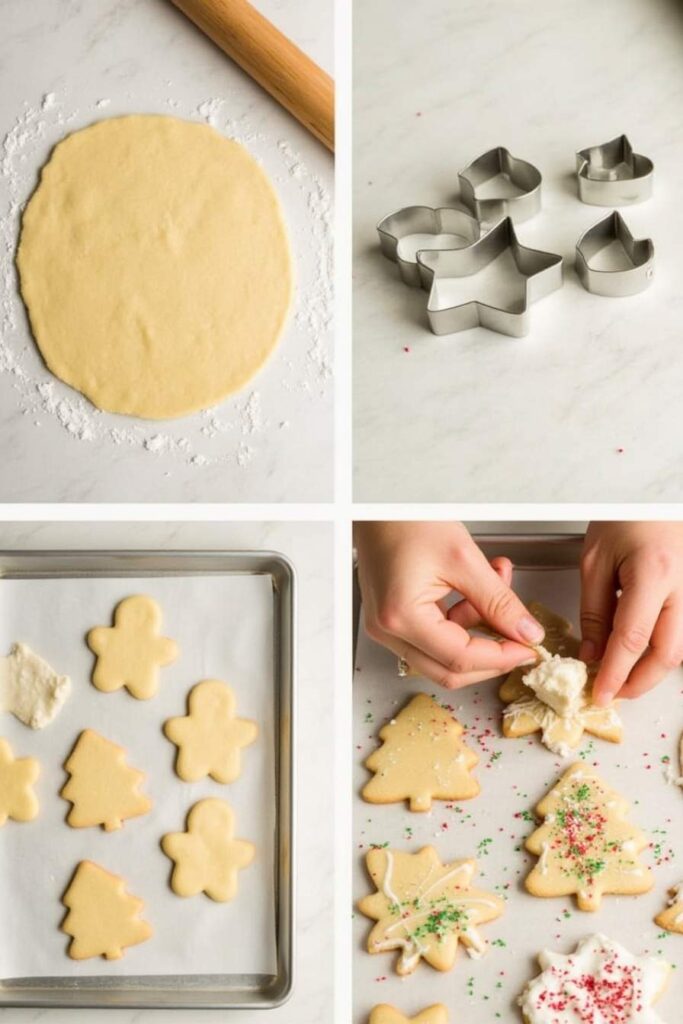
Creating Christmas butter cookies is a joyous process, combining the precision of baking with the fun of festive creativity. Follow these simple steps, and you’ll have a tray of buttery, golden cookies ready to delight family and friends.
Step 1: Cream the Butter and Sugar
Begin by beating the softened unsalted butter and granulated sugar in a large mixing bowl. Use an electric mixer to blend them until the mixture is light, airy, and fluffy. This step ensures your cookies will have the melt-in-your-mouth texture they’re famous for.
Step 2: Add the Wet Ingredients
Mix in the vanilla extract and a single large egg yolk. The vanilla adds a comforting warmth, while the yolk enriches the dough with a silky consistency that holds its shape during baking.
Step 3: Incorporate the Dry Ingredients
Gradually sift in the all-purpose flour and a pinch of salt, blending on low speed until the dough starts to come together. Avoid overmixing—stop as soon as the dough forms a cohesive ball.
Step 4: Chill the Dough
Wrap the dough tightly in plastic wrap and refrigerate for at least 30 minutes. Chilling is crucial as it solidifies the butter, ensuring your cookies retain their shape and don’t spread excessively while baking.
Step 5: Roll and Cut the Dough
Once chilled, roll out the dough on a lightly floured surface to about 1/4-inch thickness. Use your favorite Christmas-themed cookie cutters to stamp out festive shapes. Arrange them on a baking sheet lined with parchment paper, leaving a small gap between each cookie.
Step 6: Bake to Golden Perfection
Preheat your oven to 350°F (175°C). Bake the cookies for 8 to 10 minutes, or until the edges begin to turn a light golden brown. The key is to avoid overbaking, as this can rob the cookies of their soft, buttery center.
Step 7: Cool and Decorate
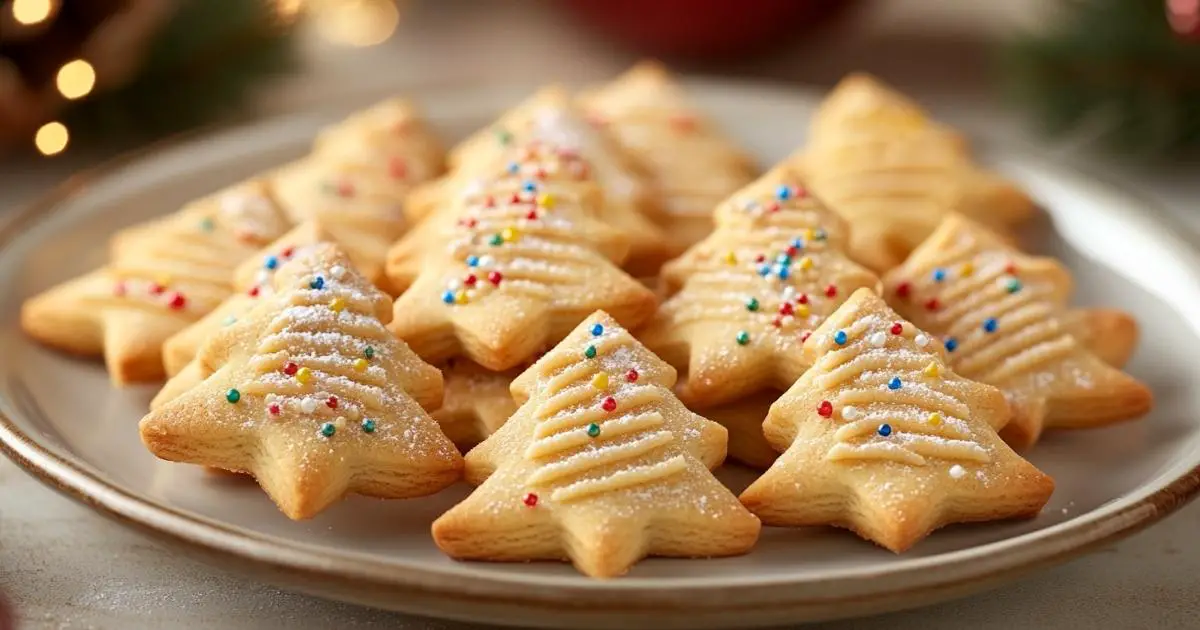
Transfer the cookies to a wire rack and allow them to cool completely. Once cooled, the decorating fun begins! Whether it’s a drizzle of icing, a shower of festive sprinkles, or edible glitter, let your creativity flow.
With these steps, baking Christmas butter cookies becomes an enjoyable tradition filled with warmth and cheer. They’re not just cookies—they’re a way to share joy, one bite at a time.
Christmas Cookie Cutters
The magic of Christmas butter cookies isn’t just in their taste—it’s also in their whimsical shapes. Cookie cutters transform a simple dough into festive masterpieces, making each cookie a tiny celebration of the season.
Stars, Snowflakes, and Bells
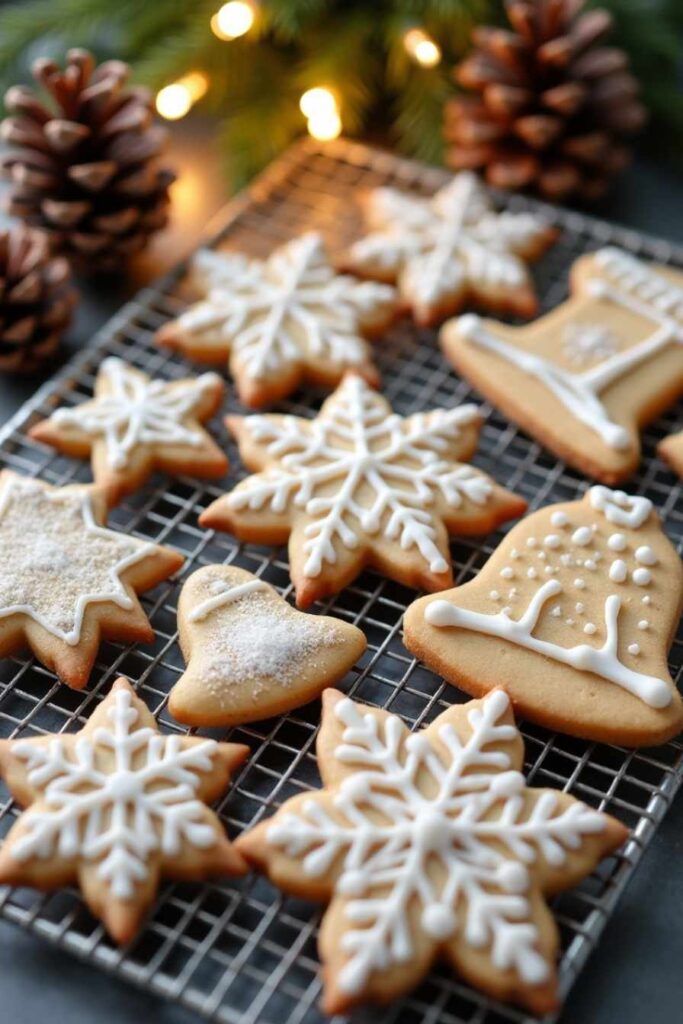
Classic shapes like stars and snowflakes bring a touch of timeless elegance to your cookie platter. Their intricate designs are perfect for sprinkling with powdered sugar or decorating with royal icing. Bells add a cheery vibe, symbolizing the joy of holiday gatherings.
Santa and Reindeer

Bring Santa’s jolly spirit to life with cookie cutters shaped like his iconic hat or full figure. Pair them with reindeer-shaped cookies for a storybook-worthy holiday scene. These shapes are always a hit with kids and adults alike.
Christmas Trees and Gingerbread Men

Nothing says Christmas quite like a cookie shaped like a tree, adorned with colorful sprinkles or edible pearls to mimic twinkling lights. Gingerbread men are a nostalgic choice, inviting creative decorating with frosting and candy.
Creative and Unique Shapes
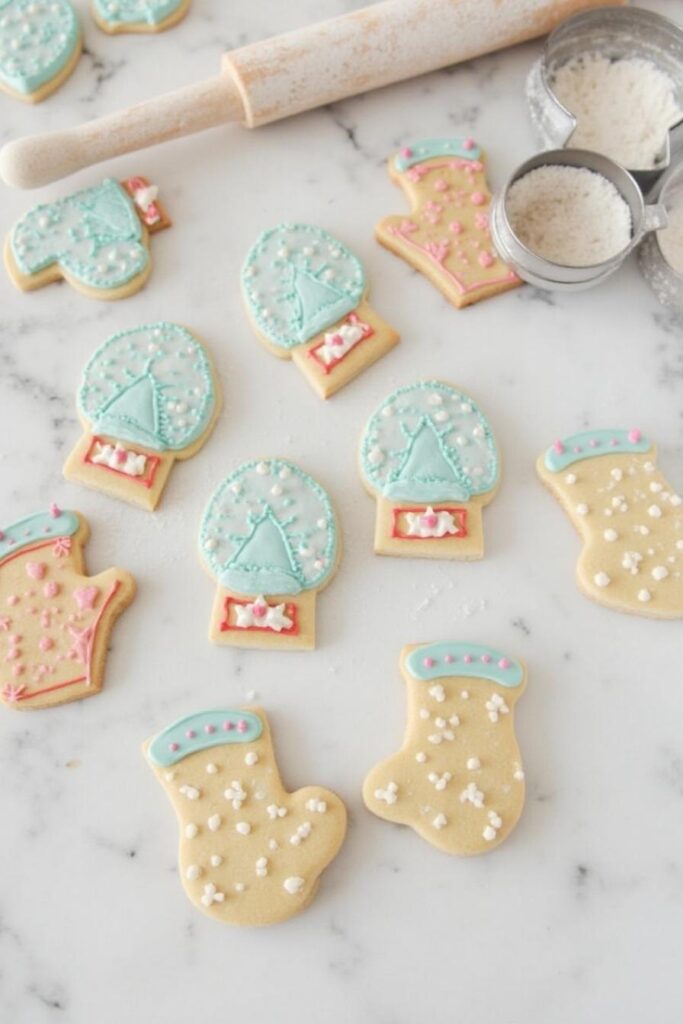
Looking for something unconventional? Try snow globes, stockings, or mitten-shaped cutters. They add a personalized touch to your cookies and are sure to spark conversation at any holiday gathering.
Investing in a variety of cookie cutters not only elevates the visual appeal of your cookies but also makes the baking process more interactive and fun. From intricate designs to playful patterns, these tools turn your Christmas butter cookies into edible works of art.
Serving and Storage Tips
Once your Christmas butter cookies are baked to golden perfection and adorned with festive decorations, the next step is sharing and savoring them. Whether you’re presenting them at a holiday gathering or gifting them to loved ones, thoughtful serving and storage can make all the difference.
Serving Suggestions
Arrange your cookies on a decorative platter lined with festive parchment paper. For an extra touch of charm, group them by shape—stars, trees, and snowflakes create a stunning visual display. Pair them with a steaming mug of hot cocoa or spiced mulled wine for a cozy treat. Hosting a holiday party? Stack cookies into a pyramid for a unique centerpiece that’s both edible and eye-catching.
Gifting Ideas
Christmas butter cookies make exceptional gifts. Place them in a holiday-themed tin or a clear cellophane bag tied with a vibrant ribbon. Add a handwritten tag for a personal touch. Layering cookies with parchment paper prevents them from sticking together, ensuring they arrive as beautiful as they left your kitchen.
Storage Tips
To keep your cookies fresh and buttery, store them in an airtight container at room temperature. They’ll stay delicious for up to a week. For longer storage, freeze undecorated cookies in a single layer, then transfer them to a freezer-safe bag. When you’re ready to enjoy, let them thaw at room temperature and decorate as desired.
By following these tips, you can extend the joy of your Christmas butter cookies, whether sharing them immediately or saving them for a festive moment down the line. Every bite will taste as delightful as the first!
Helpful Notes
Even the simplest recipes benefit from a few extra tips to ensure perfection. These helpful notes will guide you through the process and help you avoid common pitfalls, making your Christmas butter cookies truly unforgettable.
Chill the Dough for Precision
Chilling the dough isn’t just a step—it’s a game-changer. Cold dough is easier to roll out and cuts cleanly with cookie cutters, ensuring your festive shapes remain crisp and defined. If the dough gets too soft while working, pop it back in the fridge for 10–15 minutes.
Measure with Accuracy
Precision is key in baking. Use measuring cups for dry ingredients and a scale if possible. Adding too much flour can make the dough crumbly, while too little can cause it to spread during baking.
Prevent Overbaking
Butter cookies can go from perfect to overdone in moments. Remove them from the oven as soon as the edges turn golden, even if the centers look slightly soft—they will firm up as they cool.
Experiment with Flavors
While classic vanilla is timeless, feel free to experiment. A touch of almond extract adds a nutty twist, while a sprinkle of cinnamon or nutmeg gives your cookies a warm, spiced flavor.
Frosting Tips
For intricate designs, use royal icing—it dries quickly and creates a smooth, professional finish. For a softer touch, buttercream frosting works beautifully, especially when paired with edible glitter or sprinkles.
Clean Cutters, Better Cookies
Keep your cookie cutters clean between uses. Residue can distort shapes and affect the precision of your designs. A quick rinse and dry ensure each cut is as sharp as the first.
With these notes in mind, your Christmas butter cookies will not only look spectacular but taste like they were made by a seasoned professional. Enjoy the process and let your creativity shine!
Conclusion
The holidays are a time to savor moments of joy, connection, and indulgence, and these Christmas butter cookies capture the essence of all three. With their rich, buttery flavor and whimsical shapes, they’re more than just a dessert—they’re a celebration of togetherness and festive spirit. Whether you’re crafting them as gifts, sharing them at a holiday party, or simply enjoying them with loved ones by the fire, these cookies are bound to create cherished memories.
What makes them truly special is their versatility. You can keep them simple with a sprinkle of sugar or dress them up with intricate designs. Every batch tells a story—a story of laughter, creativity, and the warmth of the season.
So, roll up your sleeves, preheat your oven, and let the magic of baking bring your holidays to life. These cookies are more than a treat—they’re a tradition waiting to happen. Bake them, share them, and most importantly, savor the festive joy they bring. After all, isn’t that what the holidays are all about?
________________________________
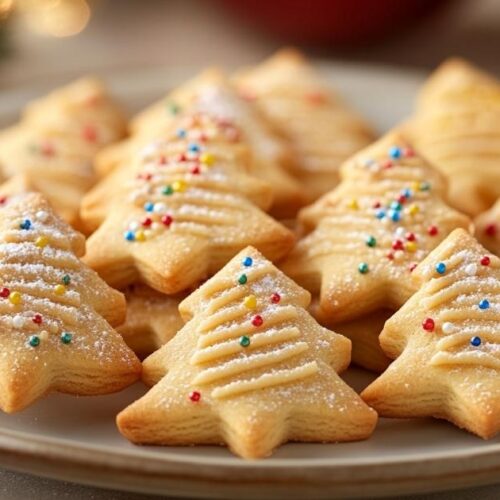
Christmas Butter Cookies
Ingredients
- Unsalted Butter (1 cup, softened)
- Granulated Sugar (3/4 cup)
- Vanilla Extract (1 teaspoon)
- Egg Yolk (1 large)
- All-Purpose Flour (2 1/2 cups)
- Salt (1/4 teaspoon)
Instructions
Step 1: Cream the Butter and Sugar
- Begin by beating the softened unsalted butter and granulated sugar in a large mixing bowl. Use an electric mixer to blend them until the mixture is light, airy, and fluffy. This step ensures your cookies will have the melt-in-your-mouth texture they’re famous for.
Step 2: Add the Wet Ingredients
- Mix in the vanilla extract and a single large egg yolk. The vanilla adds a comforting warmth, while the yolk enriches the dough with a silky consistency that holds its shape during baking.
Step 3: Incorporate the Dry Ingredients
- Gradually sift in the all-purpose flour and a pinch of salt, blending on low speed until the dough starts to come together. Avoid overmixing—stop as soon as the dough forms a cohesive ball.
Step 4: Chill the Dough
- Wrap the dough tightly in plastic wrap and refrigerate for at least 30 minutes. Chilling is crucial as it solidifies the butter, ensuring your cookies retain their shape and don’t spread excessively while baking.
Step 5: Roll and Cut the Dough
- Once chilled, roll out the dough on a lightly floured surface to about 1/4-inch thickness. Use your favorite Christmas-themed cookie cutters to stamp out festive shapes. Arrange them on a baking sheet lined with parchment paper, leaving a small gap between each cookie.
Step 6: Bake to Golden Perfection
- Preheat your oven to 350°F (175°C). Bake the cookies for 8 to 10 minutes, or until the edges begin to turn a light golden brown. The key is to avoid overbaking, as this can rob the cookies of their soft, buttery center.
Step 7: Cool and Decorate
- Transfer the cookies to a wire rack and allow them to cool completely. Once cooled, the decorating fun begins! Whether it’s a drizzle of icing, a shower of festive sprinkles, or edible glitter, let your creativity flow.
Notes
- Calories: 120 kcal
- Fat: 7g
- Saturated Fat: 4.5g
- Cholesterol: 30mg
- Sodium: 50mg
- Carbohydrates: 13g
- Sugars: 7g
- Protein: 1.5g
- Fiber: 0.3g
Discover More Irresistible Recipes
If you enjoyed baking these Christmas Butter Cookies, don’t stop there! Explore these delightful recipes from our collection and bring even more deliciousness to your table:
- Banana Bread Cookies Recipe: A sweet twist on classic banana bread in cookie form. Perfectly soft and irresistible!
- Peanut Butter Balls: A quick, no-bake treat packed with rich peanut butter flavor. Great for holiday snacking!
- Cake Mix and Cool Whip Cookies: Fluffy, chewy cookies made with just three simple ingredients.
- Hello Kitty Cake Recipe: A fun, creative cake perfect for themed parties and celebrations.
- Mini Chicken Pot Pies Muffins: Bite-sized comfort food with a flaky crust and savory filling.
- Pumpkin Pancake Recipe: Fluffy, spiced pancakes that capture the cozy essence of fall.
- Smoked Salmon Cheesecake: A savory cheesecake with a rich smoked salmon flavor—perfect for appetizers or brunch.
Explore these recipes today and discover a world of flavors that will make your culinary adventures unforgettable!
FAQs
1. Can I make the dough ahead of time?
Absolutely! The dough can be prepared up to three days in advance. Simply wrap it tightly in plastic wrap and store it in the refrigerator. When ready to bake, let the dough sit at room temperature for a few minutes to soften slightly for easier rolling.
2. What if I don’t have cookie cutters?
No problem! Use a small glass or jar lid to cut out round cookies. Alternatively, get creative by shaping the dough with a knife or freehand designs for a rustic, homemade look.
3. Can I freeze the cookies?
Yes! These cookies freeze beautifully. Place undecorated cookies in a single layer on a baking sheet and freeze until solid. Then, transfer them to an airtight container or freezer bag. They’ll keep for up to three months. Thaw at room temperature before decorating or serving.
4. How can I make these cookies gluten-free?
Substitute the all-purpose flour with a 1:1 gluten-free flour blend designed for baking. Be sure to chill the dough well, as gluten-free flours can make the dough more delicate to work with.
5. Why do my cookies spread too much during baking?
Cookies may spread if the butter is too soft or if the dough hasn’t been chilled long enough. Ensure the butter is just softened, not melted, and always chill the dough for at least 30 minutes before rolling it out.
6. Can I add other flavors to the dough?
Definitely! A splash of almond extract or a pinch of citrus zest can add a delightful twist. You can even mix in finely chopped nuts or mini chocolate chips for added texture.
7. What’s the best way to decorate these cookies?
Royal icing is perfect for intricate designs, while buttercream adds a soft, creamy finish. For a quick and festive touch, sprinkle colored sugar or edible glitter right after baking.
8. How do I prevent the dough from sticking while rolling?
Lightly flour your work surface and rolling pin. If the dough starts to stick, sprinkle a bit more flour or roll the dough between two sheets of parchment paper.
9. Can I double the recipe?
Yes! This recipe doubles easily. Just make sure to mix the dough thoroughly to ensure even distribution of ingredients.
These answers will help you tackle any baking hurdles and customize your cookies to fit your festive vision. Enjoy the process and let the holiday magic shine through every batch!

