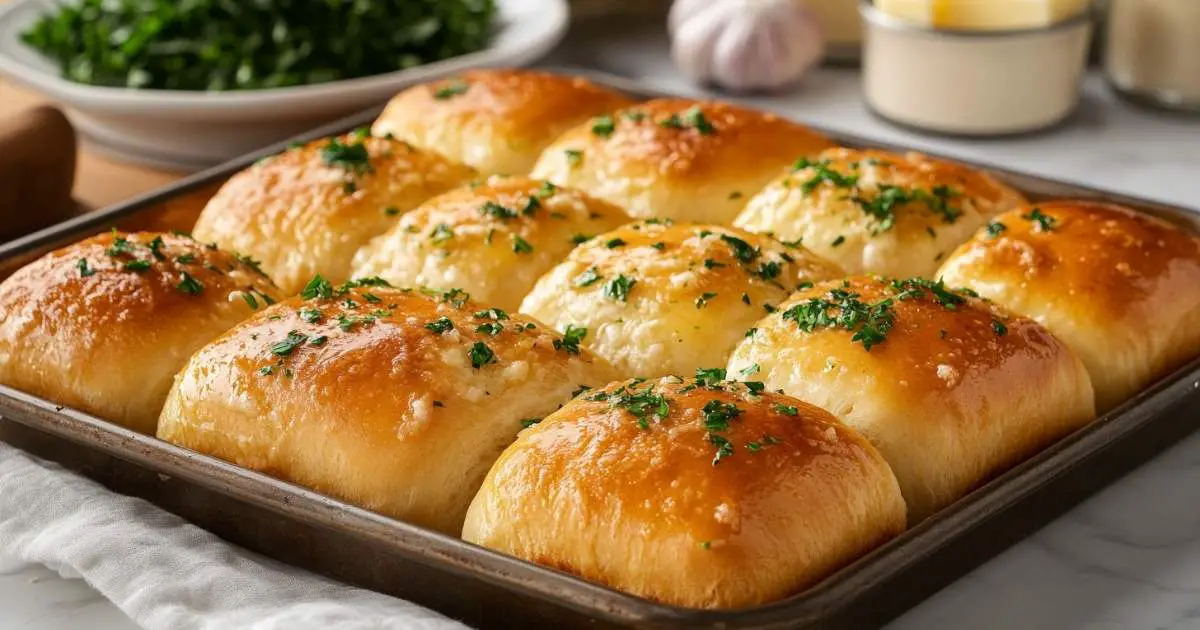
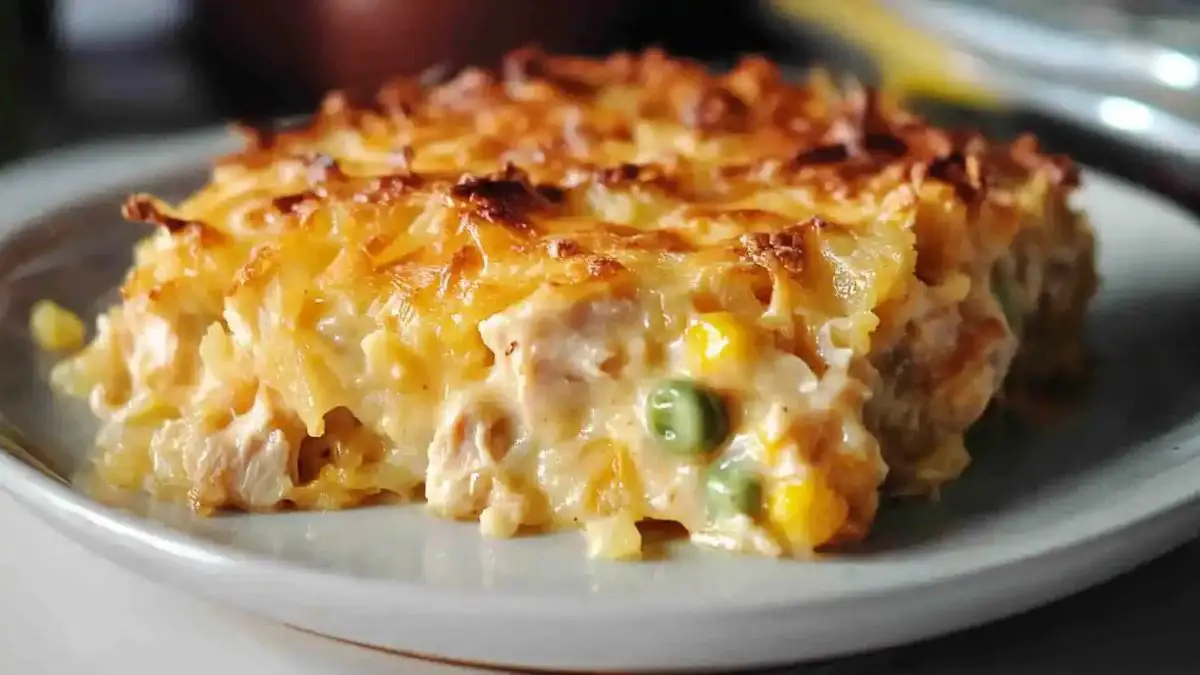
Who doesn’t love the aroma of freshly baked garlic bread wafting through the kitchen? Whether you’re a seasoned baker or just starting, this easy garlic bread rolls recipe is your go-to for soft, buttery rolls packed with flavor. Imagine tearing into a warm, golden roll, the garlic butter melting in every fluffy bite—pure comfort!
Perfect as a side dish for dinner, an appetizer, or even a snack, these rolls are as versatile as they are delicious. Plus, they’re beginner-friendly, so no need to worry about tricky steps or fancy equipment. Ready to make your kitchen smell like a bakery? Let’s dive in!
Why You’ll Love This Recipe
Garlic bread rolls aren’t just another side dish—they’re the showstopper that elevates any meal. Here’s why these rolls are bound to become your new favorite:
- Beginner-Friendly: Never baked bread before? No problem! This recipe is fail-proof, with straightforward steps perfect for any skill level.
- Packed with Flavor: Each roll is infused with buttery garlic goodness, delivering that irresistible taste we all crave.
- Soft and Fluffy: These rolls are delightfully light and airy, making them perfect for soaking up soups, stews, or pasta sauces.
- Customizable: Want to add a cheesy twist? Sprinkle some parmesan or mozzarella on top before baking. Prefer a herby kick? Mix in fresh parsley or oregano with the garlic butter.
- Versatile: Serve them as an appetizer, pair them with dinner, or enjoy them as a savory snack—the possibilities are endless.
Ready to roll up your sleeves and create these crowd-pleasers? Let’s get started!
Ingredients
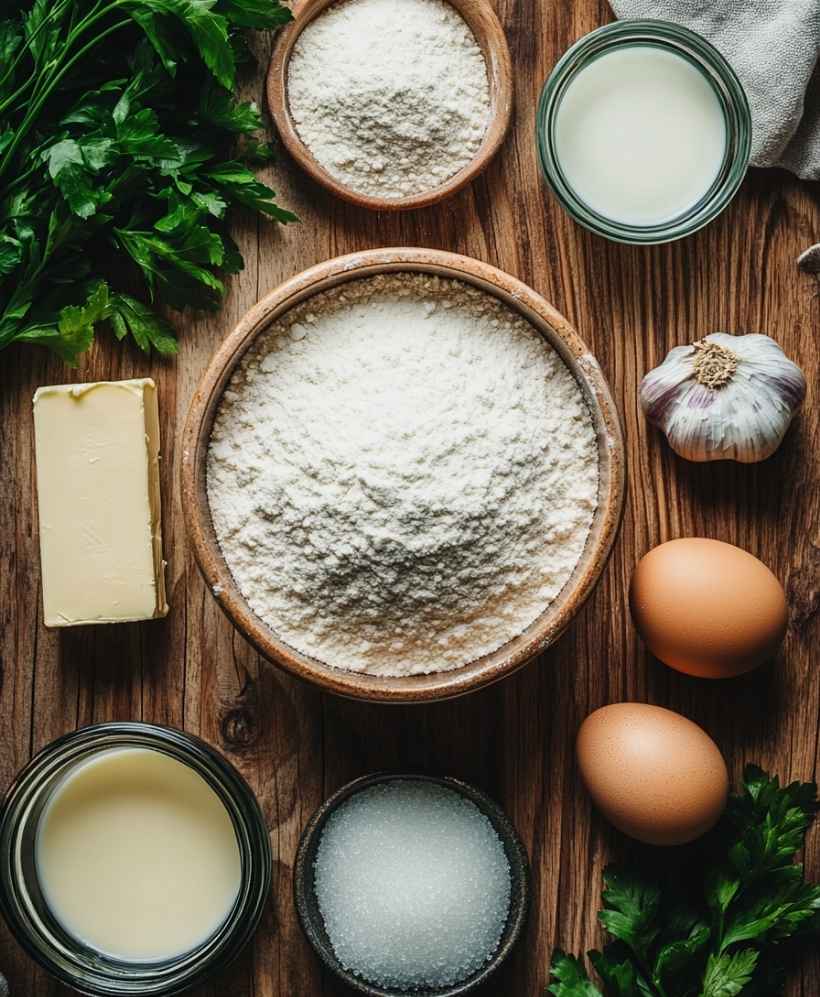
Here’s everything you’ll need to make these irresistible garlic bread rolls. Simple pantry staples come together to create something truly magical:
For the Dough:
- 3 ½ cups all-purpose flour – The foundation for soft, fluffy rolls.
- 2 ¼ teaspoons active dry yeast – The key to making your dough rise beautifully.
- 1 tablespoon sugar – Feeds the yeast and adds a touch of sweetness.
- 1 teaspoon salt – Balances the flavors.
- 1 cup warm milk – Activates the yeast and keeps the dough tender.
- 2 tablespoons unsalted butter (melted) – Adds richness to the dough.
- 1 large egg – Helps bind the ingredients and enrich the dough.
For the Garlic Butter Topping:
- 4 tablespoons unsalted butter (melted) – Creates that buttery, golden crust.
- 3 cloves fresh garlic (minced) – The star of the show, delivering bold flavor.
- 1 tablespoon fresh parsley (chopped) – Adds a pop of color and freshness.
- Optional: 2 tablespoons grated parmesan cheese – For an extra savory twist.
Pro Tips:
- Use fresh garlic for the best flavor—powder just won’t compare.
- If you don’t have fresh parsley, dried works in a pinch! Use 1 teaspoon instead.
- For a vegan option, substitute the milk and butter with plant-based alternatives and omit the egg.
Gather your ingredients, and let’s get baking! These simple yet flavorful staples are all you need to whip up something unforgettable.
How to Make Garlic Bread Rolls
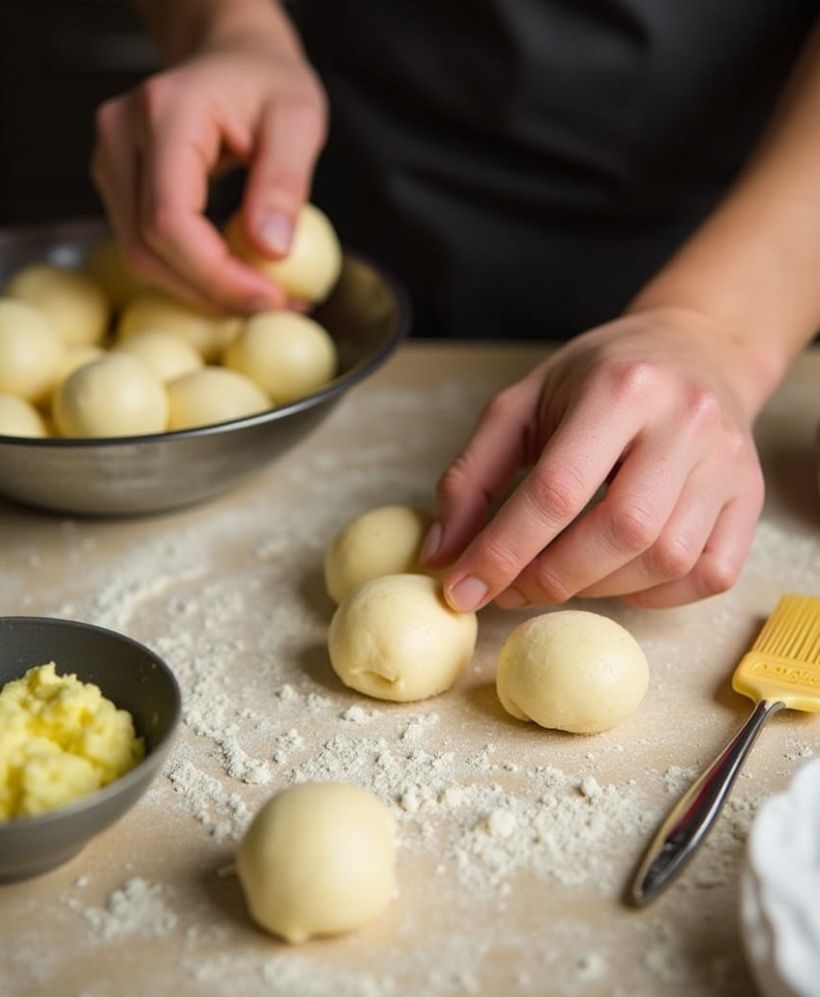
Making these garlic bread rolls is easier than you think! Follow these step-by-step instructions to create soft, buttery rolls that are packed with flavor:
1. Activate the Yeast
- In a large mixing bowl, combine warm milk (not too hot—think baby-bottle warm) with the sugar and active dry yeast.
- Let it sit for 5–10 minutes until it becomes frothy. This step ensures your yeast is alive and ready to work its magic.
2. Make the Dough
- Add the melted butter, egg, and salt to the yeast mixture. Stir to combine.
- Gradually add the flour, one cup at a time, mixing with a wooden spoon or a dough hook attachment until a sticky dough forms.
- Knead the dough on a floured surface for 8–10 minutes (or use a stand mixer for 5 minutes) until smooth and elastic.
3. Let the Dough Rise
- Place the dough in a lightly greased bowl and cover with a damp kitchen towel or plastic wrap.
- Let it rise in a warm place for 1–2 hours, or until it has doubled in size. Pro tip: If your kitchen is cold, place the bowl in a slightly warm (but turned off) oven.
4. Shape the Rolls
- Punch down the dough to release air bubbles, then divide it into 12 equal pieces.
- Roll each piece into a ball and place them on a greased or parchment-lined baking tray, leaving a little space between each.
5. Second Rise
- Cover the rolls with a clean kitchen towel and let them rise for another 30–40 minutes, or until puffy.
6. Prepare the Garlic Butter
- While the rolls are rising, melt the butter and mix it with minced garlic and parsley. For an extra kick, stir in a pinch of salt or grated parmesan.
7. Bake and Brush
- Preheat your oven to 375°F (190°C).
- Bake the rolls for 15–20 minutes, or until golden brown.
- Brush the warm rolls generously with the garlic butter as soon as they come out of the oven.
8. Serve and Enjoy
- Serve the rolls warm, and watch them disappear in seconds! Pair with pasta, soup, or enjoy them on their own.
Pro Tips for Perfect Rolls:
- If you like a crispier crust, bake for an extra 2–3 minutes.
- For extra garlicky goodness, double the garlic butter and serve some on the side for dipping.
Your kitchen will smell heavenly, and these rolls will taste like they came straight from a bakery. You’ve got this!
Serving and Storage Tips
Serving Suggestions
These garlic bread rolls are so versatile, you’ll want to serve them with everything! Here are a few ideas:
- Perfect Side Dish: Pair them with creamy soups, hearty stews, or a big bowl of pasta. They’re excellent for soaking up all those delicious sauces.
- Snack Attack: Serve them warm with a side of marinara or garlic aioli for dipping.
- Party Favorite: These rolls are a hit at gatherings. Arrange them in a basket lined with a clean kitchen towel to keep them warm and inviting.
Storage Tips
Freshly baked garlic bread rolls are best enjoyed warm from the oven, but they can be stored for later too:
- Room Temperature: Keep the rolls in an airtight container for up to 2 days. To refresh them, pop them in the oven at 350°F (175°C) for 5 minutes.
- Refrigeration: If you live in a warmer climate, refrigerate the rolls in an airtight container for up to 5 days. Just reheat before serving for the best texture.
- Freezing: Want to save some for another time? Wrap the cooled rolls tightly in foil or place them in a freezer-safe bag. Freeze for up to 3 months. When ready to eat, thaw at room temperature and reheat in the oven.
Reheating Tips
- For a fresh-from-the-oven taste, brush the rolls with a little melted butter before reheating in the oven.
- Avoid reheating in the microwave, as it can make the rolls chewy instead of fluffy.
Whether you’re serving them at dinner or storing them for later, these garlic bread rolls stay deliciously soft and flavorful. Just be warned—they disappear fast, so you might want to make a double batch!
Helpful Notes
To ensure your garlic bread rolls turn out perfect every time, here are some useful tips and tricks:
1. Choosing the Right Flour
- Use all-purpose flour for soft and fluffy rolls. If you prefer chewier rolls, you can substitute half the flour with bread flour.
2. Perfect Yeast Activation
- Double-check the temperature of your milk—it should be warm (around 110°F/43°C), not hot, to avoid killing the yeast.
- If your yeast doesn’t foam after 10 minutes, it might be expired. Start fresh with a new packet for the best results.
3. Mastering the Dough Texture
- If the dough feels too sticky during kneading, add small amounts of flour, 1 tablespoon at a time, until it’s manageable but still soft. Avoid adding too much flour, as this can make the rolls dense.
- On the other hand, if the dough feels too dry, a splash of warm milk will bring it back to life.
4. Customizing the Flavor
- Add a touch of paprika or red chili flakes to the garlic butter for a subtle kick.
- Experiment with herbs like rosemary or thyme for a fragrant twist.
5. Baking Tips for Even Rolls
- Space the dough balls evenly on your tray to allow proper air circulation and even browning.
- Halfway through baking, rotate your tray for consistent coloring on all rolls.
6. Preventing Dryness
- Brushing the rolls with garlic butter right out of the oven not only boosts flavor but also locks in moisture, keeping them soft for longer.
7. For Make-Ahead Convenience
- Prepare the dough in advance and let it rise in the refrigerator overnight. This slower rise enhances flavor and allows for more flexibility in your baking schedule.
With these tips in your back pocket, you’ll breeze through the recipe with confidence. These helpful notes ensure that your garlic bread rolls will be soft, flavorful, and absolutely irresistible every time!
Conclusion
Making garlic bread rolls at home is easier than you might think, and the results are truly worth it. From their buttery garlic aroma to their soft, fluffy texture, these rolls are guaranteed to impress family and friends alike. Whether you’re serving them alongside a cozy dinner or enjoying them as a savory snack, they bring warmth and flavor to any occasion.
Don’t let the idea of baking intimidate you—this fail-proof recipe is designed to guide you every step of the way. Plus, with the helpful tips and customizable options, you can make these rolls uniquely your own.
Now it’s your turn to try this easy recipe and share the joy of freshly baked garlic bread rolls. Trust me, once you’ve tasted these, store-bought just won’t cut it anymore. Ready to give it a shot? Let the baking adventure begin!
__________________________
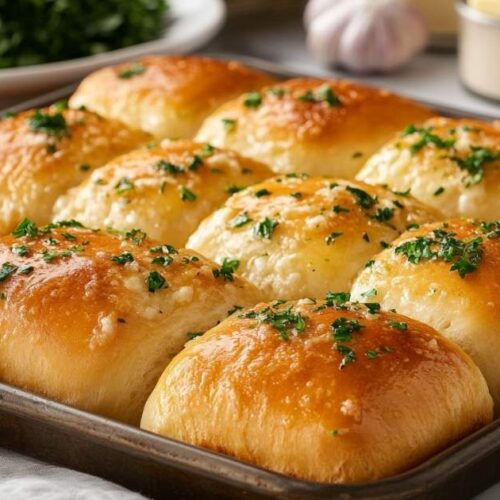
Garlic Bread Rolls
Ingredients
For the Dough:
- 3 ½ cups all-purpose flour – The foundation for soft fluffy rolls.
- 2 ¼ teaspoons active dry yeast – The key to making your dough rise beautifully.
- 1 tablespoon sugar – Feeds the yeast and adds a touch of sweetness.
- 1 teaspoon salt – Balances the flavors.
- 1 cup warm milk – Activates the yeast and keeps the dough tender.
- 2 tablespoons unsalted butter melted – Adds richness to the dough.
- 1 large egg – Helps bind the ingredients and enrich the dough.
For the Garlic Butter Topping:
- 4 tablespoons unsalted butter melted – Creates that buttery, golden crust.
- 3 cloves fresh garlic minced – The star of the show, delivering bold flavor.
- 1 tablespoon fresh parsley chopped – Adds a pop of color and freshness.
- Optional: 2 tablespoons grated parmesan cheese – For an extra savory twist.
Pro Tips:
- Use fresh garlic for the best flavor—powder just won’t compare.
- If you don’t have fresh parsley dried works in a pinch! Use 1 teaspoon instead.
- For a vegan option substitute the milk and butter with plant-based alternatives and omit the egg.
Instructions
Activate the Yeast:
- In a large mixing bowl, combine warm milk (not too hot—think baby-bottle warm) with the sugar and active dry yeast.
- Let it sit for 5–10 minutes until it becomes frothy. This step ensures your yeast is alive and ready to work its magic.
Make the Dough:
- Add the melted butter, egg, and salt to the yeast mixture. Stir to combine.
- Gradually add the flour, one cup at a time, mixing with a wooden spoon or a dough hook attachment until a sticky dough forms.
- Knead the dough on a floured surface for 8–10 minutes (or use a stand mixer for 5 minutes) until smooth and elastic.
Let the Dough Rise:
- Place the dough in a lightly greased bowl and cover with a damp kitchen towel or plastic wrap.
- Let it rise in a warm place for 1–2 hours, or until it has doubled in size. Pro tip: If your kitchen is cold, place the bowl in a slightly warm (but turned off) oven.
Shape the Rolls:
- Punch down the dough to release air bubbles, then divide it into 12 equal pieces.
- Roll each piece into a ball and place them on a greased or parchment-lined baking tray, leaving a little space between each.
Second Rise:
- Cover the rolls with a clean kitchen towel and let them rise for another 30–40 minutes, or until puffy.
Prepare the Garlic Butter:
- While the rolls are rising, melt the butter and mix it with minced garlic and parsley. For an extra kick, stir in a pinch of salt or grated parmesan.
Bake and Brush:
- Preheat your oven to 375°F (190°C).
- Bake the rolls for 15–20 minutes, or until golden brown.
- Brush the warm rolls generously with the garlic butter as soon as they come out of the oven.
Serve and Enjoy:
- Serve the rolls warm, and watch them disappear in seconds! Pair with pasta, soup, or enjoy them on their own.
Pro Tips for Perfect Rolls:
- If you like a crispier crust, bake for an extra 2–3 minutes.
- For extra garlicky goodness, double the garlic butter and serve some on the side for dipping.
Notes
- Calories: 150 kcal
- Fat: 5g
- Saturated Fat: 3g
- Cholesterol: 20mg
- Sodium: 200mg
- Carbohydrates: 22g
- Fiber: 1g
- Sugar: 2g
- Protein: 4g
Discover More Delicious Recipes
If you loved making these Garlic Bread Rolls, don’t stop there! Check out some of our other mouthwatering recipes that are sure to impress:
- Crab Brulee Recipe: A rich and creamy seafood delight perfect for special occasions.
- Kefir Sheet Cake: A light, moist cake with a tangy twist from kefir—perfect for dessert or tea time.
- Smoked Salmon Cheesecake: A savory cheesecake that combines smoked salmon with creamy goodness for an unforgettable appetizer.
Explore these recipes and take your culinary skills to the next level!
FAQs
1. Can I use instant yeast instead of active dry yeast?
Absolutely! If you’re using instant yeast, there’s no need to activate it with warm milk beforehand. Simply mix it directly with the dry ingredients. The rest of the recipe remains the same.
2. What can I use instead of parsley?
If parsley isn’t your favorite, try fresh herbs like basil, chives, or even a sprinkle of dried Italian seasoning for a flavorful twist.
3. Can I make the dough ahead of time?
Yes! For ultimate convenience, prepare the dough and let it rise in the refrigerator overnight. When you’re ready to bake, let the dough come to room temperature before shaping and proceeding with the recipe.
4. How can I make these rolls dairy-free?
Simply swap the milk for a plant-based alternative (like almond or oat milk) and use a vegan butter substitute. The rolls will still be soft and delicious!
5. Can I freeze the dough?
Absolutely! Shape the rolls and freeze them on a baking tray until firm. Once frozen, transfer them to a freezer-safe bag. When ready to bake, let them thaw and rise at room temperature before baking as usual.
6. How do I prevent the rolls from becoming dry?
Brush them generously with garlic butter right out of the oven. This not only enhances the flavor but also keeps the rolls moist and soft.
7. Can I add cheese to the rolls?
Yes! Sprinkle shredded mozzarella or parmesan cheese over the rolls before baking for a cheesy garlic bread twist that’s always a crowd-pleaser.
8. What should I do if my dough doesn’t rise?
If your dough isn’t rising, check that your yeast is fresh and your milk wasn’t too hot or too cold. Place the bowl in a warmer spot, like near a sunny window or in a slightly preheated oven (turned off), to encourage proofing.
With these answers, you’re fully equipped to tackle any hiccups and make the most delicious garlic bread rolls ever. Got more questions? Drop them in the comments, and I’ll be happy to help!

