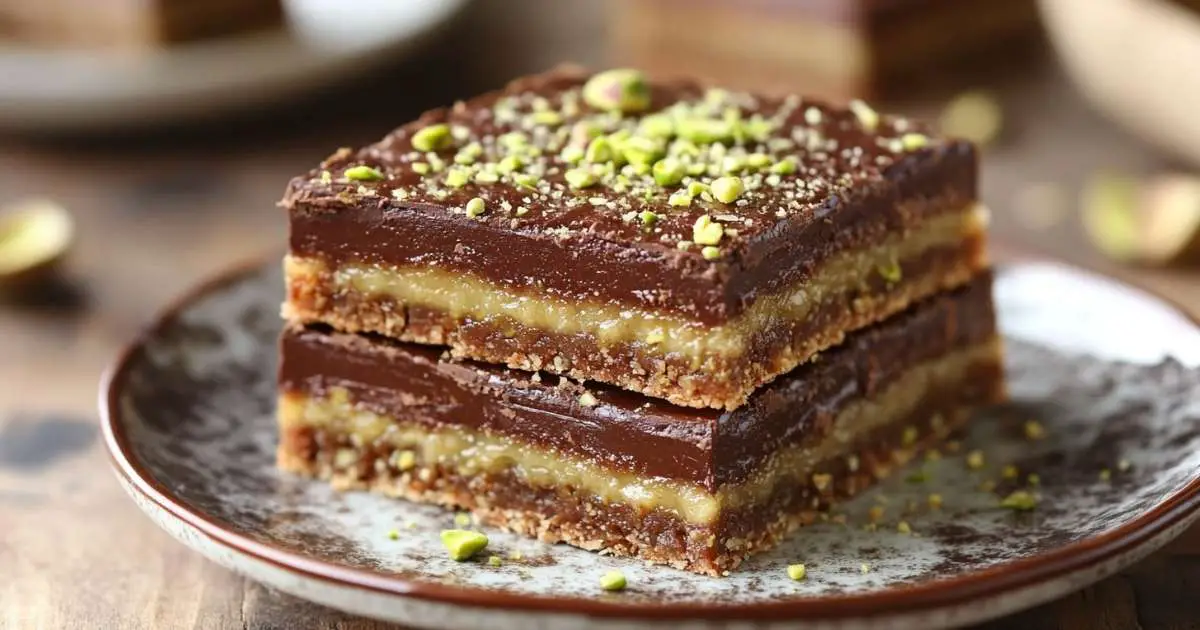
Pistachio kunafa chocolate bar is a layered dessert that merges familiar elements of Middle Eastern sweets with a chocolate twist. It begins with kunafa dough, which gives a crisp surface. The addition of ground pistachios offers a rich, nutty taste that pairs well with creamy chocolate layers. This recipe is crafted to please dessert fans seeking a fusion of textures and flavors. You get a melt-in-your-mouth effect from the chocolate filling and crunchy pistachios, all wrapped in sweet kunafa strands.
Whether you have tried traditional kunafa before or this is your first encounter with this dish, the pistachio kunafa chocolate bar delivers a gentle sweetness that makes each bite a pleasant surprise. Prepare to explore this easy method for creating a notable dessert.
Why You’ll Love This Recipe
Pistachio kunafa chocolate bar stands out for its interplay of sweet, crunchy, and velvety elements. The kunafa dough provides a golden, crisp texture once baked, while the chocolate filling remains soft and tempting. Meanwhile, pistachios lend a bright flavor that cuts through the sweet layers. This balance makes every bite interesting and fulfilling.
In many Middle Eastern desserts, kunafa is the star. It’s often used for pastry-like dishes where syrup and nuts play a big role. By mixing it with chocolate, we introduce an unexpected factor that appeals to those who crave a gentle twist on a traditional favorite. The process is straightforward, so you don’t need advanced baking skills to succeed. The steps focus on layering, folding, and baking—nothing too intimidating. In fact, if you follow the instructions carefully, you’ll see that everything blends seamlessly.
Another advantage of this dessert is its flexibility. You can shape it into bars, squares, or even round pieces. This versatility means it fits into casual gatherings or special events. It also adapts to personal preferences, since you can choose your chocolate type, whether dark, milk, or white. You decide the finishing touches, too. Some might prefer a light syrup drizzle, while others go for a heavier drench. Whatever your style, pistachio kunafa chocolate bar offers a sweet ending that satisfies most tastes. It’s a delightful dessert with a refreshing spin on well-loved flavors.
Ingredients Needed
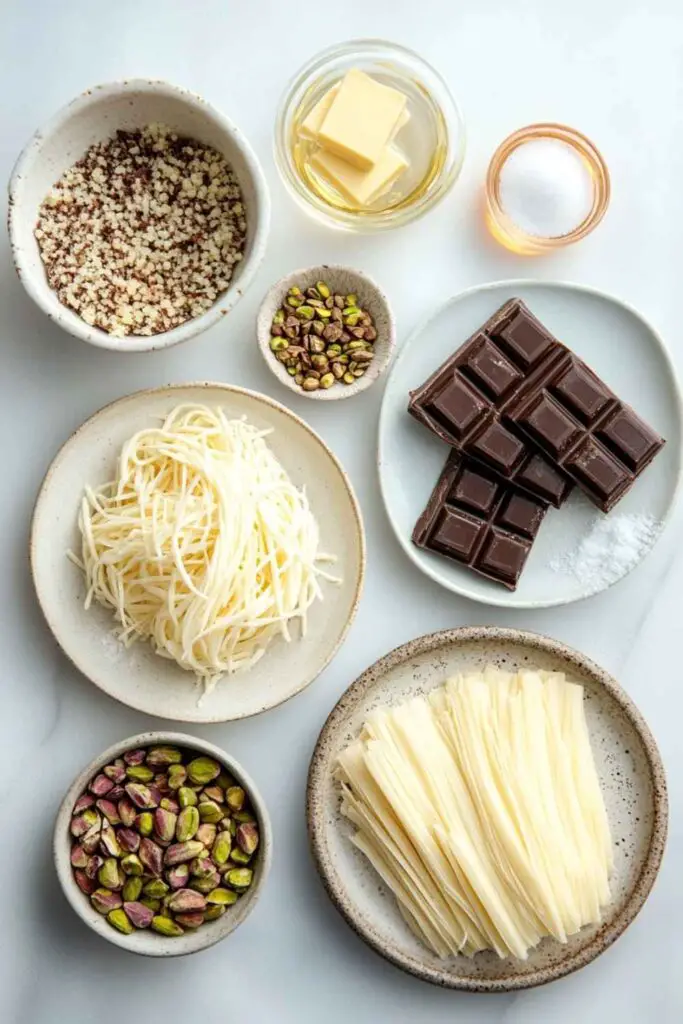
Below is a list of items you’ll need to prepare this dessert. These components are accessible and easy to find in most grocery stores or specialty markets:
- Kunafa Dough (Kataifi Dough): Look for it in the frozen section of stores that carry international products. You’ll need about 400 grams. Once thawed, it separates into fine strands that become crispy when baked.
- Unsalted Butter or Ghee (About 1 Cup): Melted butter coats the kunafa strands, ensuring an even color and crunch once baked. Ghee is an option if you prefer a more buttery taste.
- Chopped Pistachios (1 Cup): Shelled, unsalted pistachios add a unique color and delicate flavor. Finely chop or crush them to incorporate easily into the dessert layers.
- Chocolate Bars or Chips (Around 200–250 Grams): Any type of chocolate can work. Dark chocolate adds richness, milk chocolate brings a sweeter tone, and white chocolate introduces a milky note.
- Granulated Sugar (½ Cup): This sweetener helps in creating a simple syrup or a sweet sprinkle for topping, if desired.
- Water (½ Cup): Essential for forming a basic syrup that ties the flavors together.
- Optional Flavorings: A bit of rose water or orange blossom water for a subtle aroma. These are often used in Middle Eastern desserts to boost fragrance.
- Pinch of Salt: This balances the sweetness in the chocolate layer and highlights the overall taste.
Ensure that all ingredients are fresh and at room temperature, unless specified otherwise.
How to Make Pistachio Kunafa Chocolate Bar

In this section, we’ll take a detailed look at the steps required to craft your pistachio kunafa chocolate bar. The method revolves around creating a crispy kunafa base, layering chocolate, adding a nutty layer, and finishing with a top crust of kunafa strands. To keep your dessert fresh and appealing, follow each stage in the order listed below.
1. Prepare Your Equipment and Space
- Gather Your Tools: You’ll need a baking pan, preferably rectangular or square (8×8 inches or similar), a medium saucepan, mixing bowls, a pastry brush, and a sharp knife for slicing the finished dessert.
- Preheat Your Oven: Set the oven to 350°F (175°C). This temperature helps bake the kunafa until it’s golden.
- Clear Your Counter: Make sure your workspace is clean. Lay out all ingredients in measured amounts. This prevents confusion while assembling the dessert.
2. Thaw and Prep the Kunafa Dough
- Thawing Process: If your kunafa dough is frozen, remove it from the freezer and allow it to thaw in the refrigerator or on the countertop. Avoid rushing this step. The strands need to be soft yet not overly damp.
- Loosen the Strands: Once thawed, place the kunafa dough in a large bowl. Gently loosen the strands with your fingers so they don’t stay clumped.
3. Prepare the Butter Coating
- Melt the Butter or Ghee: Use a microwave-safe bowl or a small saucepan to melt about one cup of unsalted butter or ghee. Stir occasionally to avoid burning.
- Cool Slightly: Let it sit for a few moments. You don’t want to pour scalding butter on the kunafa strands.
- Coat the Kunafa Strands: Drizzle the melted butter over the loosened kunafa. Use your hands or a pair of forks to work the butter into the dough until each strand is lightly coated.
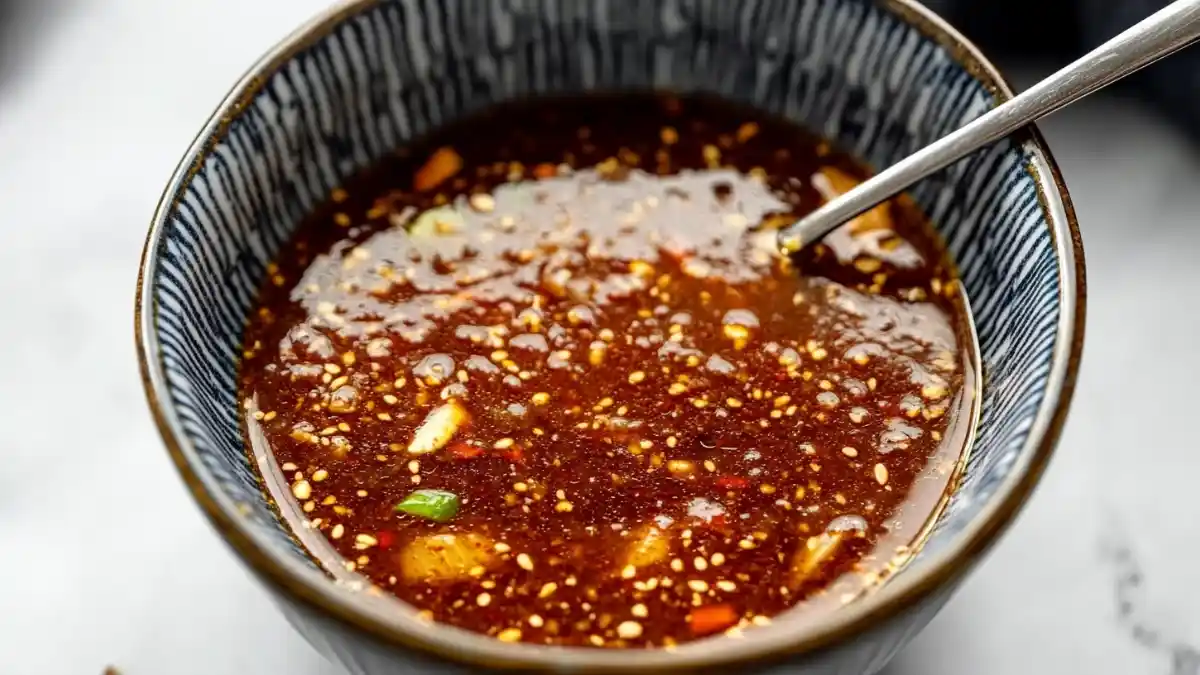
4. Create a Simple Syrup (Optional but Recommended)
- Basic Syrup: In a small saucepan, mix ½ cup sugar with ½ cup water. Place it over medium heat and stir until the sugar dissolves. Allow it to come to a gentle simmer.
- Flavoring: If you want a more aromatic result, add a teaspoon of rose water or orange blossom water. These flavors blend well with the nuttiness of pistachios.
- Consistency Check: Simmer for about 5 minutes to thicken slightly. You want a light syrup, not a heavy one.
- Cool Down: Take the syrup off the heat and let it cool to room temperature before using it. This step ensures it won’t soak into the kunafa and make it soggy too soon.
5. Assemble the Bottom Layer
- Layering Kunafa in the Pan: Lightly grease the baking pan. Take half of your buttered kunafa dough and press it into the bottom, forming a consistent base. Make sure the layer is even to help it bake at the same rate.
- Firm Pressure: Press firmly but avoid packing it too hard. The goal is to keep a bit of air so your dessert remains crisp rather than dense.
6. Add the Chocolate Layer
- Melt the Chocolate (If Desired): Some prefer melting the chocolate before layering it. You can do this in a microwave or use a double boiler on the stovetop. Stir in brief intervals to prevent scorching.
- Spread or Arrange the Chocolate: If using melted chocolate, pour it gently over the kunafa base, using a spatula to smooth it. If you’re using chocolate bars or chips, arrange them in a single layer. The heat from baking will melt them.
- Optional Touch: A pinch of salt can go on top of the chocolate to bring out the sweetness and add a subtle contrast.
7. Sprinkle the Pistachios
- Chopped or Crushed Pistachios: Scatter a generous layer of pistachios over the chocolate. Ensure an even distribution so each piece of your final dessert will have a bit of crunch.
- Press Gently: Use your hands or a spoon to press the nuts lightly into the chocolate layer. This keeps them from shifting when you add the top layer.
8. Add the Top Kunafa Layer
- Remaining Kunafa Dough: Take the rest of the buttered kunafa strands. Distribute them evenly on top of the nuts and chocolate.
- No Gaps: Make sure the surface is covered so the chocolate doesn’t ooze out. Press lightly to compact but do not smash it too hard.
9. Bake the Dessert
- Move to the Oven: Place the pan on the middle rack of your preheated oven. This ensures even heat distribution.
- Baking Time: Let it bake for 25–30 minutes, or until the top is golden. You might see slight bubbling around the edges from the butter.
- Rotate if Necessary: If your oven has hotspots, rotate the pan halfway through. Keep an eye on the color to prevent burning.
10. Apply the Syrup (If Using)
- Light Drizzle: Once you remove the kunafa from the oven, let it rest for about 5 minutes. Then, slowly drizzle the cooled syrup over the top.
- Focus on the Edges: Edges tend to be crispier, so a little extra syrup there helps balance the texture.
- Allow to Absorb: Give the dessert a few minutes to soak up the syrup. This step adds sweetness and moisture without making the kunafa soggy.
11. Cool and Slice
- Rest the Dessert: Let the pan cool for at least 15–20 minutes before slicing. The chocolate layer needs time to set.
- Cut into Bars or Squares: Use a sharp knife to slice the dessert into your desired shape. Run the knife in hot water and wipe it dry to make each cut cleaner.
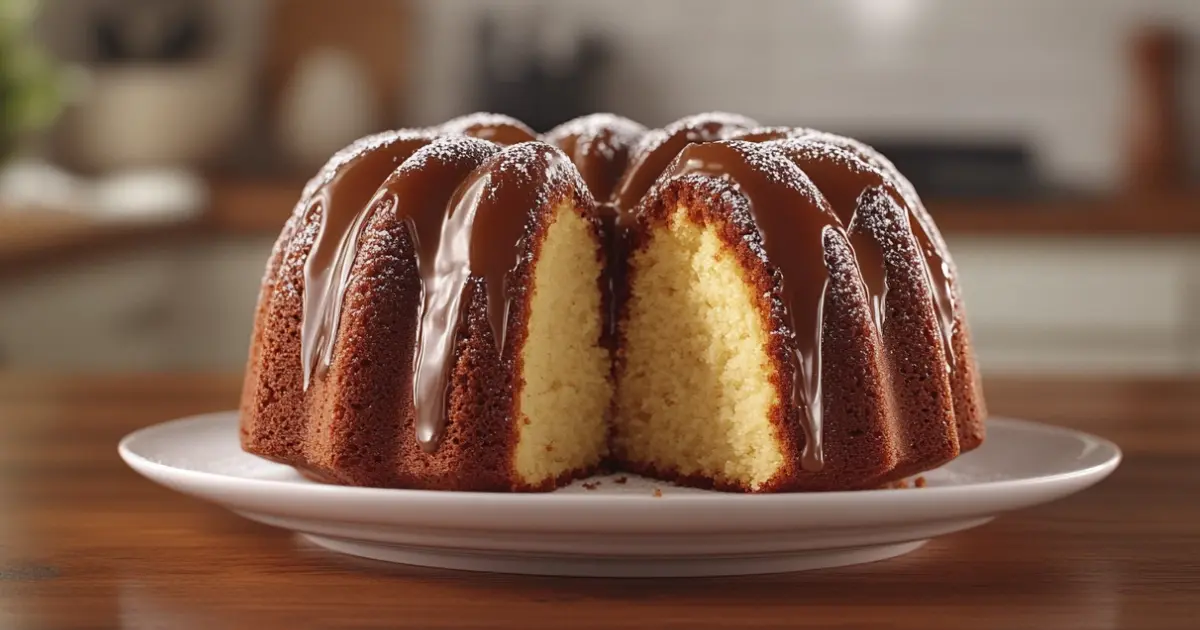
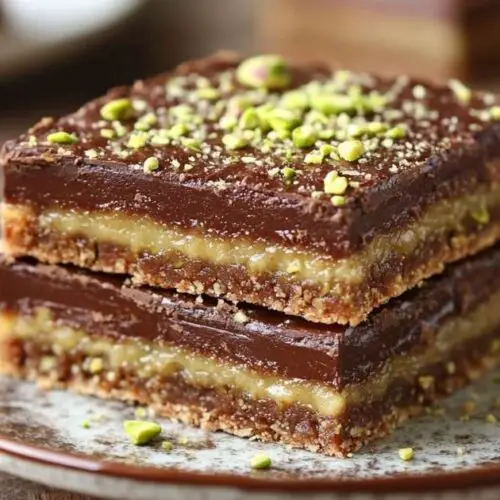
- Visual Appeal: You’ll notice the golden kunafa on top, a layer of melted chocolate, and vibrant green pistachios in the middle. It’s a feast for the eyes as well.
12. Presentation Tips
- Plate Each Piece: Gently remove each bar and place it on a serving plate. If you see any stray kunafa strands, just brush them off or tuck them beneath the bar.
- Extra Decoration: Dust a small handful of finely crushed pistachios on top for more color and a final flourish. You could also add shaved chocolate or white chocolate drizzle for visual contrast.
- Serve Warm or at Room Temperature: Warm bars have a gooey center, while room-temperature bars hold together more firmly. Both options are tasty, so choose based on your personal preference.
13. Troubleshooting and Variations
- Underbaked Kunafa: If you notice the kunafa is pale or too soft after the stated baking time, leave it in for a few more minutes. Watch for a change in color.
- Overly Sweet: Adjust sugar levels in the syrup. You can reduce sugar or skip the syrup if you want the dessert less sweet. The chocolate also contributes sweetness, so this is easy to tailor.
- Chocolate Type: Dark chocolate lovers can opt for bittersweet pieces to balance the sweetness of the kunafa and syrup. Milk chocolate offers a creamier finish, and white chocolate brings a mild sweetness that highlights the pistachio flavor.
- Extra Toppings: Some might enjoy drizzling condensed milk over the top, but keep in mind this will make the dessert sweeter. Coconut flakes or finely chopped almonds add extra textures.
14. Flavor Pairings and Serving Ideas
- Middle Eastern Meal: Pair it with strong coffee or black tea. The bitter notes complement the sweetness.
- Chocolate Lovers: Serve with a small dollop of whipped cream or a drizzle of melted chocolate on top.
- Celebratory Spread: Pistachio kunafa chocolate bar fits well on festive tables, matching up with fruit platters, light salads, or savory dishes from the region.
The entire procedure might seem long, but each step is simple when performed in sequence. The key is to ensure each layer receives attention—from the buttered kunafa base to the final syrup drizzle. By focusing on the steps, you create a dessert that blends tradition with a dash of modern flair.
Serving and Storage Tips
Serving your pistachio kunafa chocolate bar while it’s still slightly warm brings out the creamy consistency of the chocolate. It’s best to slice just before serving so you preserve the neat layers and crunchy top. If you’re aiming for a more structured slice, allow the dessert to cool fully. This will help the chocolate layer solidify.
For large gatherings, you can serve it buffet-style by arranging slices on a wide platter. Have extra chopped pistachios on hand for sprinkling. A small bowl of syrup or melted chocolate on the side is a nice touch for guests who want added sweetness.
In terms of storage, wrap leftover bars in plastic wrap or foil to maintain freshness. Place them in an airtight container and keep them at room temperature for up to two days. If you want to store them longer, refrigerate for up to a week. To reheat, pop them in a low-temperature oven (around 300°F or 150°C) for 5–10 minutes. This revives the crisp kunafa texture and refreshes the chocolate layer.
The FSIS provides comprehensive guidelines on freezing and food safety, detailing best practices to ensure food quality and prevent contamination.
Helpful Notes
- Kunafa Dough Options: Fresh kunafa dough yields the best results, but frozen versions work well if thawed correctly. Dry, brittle strands tend to break down in the baking process, so ensure your dough is pliable and not too wet.
- Chocolate Choice: It’s worth experimenting with various types of chocolate. Dark chocolate offers a bitter edge that complements the sweet kunafa strands, while milk chocolate gives a mellow sweetness. White chocolate creates a milky base that highlights the color of pistachios.
- Pistachio Quality: Use fresh, unsalted pistachios. Old or stale nuts can affect both flavor and texture. If you can find shelled pistachios, it saves time. Otherwise, shelled nuts might need peeling and chopping, which can be a bit tedious but is worth it for fresh taste.
- Syrup Sweetness: Not everyone wants a heavily sugared dessert. Adjust the sugar-to-water ratio as you see fit. A thinner syrup is less sweet, while a thicker one adds more of a sugary hit. If you skip the syrup, you can still enjoy the dessert’s natural sweetness from the kunafa dough and chocolate.
- Gluten Sensitivity: Traditional kunafa dough contains wheat, so it’s not gluten-free. If you need a gluten-free alternative, you might have to look into special shredded dough products or use gluten-free phyllo sheets. The baking time could change slightly.
- Room Temperature Ingredients: Bringing butter and dough to room temperature helps with even mixing. If ingredients are too cold, layering becomes trickier.
- Make It in Advance: You can prepare and assemble the dessert a few hours before baking. Just be sure to store it in the refrigerator if you don’t plan to bake it immediately. This approach is handy for events where you want fresh dessert but don’t want to prepare everything last minute.
These notes aim to simplify your process and give you a good shot at a successful final product.
Conclusion
Pistachio kunafa chocolate bar brings a joyful twist to a well-loved pastry tradition. By layering kunafa dough, chocolate, and chopped pistachios, you create a dessert with depth. The steps might appear long, but none of them is complicated. Each one adds a piece to the final picture: crisp kunafa, sweet and creamy chocolate, and the gentle crunch of pistachios.
Try it once and discover how easily it fits into many occasions. You can adjust the sweetness level, pick your favorite chocolate, or top it with unique garnishes. The options are wide, and they enable you to give it a personal flair. Even if you’re new to kunafa, you’ll find that this dessert is friendly to beginners. Once you master it, you can share it at potlucks, family dinners, or celebrations. Each bar invites a moment of enjoyment, blending tradition with a cozy chocolate boost.
________________________________________
Pistachio Kunafa Chocolate Bar
Ingredients
- Kunafa Dough Kataifi Dough
- Unsalted Butter or Ghee About 1 Cup
- Chopped Pistachios 1 Cup
- Chocolate Bars or Chips Around 200–250 Grams
- Granulated Sugar ½ Cup
- Optional Flavorings
- Pinch of Salt
Instructions
1. Prepare Your Equipment and Space
- Gather Your Tools: You’ll need a baking pan, preferably rectangular or square (8×8 inches or similar), a medium saucepan, mixing bowls, a pastry brush, and a sharp knife for slicing the finished dessert.
- Preheat Your Oven: Set the oven to 350°F (175°C). This temperature helps bake the kunafa until it’s golden.
- Clear Your Counter: Make sure your workspace is clean. Lay out all ingredients in measured amounts. This prevents confusion while assembling the dessert.
2. Thaw and Prep the Kunafa Dough
- Thawing Process: If your kunafa dough is frozen, remove it from the freezer and allow it to thaw in the refrigerator or on the countertop. Avoid rushing this step. The strands need to be soft yet not overly damp.
- Loosen the Strands: Once thawed, place the kunafa dough in a large bowl. Gently loosen the strands with your fingers so they don’t stay clumped.
3. Prepare the Butter Coating
- Melt the Butter or Ghee: Use a microwave-safe bowl or a small saucepan to melt about one cup of unsalted butter or ghee. Stir occasionally to avoid burning.
- Cool Slightly: Let it sit for a few moments. You don’t want to pour scalding butter on the kunafa strands.
- Coat the Kunafa Strands: Drizzle the melted butter over the loosened kunafa. Use your hands or a pair of forks to work the butter into the dough until each strand is lightly coated.
4. Create a Simple Syrup (Optional but Recommended)
- Basic Syrup: In a small saucepan, mix ½ cup sugar with ½ cup water. Place it over medium heat and stir until the sugar dissolves. Allow it to come to a gentle simmer.
- Flavoring: If you want a more aromatic result, add a teaspoon of rose water or orange blossom water. These flavors blend well with the nuttiness of pistachios.
- Consistency Check: Simmer for about 5 minutes to thicken slightly. You want a light syrup, not a heavy one.
- Cool Down: Take the syrup off the heat and let it cool to room temperature before using it. This step ensures it won’t soak into the kunafa and make it soggy too soon.
5. Assemble the Bottom Layer
- Layering Kunafa in the Pan: Lightly grease the baking pan. Take half of your buttered kunafa dough and press it into the bottom, forming a consistent base. Make sure the layer is even to help it bake at the same rate.
- Firm Pressure: Press firmly but avoid packing it too hard. The goal is to keep a bit of air so your dessert remains crisp rather than dense.
6. Add the Chocolate Layer
- Melt the Chocolate (If Desired): Some prefer melting the chocolate before layering it. You can do this in a microwave or use a double boiler on the stovetop. Stir in brief intervals to prevent scorching.
- Spread or Arrange the Chocolate: If using melted chocolate, pour it gently over the kunafa base, using a spatula to smooth it. If you’re using chocolate bars or chips, arrange them in a single layer. The heat from baking will melt them.
- Optional Touch: A pinch of salt can go on top of the chocolate to bring out the sweetness and add a subtle contrast.
7. Sprinkle the Pistachios
- Chopped or Crushed Pistachios: Scatter a generous layer of pistachios over the chocolate. Ensure an even distribution so each piece of your final dessert will have a bit of crunch.
- Press Gently: Use your hands or a spoon to press the nuts lightly into the chocolate layer. This keeps them from shifting when you add the top layer.
8. Add the Top Kunafa Layer
- Remaining Kunafa Dough: Take the rest of the buttered kunafa strands. Distribute them evenly on top of the nuts and chocolate.
- No Gaps: Make sure the surface is covered so the chocolate doesn’t ooze out. Press lightly to compact but do not smash it too hard.
9. Bake the Dessert
- Move to the Oven: Place the pan on the middle rack of your preheated oven. This ensures even heat distribution.
- Baking Time: Let it bake for 25–30 minutes, or until the top is golden. You might see slight bubbling around the edges from the butter.
- Rotate if Necessary: If your oven has hotspots, rotate the pan halfway through. Keep an eye on the color to prevent burning.
10. Apply the Syrup (If Using)
- Light Drizzle: Once you remove the kunafa from the oven, let it rest for about 5 minutes. Then, slowly drizzle the cooled syrup over the top.
- Focus on the Edges: Edges tend to be crispier, so a little extra syrup there helps balance the texture.
- Allow to Absorb: Give the dessert a few minutes to soak up the syrup. This step adds sweetness and moisture without making the kunafa soggy.
11. Cool and Slice
- Rest the Dessert: Let the pan cool for at least 15–20 minutes before slicing. The chocolate layer needs time to set.
- Cut into Bars or Squares: Use a sharp knife to slice the dessert into your desired shape. Run the knife in hot water and wipe it dry to make each cut cleaner.
- Visual Appeal: You’ll notice the golden kunafa on top, a layer of melted chocolate, and vibrant green pistachios in the middle. It’s a feast for the eyes as well.
12. Presentation Tips
- Plate Each Piece: Gently remove each bar and place it on a serving plate. If you see any stray kunafa strands, just brush them off or tuck them beneath the bar.
- Extra Decoration: Dust a small handful of finely crushed pistachios on top for more color and a final flourish. You could also add shaved chocolate or white chocolate drizzle for visual contrast.
- Serve Warm or at Room Temperature: Warm bars have a gooey center, while room-temperature bars hold together more firmly. Both options are tasty, so choose based on your personal preference.
13. Troubleshooting and Variations
- Underbaked Kunafa: If you notice the kunafa is pale or too soft after the stated baking time, leave it in for a few more minutes. Watch for a change in color.
- Overly Sweet: Adjust sugar levels in the syrup. You can reduce sugar or skip the syrup if you want the dessert less sweet. The chocolate also contributes sweetness, so this is easy to tailor.
- Chocolate Type: Dark chocolate lovers can opt for bittersweet pieces to balance the sweetness of the kunafa and syrup. Milk chocolate offers a creamier finish, and white chocolate brings a mild sweetness that highlights the pistachio flavor.
- Extra Toppings: Some might enjoy drizzling condensed milk over the top, but keep in mind this will make the dessert sweeter. Coconut flakes or finely chopped almonds add extra textures.
14. Flavor Pairings and Serving Ideas
- Middle Eastern Meal: Pair it with strong coffee or black tea. The bitter notes complement the sweetness.
- Chocolate Lovers: Serve with a small dollop of whipped cream or a drizzle of melted chocolate on top.
- Celebratory Spread: Pistachio kunafa chocolate bar fits well on festive tables, matching up with fruit platters, light salads, or savory dishes from the region.
Video
Notes
- Calories: ~320 kcal
- Fat: ~18 g
- Protein: ~6 g
- Carbohydrates: ~36 g
- Sugars: ~20 g
- Fiber: ~2 g
Explore More Delicious Recipes
If you enjoyed diving into the Pistachio Kunafa Chocolate Bar, why not explore more delightful dishes from our collection? Here are some must-try recipes to elevate your cooking adventures:
- Hello Kitty Cake Recipe – A fun and adorable cake, perfect for celebrations!
- Cake Mix and Cool Whip Cookies – Super soft and chewy cookies made with just a few ingredients.
- Easy Brookie Recipe – A perfect combination of brownies and cookies in one treat.
- Peanut Butter Balls – A no-bake, protein-packed snack with a rich chocolate coating.
- Dubai Chocolate Bar Recipe – A luxurious and indulgent chocolate dessert with Middle Eastern flair.
- Mounds Cake Recipe – A coconut-filled chocolate cake that’s irresistibly moist and delicious.
Explore these recipes today to bring more exciting flavors to your table and make every meal memorable!
FAQs
1. What Is a Pistachio Kunafa Chocolate Bar?
A pistachio kunafa chocolate bar is a layered dessert that blends the crunchy texture of kunafa dough with a creamy chocolate filling. Pistachios add a nutty element, creating a sweet-yet-balanced Middle Eastern dessert. This recipe combines familiar regional pastry traditions with a modern chocolate twist, making it both unique and approachable for dessert lovers.
2. Can I Use Different Types of Chocolate?
Absolutely. You can use dark, milk, or white chocolate depending on your taste. Dark chocolate offers a rich, slightly bitter profile, while milk chocolate is sweeter and creamier. White chocolate brings a soft, milky flavor that highlights the nutty essence of pistachios. Choose the type that best suits your preference or experiment with a blend of chocolates for a personalized spin.
3. Does It Require a Sweet Syrup?
Many pistachio kunafa chocolate bar recipes include a light sugar syrup to add sweetness and moisture. The syrup helps soften the kunafa layers, balancing the chocolate’s richness. If you prefer a less sweet dessert, reduce the syrup’s sugar content or skip it altogether. Adjusting syrup usage is an easy way to tailor sweetness to your liking.
4. Can I Use Store-Bought Kunafa Dough?
Yes. Most grocery stores with international sections carry frozen kunafa (kataifi) dough. Thaw it properly and gently separate the strands before use. Store-bought dough is convenient, ensuring consistent results without the hassle of making kunafa dough from scratch. Just remember to coat it with melted butter or ghee for a crispy, golden finish.
5. How Should I Store Leftover Pistachio Kunafa Chocolate Bars?
To maintain freshness, wrap each bar in plastic wrap or place them in an airtight container. Keep leftovers at room temperature for up to two days or refrigerate for up to a week. If you want a fresh-out-of-the-oven texture, warm the bars in a low-temperature oven for a few minutes before serving. This method helps restore the chocolate’s creaminess and the kunafa’s crunch.