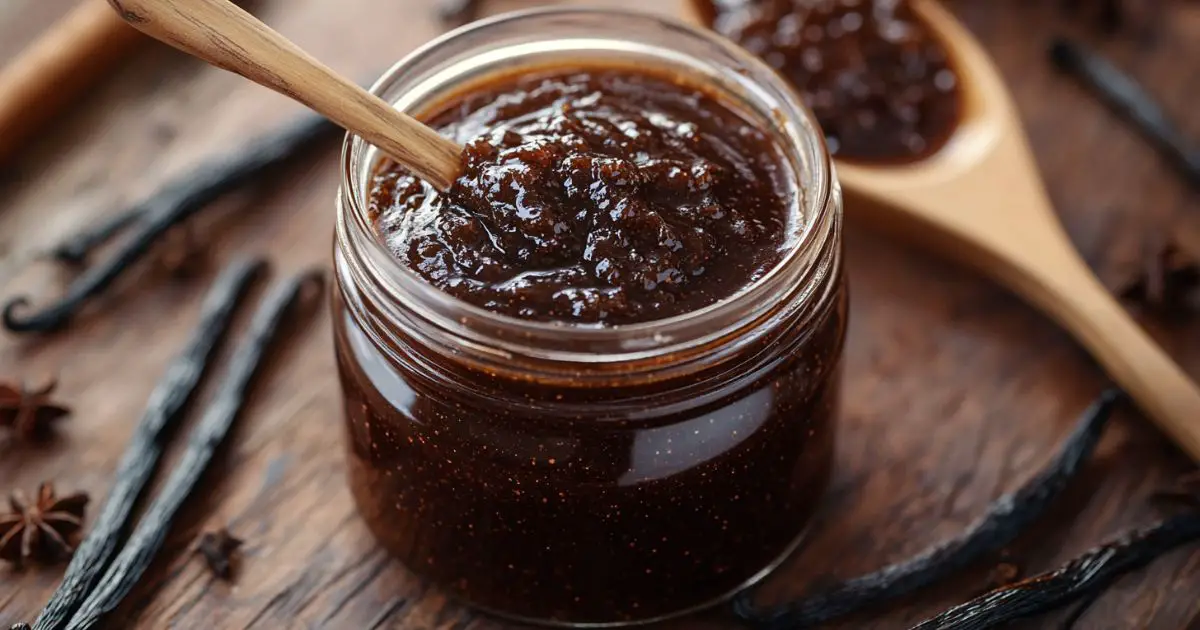
Vanilla bean paste is one of those magical ingredients that can completely transform your baked goods, desserts, and even savory dishes in unexpected ways. Its thick, concentrated texture carries a robust flavor that is deeper and more aromatic compared to regular vanilla extract. Whether you are an enthusiastic home baker or a culinary adventurer, having vanilla bean paste in your pantry can open up a world of possibilities. From enhancing the taste of creamy desserts like crème brûlée to adding a gourmet touch to everyday pancakes, vanilla bean paste is undeniably versatile.
Many people are already familiar with vanilla extract, which is a more common baking staple. However, not as many realize that there is a more intense, beautifully speckled form of vanilla that exists—vanilla bean paste. It gives you the alluring black specks of real vanilla beans, accompanied by a flavor profile that is richer and more complex. This “secret weapon” can take your dishes to the next level without requiring you to slice and scrape whole vanilla beans every single time.
In this article, we’ll explore exactly how to create your own homemade vanilla bean paste, including a full ingredient list, the step-by-step process, helpful tips, and plenty of storage suggestions. By making it yourself, you can also control the quality of vanilla beans and the sweetness level, all while saving some money compared to store-bought options. If you’re ready to infuse your bakes, beverages, and treats with a more authentic, gourmet flair, keep reading!
Why You’ll Love This Recipe
Every recipe tells a story, and vanilla bean paste is no different. Below are some of the top reasons you’ll likely fall in love with making your own homemade version:
- Incredible Depth of Flavor
Unlike standard vanilla extract, homemade vanilla bean paste delivers a much more concentrated taste, bringing out the nuanced notes of the vanilla beans. You can perceive floral and subtly smoky hints that give dimension to your dishes. - Beautiful Speckled Appearance
Those little black flecks you typically see in high-end ice creams and pastries come from real vanilla bean seeds. This paste captures that lovely aesthetic, showing off the authenticity of the vanilla you’ve used. - Long Shelf Life
Properly stored vanilla bean paste can last for several months (or more, if you’re cautious about contamination). This means you’ll always have a premium ingredient on-hand, ready to elevate your next dish. - Cost-Effective
Vanilla beans can be expensive, but creating a paste allows you to stretch the potency of each bean much further compared to always using whole beans in recipes. Making it at home also means you have control over the ingredients, so you can adjust sweetness levels and quality as needed. - Fun and Rewarding
There’s a special satisfaction in making a gourmet staple from scratch. Not only will you end up with a professional-quality ingredient, but you’ll also gain valuable insight into how each step of the process influences the final flavor. - Versatile Use in Recipes
You can use homemade vanilla bean paste in nearly any recipe that calls for vanilla extract. This includes baked goods such as cookies, cakes, and pastries, as well as custards, puddings, ice cream, whipped cream, and even cocktails.
With these reasons in mind, this recipe is perfect for adventurous cooks and bakers who want to add a sophisticated touch to their culinary creations. Homemade vanilla bean paste is about more than just flavor; it’s about craftsmanship and appreciating the little details that make food truly enjoyable.
Ingredients
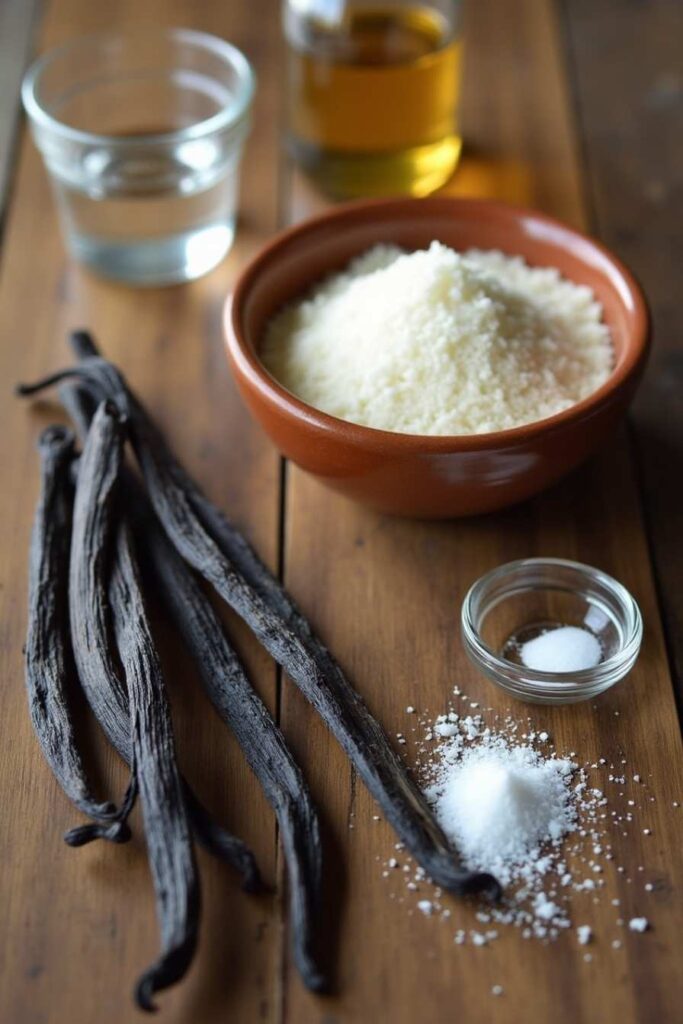
To create a rich, high-quality vanilla bean paste, you’ll need the following components. Each ingredient plays a crucial role in achieving the signature flavor and thick, syrupy consistency.
- Vanilla Beans (8–10 whole beans)
- Select plump, moist vanilla beans if you can. High-quality beans are often from regions like Madagascar, Tahiti, or Mexico, each having distinct flavor profiles.
- Look for beans that are pliable and have an oily sheen. Dry or brittle beans are harder to work with and may not provide as much flavor.
- Sugar (¾ to 1 cup)
- A standard white granulated sugar often works best for preserving and balancing the flavor. Some people prefer using light brown sugar for a slight molasses undertone, but this can subtly alter the flavor and appearance.
- Since sweetness can be subjective, start with ¾ cup if you prefer a less sweet paste, or go for a full cup if you have a sweet tooth.
- Glycerin or Light Corn Syrup (about ½ cup)
- Glycerin or light corn syrup helps achieve that thick, syrupy consistency associated with commercial vanilla bean paste.
- If you’re looking for a more natural approach, consider using food-grade vegetable glycerin or an organic corn syrup alternative.
- Vodka or Rum (2–3 tablespoons)
- These liquors act as a mild preservative and flavor extractor. The alcohol content helps draw out and intensify the vanilla’s aromatic compounds.
- The resulting paste won’t taste boozy since the alcohol evaporates over time, but feel free to reduce the amount if you’re sensitive to the flavor or use a non-alcoholic alternative like food-safe glycerin.
- Water (as needed, about 2–3 tablespoons)
- A little water is sometimes necessary to thin out the mixture if it becomes too thick during the blending or cooking process.
- Use filtered or distilled water to maintain the purity of the flavor.
- Pinch of Salt (optional)
- Though not mandatory, a tiny amount of salt can help round out the flavor profile by enhancing the sweetness and the natural taste of the vanilla.
How to Make Vanilla Bean Paste Recipe
Creating homemade vanilla bean paste is a process that involves both gentle heating and blending or processing. Here is an easy-to-follow, step-by-step outline:
Step 1: Prepare the Vanilla Beans
- Split the Beans: Using a sharp knife, carefully slice each vanilla bean lengthwise.
- Scrape Out Seeds: Gently run the tip of your knife or a small spoon along the inside of the bean to collect those minuscule, aromatic seeds.
- Set Aside Beans and Seeds: Place both the scraped seeds and the empty pod shells in a bowl. You’ll use the entire vanilla bean to maximize flavor extraction.
Helpful Tip: If some pods are drier than others, you can soak them in a small amount of warm water or your chosen alcohol for about 10–15 minutes. This step helps to soften them, making the scraping process much easier.
Step 2: Blend the Base
- Combine Sugar, Glycerin, and Vodka: In a small saucepan, mix your sugar (¾ to 1 cup, depending on sweetness preference), glycerin (½ cup), and your chosen liquor (2–3 tablespoons of vodka or rum).
- Add Scraped Vanilla Beans: Toss in both the seeds and the sliced pods from your vanilla beans.
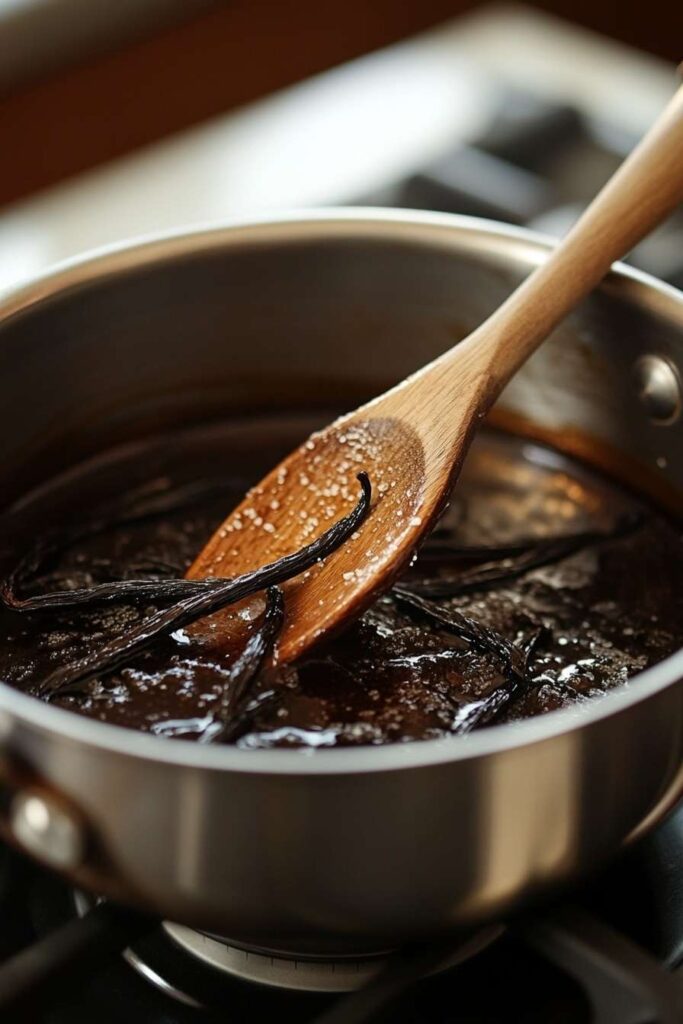
- Heat Over Low: Set the saucepan over low heat. Stir gently to dissolve the sugar, and let the mixture come to a gentle simmer—avoid a full rolling boil, as excessive heat can degrade the delicate vanilla flavor.
Step 3: Monitor Consistency
- Stir Frequently: As the mixture simmers, you’ll notice it becoming slightly syrupy. Keep stirring to prevent any sticking or burning at the bottom of the pan.
- Check Thickness: After about 10–15 minutes, the mixture should start to thicken. If it gets too thick, add 1–2 tablespoons of water at a time to loosen it up. If it seems too thin, you can let it simmer a few minutes longer to evaporate some of the liquid.
Step 4: Blend or Process
- Transfer to a Blender or Food Processor: Carefully pour the warm mixture into a blender or food processor. Be cautious; it’s hot!
- Pulse Until Smooth: Pulse for a few seconds at a time until you achieve a uniform consistency. You may still see small flecks from the pods, which is perfectly okay.
- Adjust Sweetness or Alcohol: Taste-test the paste. If you find it too sweet, you can add a tiny pinch of salt to balance the flavor. If you’d like more aromatic depth, consider adding another splash of vodka or rum.
Step 5: Final Thicken and Cool
- Return to Saucepan (Optional): If you want your paste thicker, you can pour it back into the saucepan and gently simmer until it reaches the desired texture.
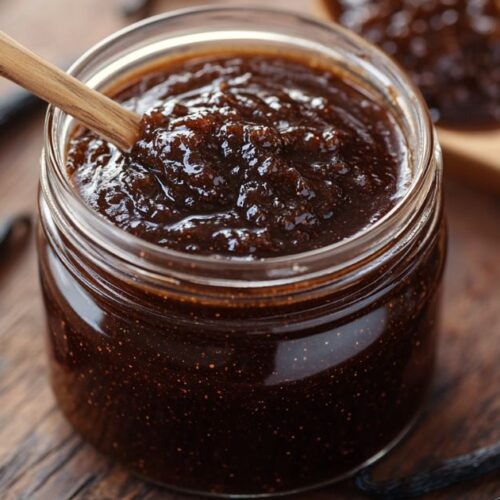
- Cool Completely: Once you’re satisfied with the thickness, let the paste cool entirely in the pan or in a clean bowl. Cooling helps the paste set and develop its flavors further.
Serving and Storage Tips
Making your own vanilla bean paste is just the first step. Next comes the fun of using this culinary gem in a variety of dishes! Here’s how to serve, store, and make the most of your homemade creation.
Serving Ideas
- Baked Goods
- Incorporate your paste into cookies, muffins, cakes, or quick breads. Replace each teaspoon of vanilla extract in a recipe with an equal amount of your homemade paste.
- Use it in buttercream frostings and fillings to impart those eye-catching vanilla specks.
- Sweet Sauces and Custards
- Enhance homemade caramel sauces, crème brûlée, puddings, and custards. The floral notes of real vanilla beans shine in cream-based desserts, resulting in a more indulgent, restaurant-quality taste.
- Beverages
- Stir a small spoonful into coffee, tea, or hot chocolate for a cozy upgrade. You can even add it to a milkshake or smoothie for that extra gourmet touch.
- Consider mixing a bit of the paste into homemade whipped cream or sweet cream foam to top your favorite drinks.
- Savory Dishes
- Yes, you read that right: vanilla can complement certain savory recipes. For instance, adding a hint to a creamy sauce for seafood can produce surprisingly delightful notes. However, use it sparingly, as a little goes a long way.
Storage Guidelines
- Sterilize Your Jar
- Choose an airtight glass jar with a tight-fitting lid. Wash it thoroughly in hot, soapy water or run it through a dishwasher cycle.
- Let it dry completely to reduce the risk of introducing any moisture or bacteria into your vanilla bean paste.
- Fill and Seal
- Carefully spoon your cooled vanilla bean paste into the jar. Fill it up to about one inch below the rim to leave room for expansion.
- Seal the jar tightly to lock in freshness.
- Refrigeration
- While homemade vanilla bean paste can sometimes be stored at room temperature, refrigeration helps maintain its flavor and texture for a longer period.
- Expect a shelf life of around 6–12 months under ideal conditions. Check periodically for any odor changes or visible mold—if in doubt, discard.
Keeping your vanilla paste fresh requires proper storage. Find more storage tips here: How to Store Vanilla Bean Paste.
- Stir Before Use
- Because homemade pastes may thicken or separate slightly over time, always stir well before using it in your recipes.
Helpful Notes
1. Bean Varieties and Flavor Profiles
Vanilla beans can come from various parts of the world, each having distinctive flavors:
- Madagascar Bourbon Vanilla: Known for its classic, rich, and creamy flavor. This variety is the most commonly used in baking.
- Tahitian Vanilla: Provides a more floral, cherry-like aroma. Perfect for lighter desserts like custards or fruit-based treats.
- Mexican Vanilla: Has a deep, smoky nuance that pairs wonderfully with chocolate and coffee.
If you’d like to explore different flavor dimensions, consider blending beans from multiple regions.
2. Alcohol-Free Alternatives
If you prefer not to use alcohol, simply replace it with food-grade glycerin. Glycerin works as a sweetener and a preservative, helping your paste maintain its consistency and flavor. Do note that an entirely alcohol-free version may not have the same shelf life. Using an alcohol substitute means you should pay closer attention to refrigeration and watch for any changes in color or smell.
3. Adjusting Sweetness
Depending on the dish you’re making, you might want a less sweet or more concentrated paste:
- Less Sweet: Reduce the sugar to as little as ½ cup, or use alternatives like honey or agave syrup. Keep in mind, changing the sweetener can impact flavor and texture.
- More Intense Flavor: Simmer for a longer time to allow moisture to evaporate. This will produce a thicker, bolder paste.
4. Troubleshooting Consistency
- Too Runny: Return the mixture to a gentle simmer and cook until more liquid evaporates.
- Too Thick: Stir in a little extra distilled water or a bit more vodka/rum to thin the consistency.
5. Safety Considerations
- Mold Growth: If you notice any visible mold or an unpleasant odor, do not use the paste.
- Sterile Conditions: Always ensure your jars and utensils are clean and dry. Reducing contamination at each step prolongs the shelf life and flavor quality of your paste.
Conclusion
Homemade vanilla bean paste is a dream come true for anyone passionate about cooking and baking. By preparing this fragrant staple in your own kitchen, you gain complete control over the ingredients, ensuring premium quality and a flavor tailor-made to your liking. The process, while somewhat time-intensive, is relatively simple and straightforward, giving you a decadent result that looks and tastes as though it comes straight from a gourmet shop.
Not only will this paste enhance your desserts and pastries with authentic vanilla speckles and robust flavor, but it also makes for a unique, heartfelt gift when shared in small jars with friends and family. By following the detailed steps—splitting the beans, simmering them with a mix of sugar and glycerin, blending, and storing properly—you’ll soon have a jar of versatile, long-lasting vanilla bean paste that can elevate everyday baking to a culinary masterpiece.
Whether you’re a professional baker or just enjoy exploring new flavors at home, homemade vanilla bean paste is an invaluable staple. Its thick texture, beautiful flecks, and concentrated taste make it a standout ingredient that’s certain to impress. You’ll find that even one simple spoonful can transform a standard recipe into a memorably aromatic delight.
_______________________________
Vanilla Bean Paste Recipe
Ingredients
- Vanilla Beans – 8-10 whole beans
- Granulated Sugar – ¾ to 1 cup (adjust sweetness to taste)
- Glycerin or Light Corn Syrup – ½ cup
- Vodka or Rum – 2-3 tablespoons
- Filtered Water – 2-3 tablespoons (as needed)
- Salt – A pinch (optional, to balance flavors)
Instructions
Step 1: Prepare the Vanilla Beans
- Split the Beans: Using a sharp knife, carefully slice each vanilla bean lengthwise.
- Scrape Out Seeds: Gently run the tip of your knife or a small spoon along the inside of the bean to collect those minuscule, aromatic seeds.
- Set Aside Beans and Seeds: Place both the scraped seeds and the empty pod shells in a bowl. You’ll use the entire vanilla bean to maximize flavor extraction.
- Helpful Tip: If some pods are drier than others, you can soak them in a small amount of warm water or your chosen alcohol for about 10–15 minutes. This step helps to soften them, making the scraping process much easier.
Step 2: Blend the Base
- Combine Sugar, Glycerin, and Vodka: In a small saucepan, mix your sugar (¾ to 1 cup, depending on sweetness preference), glycerin (½ cup), and your chosen liquor (2–3 tablespoons of vodka or rum).
- Add Scraped Vanilla Beans: Toss in both the seeds and the sliced pods from your vanilla beans.
- Heat Over Low: Set the saucepan over low heat. Stir gently to dissolve the sugar, and let the mixture come to a gentle simmer—avoid a full rolling boil, as excessive heat can degrade the delicate vanilla flavor.
Step 3: Monitor Consistency
- Stir Frequently: As the mixture simmers, you’ll notice it becoming slightly syrupy. Keep stirring to prevent any sticking or burning at the bottom of the pan.
- Check Thickness: After about 10–15 minutes, the mixture should start to thicken. If it gets too thick, add 1–2 tablespoons of water at a time to loosen it up. If it seems too thin, you can let it simmer a few minutes longer to evaporate some of the liquid.
Step 4: Blend or Process
- Transfer to a Blender or Food Processor: Carefully pour the warm mixture into a blender or food processor. Be cautious; it’s hot!
- Pulse Until Smooth: Pulse for a few seconds at a time until you achieve a uniform consistency. You may still see small flecks from the pods, which is perfectly okay.
- Adjust Sweetness or Alcohol: Taste-test the paste. If you find it too sweet, you can add a tiny pinch of salt to balance the flavor. If you’d like more aromatic depth, consider adding another splash of vodka or rum.
Step 5: Final Thicken and Cool
- Return to Saucepan (Optional): If you want your paste thicker, you can pour it back into the saucepan and gently simmer until it reaches the desired texture.
- Cool Completely: Once you’re satisfied with the thickness, let the paste cool entirely in the pan or in a clean bowl. Cooling helps the paste set and develop its flavors further.
Notes
- Calories: 50 kcal
- Total Fat: 0 g
- Saturated Fat: 0 g
- Cholesterol: 0 mg
- Sodium: 2 mg
- Total Carbohydrates: 12 g
- Dietary Fiber: 0 g
- Sugars: 11 g
- Protein: 0 g
Explore More Delicious Recipes
If you loved learning how to make the Vanilla Bean Paste Recipe, why not explore more delightful recipes from our collection? Here are some must-try ideas to inspire your cooking:
- Pistachio Cream Recipe: A creamy and nutty delight perfect for desserts and pastries.
- Alice Springs Chicken Recipe: A savory and cheesy chicken dish with bold flavors.
- Garlic Bread Rolls: Soft, buttery, and garlicky rolls that pair perfectly with any meal.
- Galena Chicken Recipe: A flavorful chicken recipe perfect for any family dinner.
- German Chocolate Poke Cake: A decadent dessert filled with chocolate and caramel goodness.
- Mexican Chicken Salad Recipe: A zesty and refreshing salad packed with bold Mexican flavors.
Explore these recipes today to bring more exciting flavors to your table and make every meal memorable!
FAQs
Below are common questions and concerns that people often have about making and using homemade vanilla bean paste.
1. Can I substitute vanilla extract with vanilla bean paste in any recipe?
Yes, you generally can. A good rule of thumb is to use a 1:1 substitution. For instance, if a recipe calls for one teaspoon of vanilla extract, you can replace it with one teaspoon of homemade vanilla bean paste. Keep in mind, though, that the flavor may be slightly more intense, which is usually a bonus!
2. How long does homemade vanilla bean paste last?
When stored in a tightly sealed, sterile jar and kept in the refrigerator, homemade vanilla bean paste can last between 6 and 12 months. Some people find that it remains good well beyond a year, especially if they’ve used alcohol to preserve it.
3. Is it normal for my paste to separate over time?
Yes, slight separation can occur over time, especially if you used minimal alcohol. The thicker components might sink, and the thinner liquid can rise. Simply stir or shake the jar before using, and the paste will be as good as new.
4. Can I use a different sweetener, like honey or maple syrup?
Absolutely. Feel free to experiment with alternative sweeteners, though be aware that they may change the flavor profile and color of your final product. Honey, for example, can offer a subtle floral note, while maple syrup might add a rich, caramel-like undertone.
5. Do I need to remove the pods after cooking?
In this recipe, the pods are typically blended alongside the seeds, which adds to the thickness and flavor. However, if you prefer a smoother paste, you can strain out larger pieces of pod or filter the mixture after blending. Just be aware that straining will remove some of the vanilla flecks that many people find desirable.
6. Can I make this recipe without any alcohol at all?
Yes, you can replace the vodka or rum with a food-grade glycerin alternative. However, know that the absence of alcohol might shorten the shelf life. If you go for a no-alcohol version, refrigeration becomes even more important, and you’ll want to regularly check for signs of spoilage.
7. What should I do if my vanilla bean paste starts to smell off?
If your homemade paste develops an off-putting odor or starts to look moldy, discard it immediately. Proper sanitation of tools, jars, and hands during preparation is vital in avoiding bacterial or fungal growth.
8. Can I make a large batch and freeze it?
Technically, yes—you can freeze vanilla bean paste, but doing so might slightly alter its texture once thawed. Since it already has a relatively long shelf life in the fridge, many people find freezing unnecessary. If you do freeze, consider dividing the paste into small airtight containers or ice cube trays so you can thaw only what you need.
9. Are there health benefits associated with real vanilla?
Vanilla does contain small amounts of antioxidants and has been studied for its potential calming properties. However, bear in mind that you’re likely consuming it in small amounts, typically as a flavor enhancer. For more detailed nutritional or medicinal information, consult reputable sources such as Healthline.
10. Where can I buy high-quality vanilla beans?
You can find premium vanilla beans online or at specialty grocery stores. Look for reputable suppliers who specify the origin (such as Madagascar, Tahiti, or Mexico) and provide clear details about the grade or condition of the beans. Always check reviews or ask for recommendations to ensure you’re getting authentic, fresh beans.
Feel free to experiment with different types of vanilla beans, sweeteners, and cooking times to craft the perfect paste that suits your palate and cooking style. Once you’ve mastered the process, you may never want to return to basic vanilla extract again. Happy baking—and enjoy the floral sweetness and captivating aroma of real homemade vanilla bean paste!