Pistachio Kunafa Chocolate Bar
Craving a sweet twist on Middle Eastern treats? Try the Pistachio Kunafa Chocolate Bar and delight your palate. Grab the full recipe and indulge today!
Ingredients
- Kunafa Dough Kataifi Dough
- Unsalted Butter or Ghee About 1 Cup
- Chopped Pistachios 1 Cup
- Chocolate Bars or Chips Around 200–250 Grams
- Granulated Sugar ½ Cup
- Optional Flavorings
- Pinch of Salt
Instructions
1. Prepare Your Equipment and Space
- Gather Your Tools: You’ll need a baking pan, preferably rectangular or square (8x8 inches or similar), a medium saucepan, mixing bowls, a pastry brush, and a sharp knife for slicing the finished dessert.
- Preheat Your Oven: Set the oven to 350°F (175°C). This temperature helps bake the kunafa until it’s golden.
- Clear Your Counter: Make sure your workspace is clean. Lay out all ingredients in measured amounts. This prevents confusion while assembling the dessert.
2. Thaw and Prep the Kunafa Dough
- Thawing Process: If your kunafa dough is frozen, remove it from the freezer and allow it to thaw in the refrigerator or on the countertop. Avoid rushing this step. The strands need to be soft yet not overly damp.
- Loosen the Strands: Once thawed, place the kunafa dough in a large bowl. Gently loosen the strands with your fingers so they don’t stay clumped.
3. Prepare the Butter Coating
- Melt the Butter or Ghee: Use a microwave-safe bowl or a small saucepan to melt about one cup of unsalted butter or ghee. Stir occasionally to avoid burning.
- Cool Slightly: Let it sit for a few moments. You don’t want to pour scalding butter on the kunafa strands.
- Coat the Kunafa Strands: Drizzle the melted butter over the loosened kunafa. Use your hands or a pair of forks to work the butter into the dough until each strand is lightly coated.
4. Create a Simple Syrup (Optional but Recommended)
- Basic Syrup: In a small saucepan, mix ½ cup sugar with ½ cup water. Place it over medium heat and stir until the sugar dissolves. Allow it to come to a gentle simmer.
- Flavoring: If you want a more aromatic result, add a teaspoon of rose water or orange blossom water. These flavors blend well with the nuttiness of pistachios.
- Consistency Check: Simmer for about 5 minutes to thicken slightly. You want a light syrup, not a heavy one.
- Cool Down: Take the syrup off the heat and let it cool to room temperature before using it. This step ensures it won’t soak into the kunafa and make it soggy too soon.
5. Assemble the Bottom Layer
- Layering Kunafa in the Pan: Lightly grease the baking pan. Take half of your buttered kunafa dough and press it into the bottom, forming a consistent base. Make sure the layer is even to help it bake at the same rate.
- Firm Pressure: Press firmly but avoid packing it too hard. The goal is to keep a bit of air so your dessert remains crisp rather than dense.
6. Add the Chocolate Layer
- Melt the Chocolate (If Desired): Some prefer melting the chocolate before layering it. You can do this in a microwave or use a double boiler on the stovetop. Stir in brief intervals to prevent scorching.
- Spread or Arrange the Chocolate: If using melted chocolate, pour it gently over the kunafa base, using a spatula to smooth it. If you’re using chocolate bars or chips, arrange them in a single layer. The heat from baking will melt them.
- Optional Touch: A pinch of salt can go on top of the chocolate to bring out the sweetness and add a subtle contrast.
7. Sprinkle the Pistachios
- Chopped or Crushed Pistachios: Scatter a generous layer of pistachios over the chocolate. Ensure an even distribution so each piece of your final dessert will have a bit of crunch.
- Press Gently: Use your hands or a spoon to press the nuts lightly into the chocolate layer. This keeps them from shifting when you add the top layer.
8. Add the Top Kunafa Layer
- Remaining Kunafa Dough: Take the rest of the buttered kunafa strands. Distribute them evenly on top of the nuts and chocolate.
- No Gaps: Make sure the surface is covered so the chocolate doesn’t ooze out. Press lightly to compact but do not smash it too hard.
9. Bake the Dessert
- Move to the Oven: Place the pan on the middle rack of your preheated oven. This ensures even heat distribution.
- Baking Time: Let it bake for 25–30 minutes, or until the top is golden. You might see slight bubbling around the edges from the butter.
- Rotate if Necessary: If your oven has hotspots, rotate the pan halfway through. Keep an eye on the color to prevent burning.
10. Apply the Syrup (If Using)
- Light Drizzle: Once you remove the kunafa from the oven, let it rest for about 5 minutes. Then, slowly drizzle the cooled syrup over the top.
- Focus on the Edges: Edges tend to be crispier, so a little extra syrup there helps balance the texture.
- Allow to Absorb: Give the dessert a few minutes to soak up the syrup. This step adds sweetness and moisture without making the kunafa soggy.
11. Cool and Slice
- Rest the Dessert: Let the pan cool for at least 15–20 minutes before slicing. The chocolate layer needs time to set.
- Cut into Bars or Squares: Use a sharp knife to slice the dessert into your desired shape. Run the knife in hot water and wipe it dry to make each cut cleaner.
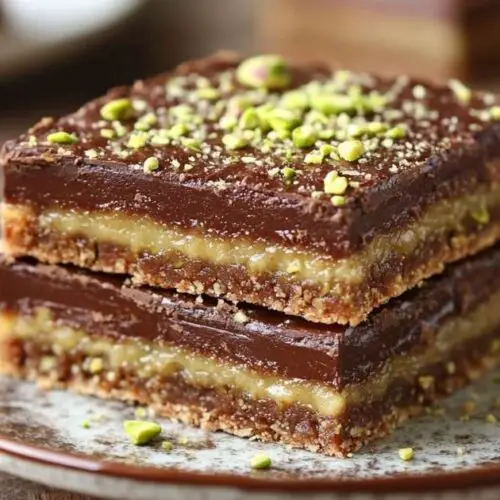
- Visual Appeal: You’ll notice the golden kunafa on top, a layer of melted chocolate, and vibrant green pistachios in the middle. It’s a feast for the eyes as well.
12. Presentation Tips
- Plate Each Piece: Gently remove each bar and place it on a serving plate. If you see any stray kunafa strands, just brush them off or tuck them beneath the bar.
- Extra Decoration: Dust a small handful of finely crushed pistachios on top for more color and a final flourish. You could also add shaved chocolate or white chocolate drizzle for visual contrast.
- Serve Warm or at Room Temperature: Warm bars have a gooey center, while room-temperature bars hold together more firmly. Both options are tasty, so choose based on your personal preference.
13. Troubleshooting and Variations
- Underbaked Kunafa: If you notice the kunafa is pale or too soft after the stated baking time, leave it in for a few more minutes. Watch for a change in color.
- Overly Sweet: Adjust sugar levels in the syrup. You can reduce sugar or skip the syrup if you want the dessert less sweet. The chocolate also contributes sweetness, so this is easy to tailor.
- Chocolate Type: Dark chocolate lovers can opt for bittersweet pieces to balance the sweetness of the kunafa and syrup. Milk chocolate offers a creamier finish, and white chocolate brings a mild sweetness that highlights the pistachio flavor.
- Extra Toppings: Some might enjoy drizzling condensed milk over the top, but keep in mind this will make the dessert sweeter. Coconut flakes or finely chopped almonds add extra textures.
14. Flavor Pairings and Serving Ideas
- Middle Eastern Meal: Pair it with strong coffee or black tea. The bitter notes complement the sweetness.
- Chocolate Lovers: Serve with a small dollop of whipped cream or a drizzle of melted chocolate on top.
- Celebratory Spread: Pistachio kunafa chocolate bar fits well on festive tables, matching up with fruit platters, light salads, or savory dishes from the region.
Video
Notes
Nutrition Information (per serving)
- Calories: ~320 kcal
- Fat: ~18 g
- Protein: ~6 g
- Carbohydrates: ~36 g
- Sugars: ~20 g
- Fiber: ~2 g